


This GardenTrax earth auger review comes down to a clear verdict: buy the 43cc kit for single holes in workable ground, dug by one person, and skip it for rocky ground, wide bits or any job that needs a printed depth figure. GardenTrax sells the kit with a 2-cycle engine and an 8 in by 36 in bit, so you mix fuel and start it with a pull cord. I ran it in the yard around my house, outdoors only, because a gas auger never belongs in a shed. Read the safety section before the first start, because a turning bit and a bind are the real risks.
Affiliate Disclosure: Garden Power Scout is a proud participant in the Amazon Services LLC Associates Program. As an Amazon Associate, we earn from qualifying purchases, at no extra cost to you.
GardenTrax Earth Auger Review: My Verdict on the 43cc Kit
The GardenTrax 43cc is a hand-held gas earth auger: a 2-cycle powerhead on a looped handlebar, full-wrap foam grips and an 8 in by 36 in spiral bit with a fishtail point. GardenTrax sells it for one-person digging projects such as fence posts, tree planting and landscaping. That sets the job, which is a marked, cleared spot where a bit this size makes sense and you can hold the machine with both hands. Inside that job it starts with a pull cord and needs no battery or cord to the house.
- Who it is for: a homeowner or small-farm owner with a handful of single holes to dig, one person on the handles and a fuel can outdoors.
- What it does best: keeps the work free of cords and batteries, with an 8 in bit already in the kit.
- Main trade-off: a gas engine brings fuel, noise and exhaust, and a hand-held 43cc machine twists in your hands if the bit binds.

What GardenTrax Lists for This Kit
GardenTrax gives a short list of figures for the 43cc kit, and two of them decide the job: the bit and the engine. Every figure in the table is GardenTrax’s own, and the labels say so.
| Spec | GardenTrax 43cc |
|---|---|
| Auger Type | Gas earth auger, hand-held |
| Engine, GardenTrax | 43cc, 2-cycle |
| Power Source | Gas, mixed fuel, pull start |
| Bit in the Box, GardenTrax | 8 in by 36 in spiral bit with a fishtail point |
| Output Shaft, GardenTrax | 7/8 in |
| Fuel Tank, GardenTrax | 36 ounces |
| Operators, GardenTrax | One person |
| Handles, GardenTrax | Full-wrap foam grips |
| Maximum Digging Depth | Not stated by GardenTrax for this kit |
| Engine Warranty, GardenTrax | 2-year limited |
The 36 in is the length of the bit, not how deep the machine digs, and GardenTrax states no depth maximum for the kit. I size my holes to the job and to a post maker’s or an extension source’s guidance, never to the length of the bit I happen to hold.
What Is in the Box and What You Still Need
GardenTrax sells the kit as a powerhead plus the 8 in bit, and the 7/8 in output shaft is where the bit connects. Everything else in the job is yours to bring.
- In the kit: the 43cc powerhead and the 8 in by 36 in bit, according to GardenTrax.
- You supply the fuel: a clean fuel can and mixed fuel, made as the manual in the box describes.
- You supply the protection: eye protection, hearing protection, long pants, sturdy closed footwear and snug gloves, as the safety section below sets out.
- You supply the call: an 811 request for every planned hole, before the first start.
Read the manual in the box before the first start. Its fuel, starting and operating lines are the ones that apply to this kit, and they come before anything I write here.
Before the First Start
A gas auger has a steel bit that turns and an engine that makes carbon monoxide, so I set the safety up before I touch the pull cord. The shutdown box below covers a gas auger, and every task in this review that puts a hand or a tool near the bit points back to it.
Full Shutdown Box
Shutdown before you clear or free the bit, change or attach the bit, free a stuck bit, adjust, check or add oil or fuel, clean, load, move, store or leave the auger. Never reach toward the bit while it turns, and never clear it or free it with the machine running. Gas auger: release the throttle, trigger or control, turn the engine off, wait until the bit and every moving part have stopped completely, then disconnect the spark plug wire (a spark plug cap on some makes) and secure it away from the plug. Let the engine and muffler cool before you touch the bit or anything near the exhaust. Only then free a stuck bit or clear wrapped material, using only the method your manual specifies (gloves do not make grabbing sharp wire or cutting edges safe), and check the bit and guards for damage. Do not handle unidentified wire, cables or pipes. Do not use reverse or run the engine to back the bit out unless your manual expressly authorizes it for this task, with both hands on the designated handles and everyone clear of the bit; complete the full shutdown again before any further hands-on work. Add every step your manual gives, in its order, and refit every guard and shield before you restart.
The manual in the box adds its own steps to this order, in its own sequence, and those steps come first for this kit. Keep the gloves snug: never loose gloves near a turning bit.
Protective Gear
Wear safety glasses with side shields or goggles meeting your manual’s specification, including ANSI Z87.1 where required, and add a face shield where required. Wear hearing protection with gas engines and wherever your manual requires it. Wear long pants and sturdy, closed footwear with secure traction, plus any additional protection your manual specifies. Tie back long hair, remove jewelry and secure drawstrings; do not wear loose clothing or loose gloves. Use the gloves specified for the task and keep hair, clothing, gloves, hands and feet away from moving parts.
Clear the Area
Before you start, walk the spot and remove rocks, sticks, wire, hose, stakes and anything else the bit could catch or throw. Identify irrigation lines, drip lines, cables and sprinkler heads before you start, and take loose garden hoses out of the work area. Do not handle or move unidentified cables, pipes or utility lines: keep the auger away from them and contact the utility if their location is uncertain.
Buried Lines
Contact 811 before digging and include every planned hole in the locate request. Wait the required state notice period and confirm responses from every notified utility, including markings or a clear/no-conflict response for the work area. Resolve missing or conflicting responses before digging. Follow state ticket-validity and tolerance-zone rules, preserve markings, and keep augers outside the required clearance area. Near marks, use careful hand digging or another locating method permitted by state rules and the utility; obey any stricter auger-manual prohibition. Arrange separate locating for private services that 811 does not cover (irrigation lines, cables). Do not dig where a service’s location remains uncertain, and do not switch to a larger machine to get around it. No augering depth above a buried service is safe.
According to PHMSA, 811 is the free national call-before-you-dig number, and the required notice period depends on state law. The 811 call comes from the one-call source, not from this kit. Damaging buried utilities is a recognized safety risk and cost in excavation work (1).
Bystanders
Keep children, pets and other people out of the work area and at least the distance specified in your exact manual. Stop if anyone enters that area. If your manual gives no number, keep everyone well clear of the work area as it directs, and stop if anyone approaches. No distance makes a work area safe on its own: keep watching it.
A one-person auger is operated by one person, and I keep every other person well clear of the work area, as the manual in the box describes. Stop the moment anyone walks in.
Carbon Monoxide
Never start or run a gas auger indoors or in a garage or shed, even with the doors open. Start and run it outdoors: the exhaust contains deadly carbon monoxide, which has no color, taste or smell.
Small gasoline engines running in poorly ventilated spaces have produced dangerous carbon monoxide levels (2). I start the auger on open ground away from doors, windows and the shed, and I let the engine and muffler cool before I touch anything near the exhaust.
Refuelling
Before refuelling, complete the full gas shutdown in the shutdown box. Refuel outdoors on the ground, not in a truck or trailer, with the engine cooled. Follow your exact manual’s precautions for ignition sources, filling the tank and dealing with spilled fuel. Mix fuel and oil only as the exact manual says.
Starting and Holding It: Handles, Stance and the First Hole
Before you do this, complete the full shutdown for your auger in the shutdown box above. Then set up the spot: marked, cleared and 811 answered. GardenTrax lists a quick pull-start, and I follow the starting steps in the manual in the box, with my feet set and the spot clear before I pull.
The full-wrap foam grips are the first thing my gloved hands notice. Both hands stay on the grips from the first turn of the bit, so I clear the stones from the spot before I start, because I have no free hand once it runs. The 8 in bit looks wide beside a fence post, and the bit width alone does not tell me what hole a post or a tree needs.
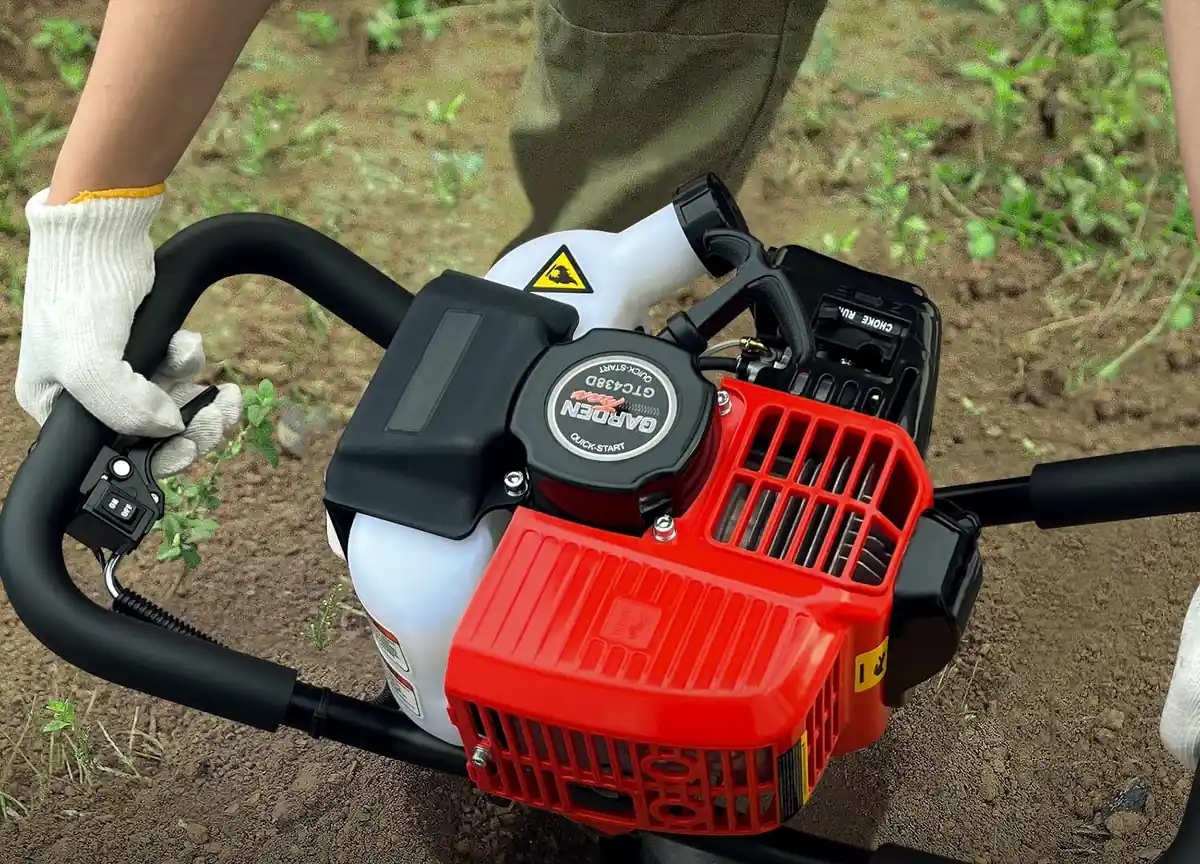
A gas auger is loud, and the sound is not the only exposure. Occupational vibration is common and causes finger, hand and arm disorders that controlling exposure can prevent (3), and workers exposed to both vibration and noise showed more hearing loss than unexposed workers (4). I wear hearing protection from the first pull of the cord and take a break when my hands feel the vibration.
Take Breaks
Digging with an auger is heavy, jarring work that twists your arms and back. Take breaks, stop when you are tired or your attention slips, and use the gloves your manual recommends.
When the Bit Binds or Hits a Root
A hand-held auger turns the bit into the ground, and when it catches, the handles take the twist. A lab simulation of tool torque reaction found that short pulses loaded the wrist muscles hard even when the peaks were a small share of maximum strength (5). So I hold both handles, keep my footing balanced and treat any jolt as a stop signal.
Binding and Torque Reaction
If the bit hits a root, a rock or a buried object, it can bind and the machine can twist or kick. Keep firm, balanced footing and hold the designated handles with both hands. Keep hands and feet away from the bit; never grasp or brace the bit or shaft. Release the throttle or trigger immediately if the bit binds or control is threatened, then complete the full shutdown in the shutdown box and inspect for damage before restarting. Use reverse only where your manual authorizes it for your model.
At a bind, a grinding sound, smoke, a hot-oil smell or an engine that cuts out, I release the throttle at once, complete the full shutdown in the shutdown box above and inspect the bit and guards before I start again. I resume only when the cause is cleared, the damage is dealt with and the restart conditions in the manual in the box are met. I use reverse or a freeing method only where the manual in the box authorizes it, and I call GardenTrax or a qualified service shop when a bit will not come free.
Stuck Bit
If the bit sticks in the hole or material wraps around it, do not force it and do not reach for the bit. Stop and complete the full shutdown in the shutdown box before touching or inspecting it. Use only the freeing or clearing method specified in your exact manual; gloves do not make grabbing sharp wire or cutting edges safe. Do not handle unidentified wire, cables or pipes. Powered reverse is permitted only when your manual expressly authorizes it for that task, with both hands on the designated handles and everyone clear of the bit. Complete the full shutdown again before any subsequent hands-on work. If your manual gives no procedure, obtain manufacturer or qualified service guidance.
Soil Condition
Do not dig in frozen or rock-hard ground or in ground full of roots and stones: the bit can bind and the machine can twist or kick.
Slopes and Footing
On a slope or uneven ground, slow down, keep firm footing and follow only the slope or footing rule in your own manual. If your manual gives no such instruction, obtain guidance from the manufacturer before using the auger on a slope.
Changing the Bit, Carrying and Storing It
Before you do this, complete the full shutdown for your auger in the shutdown box above. The bit connects to a 7/8 in output shaft, according to GardenTrax, so the shaft size is the first thing I check before I fit any bit. I change the bit only after the full shutdown, with the spark plug wire off and secured, and I follow the manual in the box for how the bit is attached.

Before you do this, complete the full shutdown for your auger in the shutdown box above. After digging, the flights carry soil, and I knock it off with a stiff brush, never a bare hand. Then I wipe the bit and store it off the shed floor, dry, with the auger out of children’s reach.
Lifting and Transport
Before you lift, load, carry or move the auger, complete the full shutdown in the shutdown box. Load and unload only as your manual describes and refuel a gas unit on the ground, not in the truck bed. Follow the manual’s lifting and handling instructions.
I print no single weight figure for the kit, so I treat the carry from the shed to each marked spot as a real lift and let the engine and muffler cool first. I never carry the auger by the handles with the engine hot, and I follow the manual’s fuel steps before the auger goes in a truck.
Who Should Buy It and Who Should Skip It
Match the machine to the holes. The GardenTrax 43cc suits a short list of single holes dug by one person. My roundup of one-person earth augers ranks five models for that job.
- Buy it if: you dig single holes for stakes, small posts or planting, and you can work outdoors with a fuel can and ear protection.
- Buy it if: you want an 8 in bit in the kit and no cord or battery to manage.
- Skip it if: the ground is frozen, rock-hard or full of roots and stones, because a bit that binds twists the machine.
- Skip it if: you need a published maximum depth, a printed reverse procedure or a bit wider than the one in the kit.
Drawbacks
The GardenTrax 43cc has five real drawbacks, and most of them come with any hand-held gas auger. I compare five other gas options in my gas earth auger comparison.
- Fuel and exhaust: you mix fuel, refuel outdoors and never run it in a shed or garage.
- Noise and vibration: hearing protection and breaks are part of the job.
- Torque reaction: a bind twists the handles, so firm footing and both hands matter on every hole.
- No depth maximum stated: the 36 in is the length of the bit, so I do not promise a depth.
- No single weight figure printed: I give none for the kit, so plan every carry from the shed as a heavy lift.
How It Compares With Other Gas Augers
Two other gas augers sit near it. The figures below are each maker’s own.
| Spec | GardenTrax 43cc | Earthquake E43 | DC HOUSE 52cc |
|---|---|---|---|
| Auger type | Gas, hand-held | Gas, hand-held | Gas, hand-held |
| Engine | 43cc, 2-cycle | 43cc, 2-cycle | 52cc, 2-cycle |
| Bits in the box | One 8 in by 36 in | One 8 in by 36 in | 6 in and 10 in |
| Operators | One person, per GardenTrax | One person, per Earthquake | One or two, per the manual |
Earthquake E43
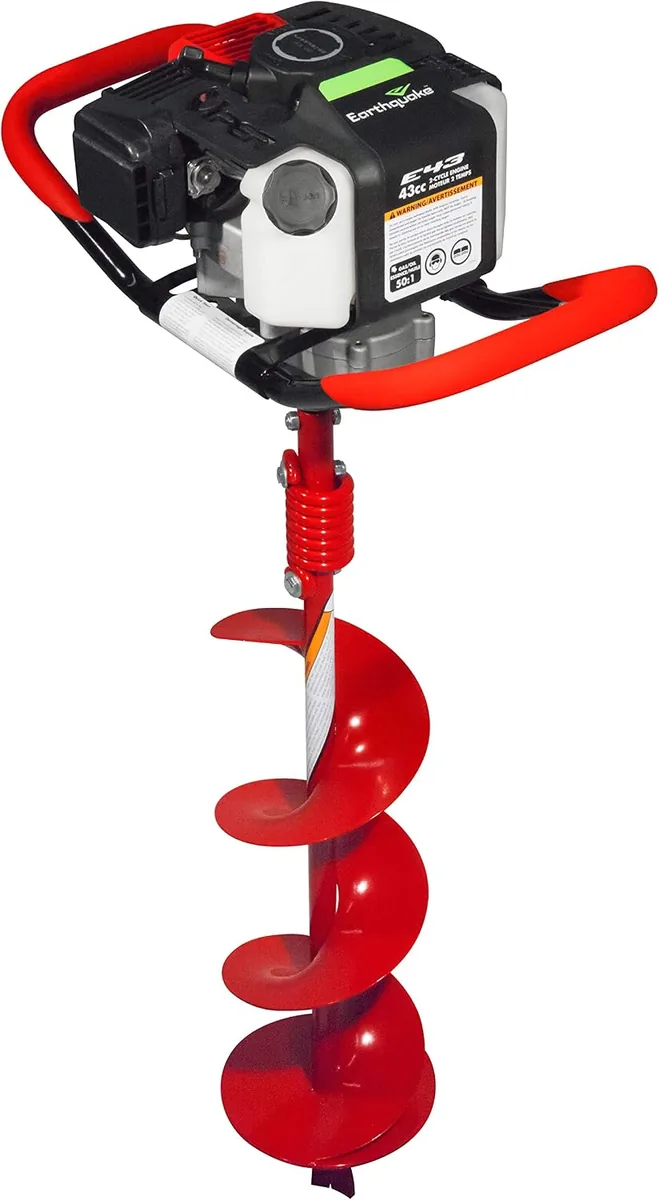
The E43 is a one-person 43cc gas auger with an 8 in by 36 in bit, and Earthquake publishes no depth maximum for it. Pick it if you want the same engine size and bit from a maker with a printed manual for the model. My E43 auger review goes through that kit in detail.
DC HOUSE 52cc
The DC HOUSE is a 52cc gas auger sold with a 6 in and a 10 in bit, and its manual describes a second person on the handles for wide holes. Pick it if your holes run wider than 8 in and you have a helper who knows the plan before the bit touches the ground. My DC HOUSE auger review covers the kit and its two bits.

My Final Verdict on the GardenTrax 43cc Kit
The GardenTrax 43cc is a plain, hand-held tool: a 2-cycle engine, a pull cord and an 8 in bit in the kit. Buy it for single holes in workable ground, keep both hands on the grips and give the shutdown steps the time they ask for. Skip it for frozen or rocky ground, wide bits or any job that needs a printed depth figure. That is where my GardenTrax earth auger review lands: a clear yes for a handful of single holes, and a clear no for anything heavier. If you would rather skip fuel, my WORX earth auger review covers a cordless 40V option.
Frequently Asked Questions
Is the GardenTrax 43cc earth auger a one-person auger?
The GardenTrax 43cc earth auger is sold as a one-person auger, and GardenTrax calls it a one-man earth auger combo for single-operator digging projects such as fence posts and tree planting. Run it that way, with both hands on the grips and no helper beside the bit, unless the manual in the box tells you otherwise.
What size bit comes with the GardenTrax 43cc earth auger?
The GardenTrax 43cc earth auger comes with an 8 in by 36 in spiral bit, according to GardenTrax, and the 36 in is the length of the bit, not a digging depth. The bit connects to a 7/8 in output shaft, so read the manual in the box before you fit any other bit.
What comes in the box with the GardenTrax 43cc earth auger?
GardenTrax sells the 43cc earth auger as a combo of one 43cc 2-cycle powerhead and one 8 in by 36 in spiral bit with a fishtail point. You supply the fuel can, mixed fuel made as the manual in the box describes, eye and hearing protection, and an 811 request before any hole.
What engine does the GardenTrax 43cc earth auger have?
The GardenTrax 43cc earth auger has a 43cc 2-cycle gasoline engine with a quick pull-start, according to GardenTrax. It runs on mixed fuel made as the manual in the box describes, and it starts and runs outdoors only, because the exhaust contains deadly carbon monoxide, which has no color, taste or smell.
Do you need hearing protection with the GardenTrax 43cc earth auger?
You need hearing protection with the GardenTrax 43cc earth auger because it has a gas engine, and gas engines are loud enough to damage hearing over a session of digging. Add eye protection, long pants, sturdy closed footwear and snug gloves, and follow the manual in the box where its specification is stricter.
References
- Gallagher AG, Hart M, Cleary D, et al. Proficiency based progression simulation training significantly reduces utility strikes: a prospective, randomized and blinded study. PLoS One. 2020;15(5):e0231979.
- Hyson BE, Friedman BM, Spear B, Bishop-Freeman SC. Lethal carbon monoxide generated from small internal combustion engines. J Anal Toxicol. 2024;48(8):625-629.
- Palmer KT, Bovenzi M. Rheumatic effects of vibration at work. Best Pract Res Clin Rheumatol. 2015;29(3):424-439.
- Thaper R, Sesek R, Garnett R, Acosta-Sojo Y, Purdy GT. The combined impact of hand-arm vibration and noise exposure on hearing sensitivity of agricultural/forestry workers: a systematic literature review. Int J Environ Res Public Health. 2023;20(5):4276.
- Armstrong T, Bir C, Foulke J, Martin B, Finsen L, Sjogaard G. Muscle responses to simulated torque reactions of hand-held power tools. Ergonomics. 1999;42(1):146-159.
Safety Note: Only an adult who has read the manual and understands the controls should use an earth auger or post hole digger, never a child or anyone tired or impaired. Use the number of people your manual specifies, and keep everyone else out of the work area. The rotating bit can catch hair, clothing and gloves, and it can bind on a root, a rock or a buried object: the machine can then twist or kick in your hands. Stand with firm, balanced footing and hold the designated handles with both hands. Keep hands and feet away from the bit; never grasp or brace the bit or shaft. Never wrap the power cord around your hand, arm or body. If utility contact or a gas leak is suspected, stop work immediately. Do not touch, inspect, free or move the auger or exposed service, and do not attempt the normal hands-on shutdown or disconnect electrical connections in the suspected leak area. Leave the area, keep others away and contact the utility from a safe location; call 911 for a suspected gas leak or immediate danger. Otherwise, release the throttle or trigger immediately if the bit binds or control is threatened, then follow the shutdown procedure. On a two-person unit, both operators must understand the controls and agree on start and stop signals before starting; stop whenever either operator calls stop. Use reverse only where your manual expressly authorizes it. Never touch or clear the bit while it turns. Before you clear or free the bit, change or attach the bit, adjust, check or add oil or fuel, clean, load, move, store or leave the auger, complete the shutdown for its power type. Corded electric: release the switch or trigger, wait until the bit has stopped completely, then unplug it from the outlet by the plug, not the cord; before transport or storage, also let the motor cool. Battery: release the switch or trigger, wait until the bit has stopped completely, then remove the battery, and the switch key where the model has one. Gas: release the throttle, trigger or control, turn the engine off, wait until the bit and every moving part have stopped completely, then disconnect the spark plug wire and secure it away from the plug, and let the engine and muffler cool before touching the bit, engine, muffler or anything near the exhaust. For a drill-driven bit or any attachment system, follow the shutdown instructions in both the bit or attachment manual and the power-head or drill manual. If the bit sticks or material wraps around it, stop and complete the full shutdown before touching or inspecting it. Use only the freeing or clearing method specified in the exact manual; gloves do not make grabbing sharp wire or cutting edges safe. Do not handle unidentified wire, cables or pipes. Powered reverse is permitted only when the exact manual expressly authorizes it for that task, with both hands on the designated handles and everyone clear of the bit. Complete the full shutdown again before any subsequent hands-on work. Wear safety glasses with side shields or goggles meeting the manual’s specification, including ANSI Z87.1 where required; add a face shield where required. Wear hearing protection with gas engines and wherever the manual requires it. Wear long pants and sturdy, closed footwear with secure traction, plus any additional footwear protection the manual specifies. Tie back long hair, remove jewelry and secure drawstrings; do not wear loose clothing or loose gloves. Use the gloves specified for the task and keep them, clothing, hair, hands and feet away from moving parts. Contact 811 before digging and include every planned hole in the locate request. Wait the required state notice period and confirm that every notified utility has responded with markings or a clear/no-conflict response for the work area. Resolve missing or conflicting responses before digging. Preserve the marks and follow your state’s ticket-validity and tolerance-zone rules. Keep the auger out of the required clearance area; near marks, use careful hand digging or another locating method permitted by state rules and the utility. Follow any stricter prohibition in the auger’s manual. Marks do not show a safe drilling depth. Arrange to locate private irrigation lines, cables and other services that 811 may not cover. If a line’s location remains uncertain, do not dig there. Do not handle or move unidentified cables, pipes or utility lines. Before you start, remove rocks, sticks, wire and loose hoses, and identify irrigation lines, drip lines and sprinkler heads. Keep children, pets and other people out of the work area and at least the distance your exact manual specifies. Stop if anyone enters that area. If your manual gives no number, keep everyone well clear of the work area as it directs. No single distance is safe for every auger. On a slope or uneven ground, slow down, keep firm footing and follow only your manual’s rule. Do not dig in frozen or rock-hard ground. Before refuelling, complete the full gas shutdown described above. Refuel outdoors on the ground, not in a truck or trailer, with the engine cooled. Keep fuel away from smoking, flames, sparks and other ignition sources. Use an approved fuel container, avoid overfilling, secure the cap and follow the manual’s spill-cleanup and restart-location instructions; do not start with a fuel leak. Use the specified fuel and oil arrangement for that engine. Never start or run a gas auger indoors, in a garage or shed, or in an enclosed or poorly ventilated area, even with doors open. Operate outdoors where exhaust cannot accumulate or enter occupied spaces through doors, windows or air intakes. Exhaust contains deadly carbon monoxide. For a corded auger, inspect the cord and extension cord before use and do not use damaged cords or plugs. Use an outdoor extension cord meeting the exact manual’s gauge, length, plug and grounding requirements, and follow its GFCI instructions. Keep connections dry and the cord clear of the bit, heat, oil and sharp edges. Never carry the auger by its cord or wrap the cord around your body. Do not use it in rain or wet conditions prohibited by the manual. Use only manufacturer-approved batteries and chargers for the exact model. Complete the battery shutdown before removing or changing a battery, and keep the switch off and fingers off the trigger when installing one. Do not use damaged or modified batteries or chargers. Keep loose battery terminals away from metal objects, and follow the battery and charger manuals for moisture exposure, charging temperature, cooling and storage. Load and unload only as your manual describes, and store the auger dry and out of children’s reach. Take breaks and stop when you are tired.