

The best post hole digger for a few holes at your house is the one whose power source, bit and kit fit the job. I dig and plant on my 3.7-acre apricot and plum farm, and I put each of these seven machines to work there.
Affiliate Disclosure: Garden Power Scout is a proud participant in the Amazon Services LLC Associates Program. As an Amazon Associate, we earn from qualifying purchases, at no extra cost to you.
Below are seven powered diggers, corded, battery and gas, led by my pick, the XtremepowerUS 1500W Electric Post Hole Digger with 6-Inch Bit. Each review gives the printed bit size and depth, the rules its manual sets and who should skip the machine.
Best Post Hole Digger Reviews 2026 and the 7 Machines I Put to Work
These seven machines run on a cord, a battery or gas, from a corded unit to a power head sold without a bit. I ranked them by how well each fits a few holes at a house or small farm and by what its own manual says it will not do.
1. XtremepowerUS 1500W Electric Post Hole Digger with 6-Inch Bit Best Overall
The XtremepowerUS 85060 is the digger I plug in first when the job is a handful of holes, because it needs no fuel, no mix and no battery to charge. It runs from a 110 V outlet and draws 10.9 amps according to the manual, so a cord and an outlet are the whole power plan. It is the only corded machine on this page, and for a yard with an outlet near the work it is the best post hole digger I can recommend.

WHY I CHOSE THIS ✓
I put the 85060 first because it asks the least of a homeowner who digs a few holes. No fuel, no mix, no battery: an outlet and the right cord. It is the one corded machine on this page, and where the holes sit near power that is the whole case. Where the manual is thin, I say so and work to its numbers, which are a 560 mm depth and a 6 inch bit ceiling.
XtremepowerUS 1500W Electric Post Hole Digger with 6-Inch Bit Specs
Key Features:
- Plug-in motor: 110 V and 10.9 amps per the manual, so there is no fuel to mix and no battery to charge.
- Two-handle frame: the manual says to grip both handles with both hands whenever the bit turns.
- Trigger switch: you squeeze it slowly to start the bit, then press the handles lightly down.
- Printed overload warning: an overloaded auger may stop turning, and a stall means full shutdown and inspection before any restart.
- Sound warning: XtremepowerUS prints that sound may exceed 85 dB(A) and hearing protection must be worn.
- Wipe-clean body: a soft cloth with mild soap and water, and no ammonia, chlorine or abrasives.
- 3/4 inch shaft: the model is sold with this shaft size, so a replacement bit has one to match.
I follow the order the manual prints: auger upright on the spot, feet clear of the bit, both handles, a slow squeeze of the trigger and light downward pressure. Light pressure and frequent lifts are the technique. The manual says to raise the auger often so the debris clears and not to lean your body weight on it. XtremepowerUS also says not to use it in excessively rocky ground.
I lay the cord out first, because the manual asks for an outdoor extension cord heavy enough to carry the current and warns that an undersized cord overheats. It also says the tool must be grounded, plugs must match the outlet and never be modified, and adapter plugs must not be used. It prints no gauge and no length, so ask XtremepowerUS before you buy a cord. I keep the cord behind me and away from the bit, and the tool out of rain and wet ground.
Stood beside a post, the bit looks like a hole for that post and little more. The manual’s data table lists a 4 inch bit and its safety text allows up to 6 inches, so I treat 6 inches as the ceiling. It prints 560 mm of drilling depth, about 22 inches, and the product page claims more, so I plan around the manual. This manual does not tell you to call 811, so start with the buried-line steps in the safety section below before the cord leaves the shed.

Lift the bit out of the hole every so often with the trigger held, as the manual says, so the soil rides up the flights and out. A hole that packs with loose soil makes the motor work harder.
Know the manual’s gaps before the first hole. It prints no reverse, no freeing method and no bystander distance; if the bit sticks, release the trigger, complete the full shutdown in the safety section below and ask XtremepowerUS for guidance.
Before you change the bit, wipe off soil or store it, complete the full shutdown in the safety section below. The manual warns that long use may produce white finger, so I rest when my hands tell me to. It asks for eye protection, heavy-duty non-slip gloves, snug sturdy clothing with long pants, non-slip boots and, where sound may exceed 85 dB(A), hearing protection, with no loose jackets, scarves, jewelry or cuffed pants. XtremepowerUS prints no warranty term in the manual, so confirm the coverage when you buy.
Pick the 85060 if the holes sit near an outlet,, the job is a few posts or tree stakes and you want no fuel in the shed. Skip it if the holes are far from power, the ground is full of rock, you want a bit wider than 6 inches or you need a printed reverse and warranty. XtremepowerUS prints no bystander distance for it, so keep everyone well clear of the work area, as its manual directs.
FINAL VERDICT
The 85060 is the digger I hand a neighbor with a fence line to patch and an outlet in the shed. Work to the manual’s 560 mm and 6 inch figures and it does the plain job it was built for.
It is the plug-in digger I reach for first.
2. Earthquake E43 1-Person Gas Earth Auger, 43cc with 8-Inch Bit Best Premium
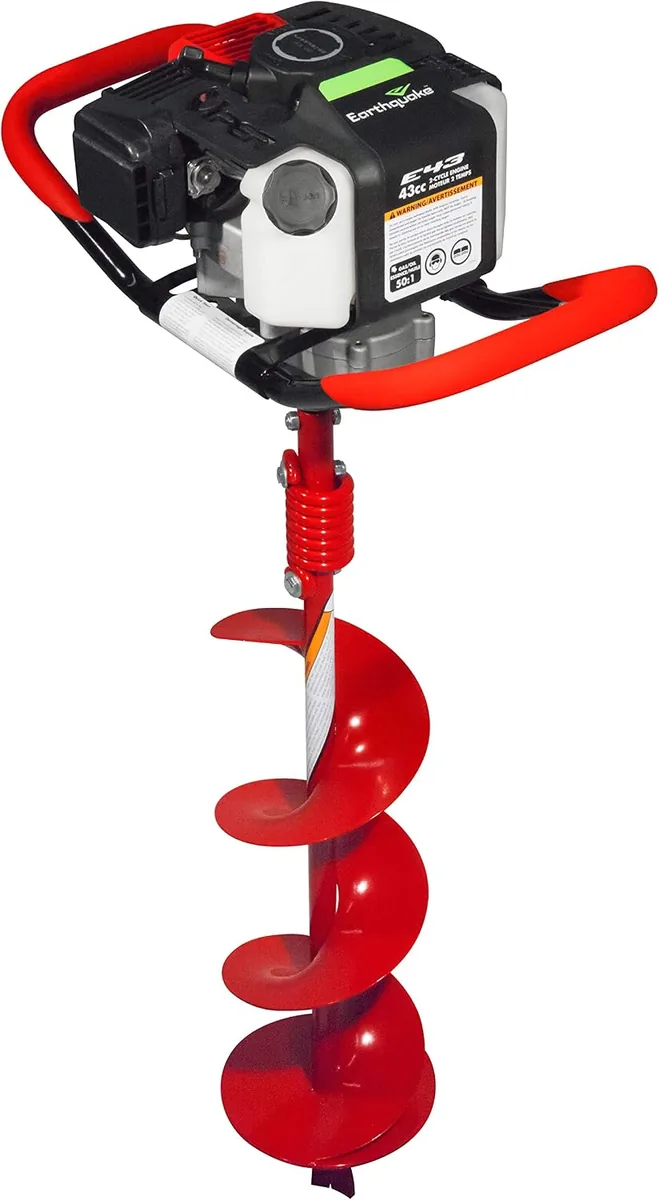
The Earthquake E43 is the step up from the budget machines on this page: a 43 cc two-cycle engine, an 8 inch by 36 inch bit already in the box and a maker that prints a fuel chart and a cold-start order in the manual. Earthquake sells it as a one-person auger. I rank it second because it is the higher-priced complete kit, ready to dig once the fuel is mixed.
WHY I CHOSE THIS ✓
The E43 takes second place because it is a complete one-person kit from a maker that prints its fuel chart, its start-up order and a five-year powerhead term. The higher price buys a bit in the box and a maker’s page behind it. It asks you to mix fuel and to register the warranty within 30 days, and I accept that for a machine that arrives ready to dig.
Earthquake E43 1-Person Gas Earth Auger, 43cc with 8-Inch Bit Specs
Key Features:
- 8 inch by 36 inch bit in the box: one hole size is ready to dig, with a fishtail point and a replaceable blade according to the maker.
- Flex-Coil spring: Earthquake says the coil between powerhead and bit reduces upper-body impact on a stubborn rock or root, which is the maker’s claim.
- 50:1 fuel chart: the manual prints oil amounts for one, two and five gallons, so there is no guessing the mix.
- Primer bulb and choke lever: the manual gives a cold-start order, with an extra primer push after five or six pulls.
- Idle rule: the manual says the auger should not turn at idle and lists an auger that turns at idle in its troubleshooting table.
- Optional extensions: 12 inch and 18 inch extensions are sold separately if you need more reach than the bit alone.
- Clear gear rules: the manual requires side-shield eyewear and a hearing device every time.
The manual’s cold-start order is choke to CHOKE, prime until the hose fills, switch on, then a slow pull until the cord gets slightly harder and one rapid full arm stroke. After five or six pulls it says to push the primer once more. Once the engine fires, Earthquake tells you to release the throttle for a moment and return your left hand to the handlebar before you go to half choke and then run. I put ear protection on before the first pull.
Fuel decides what ownership costs in effort. The engine runs a 50:1 mix, and the manual says never to mix in the tank and never to run straight gas, which voids the warranty and damages the engine. It asks for unleaded regular and prefers premium without ethanol. The clutch reaches full power after about two hours of normal operation, and the manual warns that it can slip during that break-in.
Beside a fence post the 8 inch bit looks wide, and the coiled spring above it surprised me, because it is the first thing the eye lands on. The maker prints no digging depth, and the 36 inches is the length of the bit. Before you attach or change a bit or an extension, complete the full shutdown in the safety section below. Earthquake lists the powerhead as not compatible with a torque reducer and prints no torque-reaction warning, so the braced stance in the safety section is the rule I follow.

Before you lift or move it, complete the full shutdown in the safety section below. Then carry the powerhead by the handlebars and never by the bit, never between holes with the engine running, and with fuel in the tank transport it upright in an open vehicle, as the manual says.
Run it outdoors only. Earthquake says engines give off carbon monoxide, an odorless and colorless poison gas, and tells you to start and run the engine outdoors, never in an enclosed area even with doors or windows open.
Before you refuel, clean the bit or store the auger, complete the full shutdown in the safety section below. Earthquake adds that after a strike you inspect the powerhead and auger and repair any damage before you start again. It asks for goggles or glasses with side shields, a hearing device, work gloves, sturdy footwear, long trousers and a long-sleeved shirt or jacket, and it bans shorts, sandals, sneakers and open shoes. The air filter wants service every three months or after 20 hours, and for long storage you remove the auger and grease the output shaft.
Choose the E43 when you want a complete gas kit for occasional fence, mailbox or tree jobs and you will mix fuel as the chart says. Skip it if you need a printed digging depth, a second bit size in the box or a reverse, or if you want a battery or corded machine. Earthquake prints no bystander distance, so keep everyone well clear of the work area, as its manual describes.
FINAL VERDICT
The E43 is the gas kit I recommend to a homeowner who wants a bit in the box and a maker’s paperwork behind it. Mix the fuel by the chart, register the warranty, and the package is complete.
It is the complete gas kit I step up to.
3. VEVOR 43cc Gas Post Hole Digger with 8-Inch Bit Best Value
The VEVOR 43cc puts a gas auger and an 8 inch by 30 inch bit in one budget-tier box, and that is why it takes the value place on this page. VEVOR’s manual prints sound and vibration tables, a five-meter bystander distance and the full start-up steps. It is the best value for a homeowner who wants a complete gas kit and will read the manual twice.

WHY I CHOSE THIS ✓
The VEVOR 43cc is my value pick for a complete gas kit at a budget price. You get the machine, an 8 inch by 30 inch bit, a printed bystander distance and printed sound and vibration tables. The scope matters: this is the value pick for small jobs at home, not for a user who wants a depth figure, a warranty term or a long safety list.
VEVOR 43cc Gas Post Hole Digger with 8-Inch Bit Specs
Key Features:
- 8 inch bit in the box: the 200 mm by 800 mm bit comes with the machine, so one hole size is ready to dig.
- Safety switch and trigger: the manual has you press and hold the safety switch, then pull the trigger to raise the speed.
- Printed sound and vibration tables: the manual lists 93.8 dB(A) sound pressure in operation and handle vibration of about 20.5 m/s2 on the main handle, with no distance or standard named.
- Five-meter bystander rule: VEVOR says to keep everyone at least five meters from the work area, which is its own figure for this model.
- Clip-and-pin bit fitting: you remove the clip and pin, align the holes and clip the pin back in.
- Longer pull cord: the maker claims a 1.2 m cord, which is longer than a regular cord, according to VEVOR.
- Stop control: the manual says to release the trigger, switch to OFF and let the machine stop completely before you put it down.
Before you assemble or fit anything, complete the full shutdown in the safety section below; the handles ship off the frame, and I bolted them on myself: eight pairs of screws and nuts, a 13 and a 10 wrench, and two nylon ties for the wire. The manual then says to hold the drill upright, switch to ON, pull the starter and, once the bit has gone about 10 cm into the ground, grasp the frame strongly and push harder. It also says to lower the bit gradually for a deep hole. The bit does the work if you let the speed build first.
The manual prints sound pressure of 93.8 dB(A) in operation and warns of hearing loss after long use without protection, so I put ear protection on before the pull. The vibration table is high on paper, about 20.5 m/s2 on the main handle and 21.0 on the auxiliary one, and the manual describes white finger. It names no distance and no standard for either table. I treat both as VEVOR’s figures and stop when my hands go numb and see a doctor, as the manual says to do on numbness, tingling, pain or color change.
The manual’s text gives one mixing ratio and its technical table gives another, so I use the ratio in the manual only after I confirm it with VEVOR, and I do not mix a tank before then. Before you refuel, complete the full shutdown in the safety section below. The manual also says to fill the tank to 80 percent preferably, to use unleaded gasoline without ethanol or methanol and never to refuel indoors. The 8 inch bit looks heavy against a thin stake, and the maker names no other bit for this kit.
Before you carry it from the shed, complete the full shutdown in the safety section below. The manual gives 11.9 kg with no basis and says to carry the tool by the handle and never by the drill.
The manual has gaps you should know about. It prints no warning about underground lines, no torque-reaction text and no spark plug step, and VEVOR’s only stuck-bit step is to release the accelerator and return to idle, so complete the full shutdown in the safety section below first.
Before you clean the bit or put the machine away, complete the full shutdown in the safety section below. VEVOR limits it to private domestic use, says people under 18 must not use it and asks for a helmet, protective mask, ear protection, gloves, non-slip footwear and protective clothing. The manual prints no warranty term, so confirm the coverage with the seller. It tells you to check the rod and tool body after each use and to empty the fuel tank completely for long storage.
Buy it if you want the lowest-cost complete gas kit on this page and you will confirm the fuel ratio before the first tank. Skip it if you need a published depth, a warranty term in the box, a printed one-person rating or a reverse. It is also the wrong pick for commercial use, which the manual excludes.
FINAL VERDICT
The VEVOR 43cc is the value pick for a homeowner with a few holes and a gas can, as long as the safety section comes first. It earns its place on price and completeness, and it loses ground wherever the manual stays silent.
It is the budget gas kit I read twice.
4. WORX WG865 40V Cordless Earth Auger with 8-Inch Bit Best Battery
The WORX WG865 is the only battery machine on this page. Two 20 V batteries make up its 40 V max supply, and the brushless motor needs no cord and no fuel mix. It is the best battery post hole digger here for a yard with no outlet near the work and no wish to keep a fuel can. My WORX auger review covers the WG865 40V cordless model with its 8 inch bit.

WHY I CHOSE THIS ✓
I give the battery place to the WG865 because it is the only cordless machine here and it states its controls and limits in numbers. It suits the yard with no outlet and no fuel can, and the weight and the two-battery rule are the price.
WORX WG865 40V Cordless Earth Auger with 8-Inch Bit Specs
Key Features:
- Rotation selector: three positions give reverse, forward low at 145 RPM and forward high at 220 RPM, as WORX prints them.
- Printed torque: the manual lists 59 ft/lbs (80 Nm) for this model.
- Kickback and overload lights: blue shows a kickback stop, and red shows a fault or overload.
- Two-battery rule: it runs only with both batteries installed, and mixed capacities limit it to the lower one.
- Printed depth: WORX gives a maximum working depth of 32 in with the 8 in bit.
Push the safety lock-off lever back, then squeeze and hold the trigger. WORX says to start at low speed with the bit tip on the ground, because a freely spinning bit is likely to bend. I set my thumb on the selector and the tip on the ground before I squeeze.
The five-light battery indicator is the first thing I check after fitting the pair, and WORX says to charge both batteries together. A battery at -4 F or colder may not start the tool, and WORX says to warm it indoors for 10 minutes or longer. Before you fit or remove a battery, complete the full shutdown in the safety section below.

WORX says a kickback stops the machine and lights the blue indicator. After one, release the trigger, complete the full shutdown in the safety section below and inspect for damage before you restart.
It is a heavy tool to carry: before you lift or move it, complete the full shutdown in the safety section below, and let the motor cool and secure the unit in transit, as WORX says. I lift the bare 26.92 lb out of the shed with both hands.
WORX asks for overalls, goggles or a face mask, ear protection, a helmet and non-slip shoes, and recommends rubber gloves. The bit may be extremely hot after use, so do not touch it right away; before you clean it, complete the full shutdown in the safety section below. The manual tells you to make sure no buried pipe or wire is in the working area and does not mention 811.
Choose it for a yard with no outlet near the work, no wish to mix fuel and a use for reverse and speed control. Skip it if you want another bit size. WORX prints no bystander distance, so keep everyone well clear of the work area, as its manual describes.
FINAL VERDICT
The WG865 is the battery machine for a yard without an outlet or a fuel can, and it tells you plainly what it does. Carry the weight, charge both batteries together and keep to the 8 inch bit.
It is the cordless digger for yards with no outlet.
5. DC HOUSE 52cc Gas Earth Auger with 6-Inch and 10-Inch Bits Manual Describes Two Operators
The DC HOUSE 52cc is the one machine on this page whose own manual describes a second person on the handles. Holes six inches or larger may be easier with two people, the manual says, and the kit as sold comes with a 6 inch and a 10 inch bit. That makes it the gas pick for a homeowner who has a helper on the day and wants two hole sizes.

WHY I CHOSE THIS ✓
The DC HOUSE sits fifth because it is the one machine here whose own manual describes a helper position. It suits two people and larger holes, and the price is a manual to check on fuel mix and warranty.
DC HOUSE 52cc Gas Earth Auger with 6-Inch and 10-Inch Bits Specs
Key Features:
- Two bits in the kit as sold: the 6 inch and 10 inch bits give you two hole sizes.
- Helper position: the manual describes an operator and a helper, with the helper on the support handle only.
- Throttle lockout lever: the manual says the throttle trigger cannot be pressed unless the lever is engaged.
- Purge bulb and decompression button: the manual lists both as starting aids.
- Cool-down rule: after a long run the manual says to idle the engine for several minutes.
In the manual’s two-man steps the operator guides the auger while gripping the throttle handle and the lower hand grip, and the helper guides it by gripping the loop handle on the opposite side. Both people agree the plan before the bit touches the ground, and both stop when either calls a stop. Looking at where the support handle sits, I read it as the part that makes the job: it is the only place the second pair of hands belongs. My DC HOUSE earth auger review covers the 52cc gas model and its 6 in and 10 in bits.
Starting follows the manual: bit pinned in the socket, choke, power switch to I, seven or eight presses on the primer and then the starter. I found the lockout lever and the throttle trigger under the same hand. The manual and the product page give different mixing ratios, so I confirm the ratio with DC HOUSE before the first tank.
The manual says never to run the auger with the handles above chest height, because you could lose control. Before you lift it by the handlebar frame, complete the full shutdown in the safety section below.
A bind twists the machine. The manual says the auger may twist suddenly and forcefully on a large rock, root or hidden obstacle, so release the throttle trigger at once and complete the full shutdown in the safety section below before you lift the auger out or touch the bit, then inspect for damage.
The manual asks for eye protection that meets ANSI Z87.1, hearing protection, no-slip rubber work gloves, long pants, long sleeves and nonskid shoes, never shorts or bare feet, and I wear ear protection every time. It sets 3 m (10 ft) for children and animals, which is DC HOUSE’s own figure for this model. It names underground hazards but not 811, so read the buried-line steps in the safety section below first.
Pick it if you have a second person for larger holes and want two bit sizes in one gas kit. Skip it if you want an 8 inch bit, a reverse or a manual with no conflicting figures.
FINAL VERDICT
The DC HOUSE is the gas kit for a two-person job with larger holes, and the helper steps in its manual are the reason to buy it. Confirm the fuel ratio before the first tank and it earns its place.
It is the gas auger with a helper position.
6. VEVOR 52cc Gas Post Hole Digger with Two Bits and Rods Includes Three Extension Rods
The VEVOR 52cc is the only kit on this page with extension rods in the box. The manual’s parts list names three rods, a 150 mm bit and a 250 mm bit, so the bit can be lengthened with a clip and a pin. It suits a reader who wants rods and two bit sizes from day one and accepts a short manual. My VEVOR 52cc review covers the D52-F kit and its bits in full.

WHY I CHOSE THIS ✓
The VEVOR 52cc sits sixth because it is the only kit here with extension rods, and both bits come with it. It suits a reader who wants rods and two bit sizes in one box, and the manual is short.
VEVOR 52cc Gas Post Hole Digger with Two Bits and Rods Specs
Key Features:
- Three extension rods: the manual’s parts list names them, and a clip and pin join each rod.
- Two bits: the manual prints 150 mm and 250 mm bits, each 800 mm long.
- Sound and vibration tables: 93.8 dB(A) sound pressure in operation and about 20.5 m/s2 on the main handle, with no distance named.
- Five-meter bystander rule: VEVOR’s own figure for this model, and no guarantee of safety.
- Safety switch and trigger: you press and hold the switch, then pull the trigger.
Before you fit or remove a rod or a bit, complete the full shutdown in the safety section below. Fitting a rod is then a clip and a pin: take out the clip and pin, line up the next rod with the holes and clip the pin back in. Laid on the ground beside the frame, the 800 mm bit is the longest part of the kit, and since VEVOR prints no maximum depth, I read a rod as added length and never as a depth.
Start-up is short: switch ON, pull the launcher cable, press and hold the safety switch, then pull the trigger. The sound table surprised me: the manual prints 68.4 dB(A) at idle and 93.8 in operation, a gap of about 25 dB(A) with no distance named. I wear ear protection from the first pull.
Mix the fuel in a clean container and stir it for more than a minute, as VEVOR says, and fill the tank to 80 percent preferably. Before you refuel, complete the full shutdown in the safety section below.
The manual is short on safety. It prints no warning about underground lines and no bind method, and VEVOR’s only stuck-bit step is to release the accelerator and return to idle, so complete the full shutdown in the safety section below first.
VEVOR limits it to private domestic use and asks for a helmet, protective mask, ear protection, gloves, non-slip footwear and protective clothing. The vibration table is high on paper, with 20.5 m/s2 on the main handle, and the manual describes white finger, so I stop when my hands tell me to and see a doctor on numbness, tingling, pain or color change, as the manual says. For long storage VEVOR says to remove the fuel from the tool, and before you do that, complete the full shutdown in the safety section below.
Choose it if you want rods and two bit sizes in one gas kit for private household use. Skip it if you need a printed weight, depth or warranty term, a reverse or a bit near 8 inches. VEVOR states no operator count for it.
FINAL VERDICT
The VEVOR 52cc is the rods-and-bits kit for a household that wants options in the box. Treat the short manual as a reason to read the safety section twice.
It is the gas kit that ships with its own rods.
7. Earthquake Dually 10310 52cc Gas Earth Auger Powerhead Power Head Only
The Earthquake Dually 10310 is a power head sold without a bit, so the price buys the engine and handlebars only. Earthquake’s page and the sales page say it suits one or two people, with two throttle controls on the handlebars. It is the pick for a reader who already owns a 7/8 inch smooth-shaft bit or plans to buy one with it. My Dually auger review covers the power head sold without a bit.

WHY I CHOSE THIS ✓
I list the Dually last because it is a power head and the bit is a separate purchase. It earns its place for a reader who has chosen the bit first and wants a gas head with two throttle controls.
Earthquake Dually 10310 52cc Gas Earth Auger Powerhead Specs
Key Features:
- Power head only: you choose the bit, and Earthquake’s page names a 7/8 inch smooth shaft.
- Two throttle controls: according to Earthquake, two independent throttles on the handlebars serve a single or two-person position.
- Caged handlebar: the sales page describes handlebars that encase the engine.
- Printed specifications: the manual lists 62 ft-lb output shaft torque, a maximum of 285 RPM, a 32:1 gear ratio and a 0.3 gallon tank.
- Idle rule: the auger should not rotate when the engine idles, and the troubleshooting table covers an auger that turns at idle.
A bit is the first purchase, and the manual prints no bit size at all. The sales page says bits from 2 inch to 10 inch fit, and Earthquake’s page names a 7/8 inch smooth shaft, so match the shaft before you match the diameter. Before you attach a bit, complete the full shutdown in the safety section below.
The manual’s cold start is prime, choke, switch on, a slow pull and then a rapid full arm stroke. It warns that the starter rope can jerk toward the engine and that the unit must be stable before you pull. I set the frame on level ground and plant my feet before the first pull.
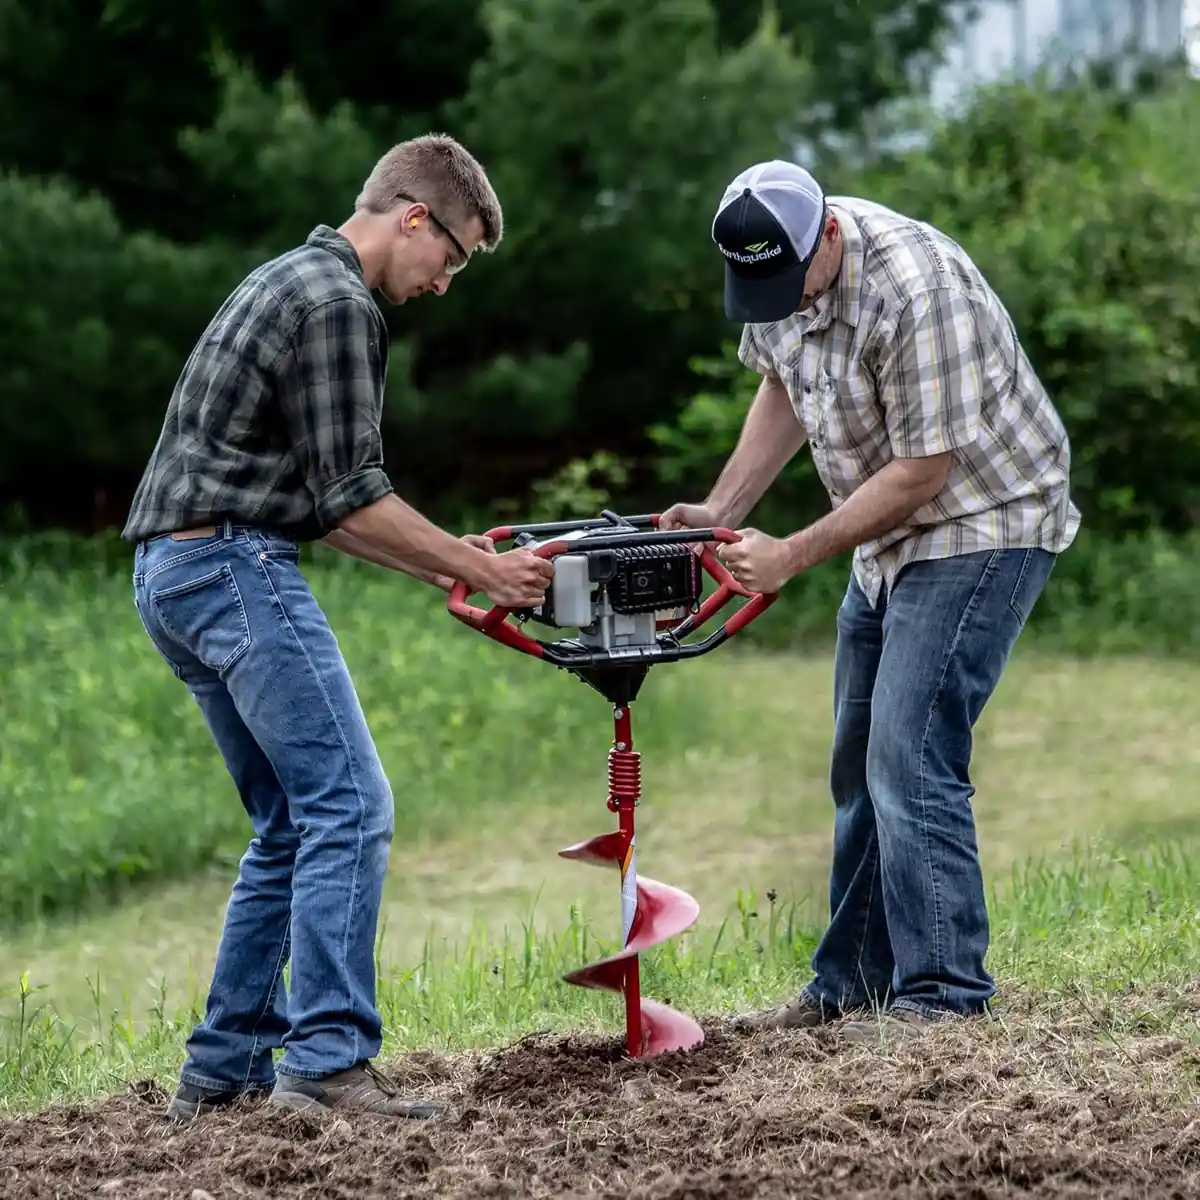
Before you carry or lift it, complete the full shutdown in the safety section below. Earthquake says to carry the power head by the handlebars and never by the auger, and with fuel in the tank to transport it upright in an open vehicle, and I lift the 24 lb power head that way.
Fuel is exact: the engine needs the 50:1 mix, never mixed in the tank, and straight gasoline damages the engine and voids the warranty. The warranty excludes the engine and asks for registration within 30 days under the 2017 edition.
Earthquake warns not to drill above underground utilities and does not name 811, so the buried-line steps in the safety section below come first. The manual also says not to operate in soil with large rocks. It asks for goggles or glasses with side shields, a hearing device, work gloves, sturdy footwear and long sleeves and trousers, never shorts, sandals, sneakers or bare feet, and I fit my hearing device before the first pull. Before you clean or service the machine, complete the full shutdown in that section.
Choose it if you own a 7/8 inch smooth-shaft bit or want to pick the bit yourself. Skip it if you want a bit in the box, a printed depth or a reverse. Treat the one-or-two-person claim as Earthquake’s page speaking, and keep everyone well clear of the work area, as the manual describes.
FINAL VERDICT
The Dually is the power head for a reader who has chosen the bit first. Buy it for the engine and handlebars, and plan the bit as a second purchase.
It is the power head for a reader who owns the bit.
How to Choose the Best Post Hole Digger
Choosing a powered digger comes down to where the power comes from, the bit size and depth the maker prints, what is in the box and how the manual tells you to stay safe. I read each manual’s numbers first, because a printed figure is a limit that holds only for the machine and bit it names.
How Many Holes and How Far From Power
Count the holes and walk to the farthest one before you buy. A hand tool has no cord, fuel or battery to manage, and for one or two holes in loose ground it can be the simpler choice. A powered digger earns its place when the holes are several and the work would otherwise fall on your arms and back. I recommend a corded electric post hole digger for holes within reach of an outlet.
| Power | What you bring | What to read in the manual |
|---|---|---|
| Corded | An outlet and an outdoor extension cord | Cord rules, rain and wet-ground rules |
| Battery | Charged batteries and the maker’s charger | Battery and charger rules, cold limits |
| Gas | Fuel, two-cycle oil and an outdoor place to run it | Fuel mix, refuelling, carbon monoxide, hearing protection |
- Corded: no fuel and no battery, with the job limited by the length of the cord.
- Battery: no cord and no fuel, with two charged batteries and the maker’s charger to look after.
- Gas: the most freedom from a cord, paid for with fuel mixing, a hot muffler and a loud engine.
I walk from the shed to the farthest hole before I choose a power source, because the distance decides whether a cord, a battery or a fuel can fits the job. If you lean toward gas, my gas earth auger picks compare five models.
Bit Size and Depth as the Maker Prints Them
A printed bit size is a size and a printed depth is a ceiling. On a powered digger the bit does the cutting, so its diameter sets the hole width. The bits on this page run from 4 inches to 10 inches, and the length of a bit is only its length, never the depth of the hole. Two makers print a working depth, each with the bit it names, and the others print none.
| Printed figure | What it tells you |
|---|---|
| Bit diameter | The hole width the bit cuts, as the maker names it |
| Bit length | How long the bit is, never how deep the hole will be |
| Maximum depth | The maker’s ceiling with the bit it names |
| Extension | Added reach; a depth figure counts only with the bit and extension the maker names |
Post depth and tree hole size are not auger-manual topics, and the sources differ. Penn State Extension, writing about horse fences, says a typical line post is set 36 inches deep, corner and gate posts are about 25 percent larger and often set 48 inches deep, and soil conditions change both. For planting, Maryland Extension says a hole no deeper than the root ball and at least twice as wide, and Colorado State says three times as wide and one to two inches shallower than the root ball. Depth matters: planting 15 or 31 cm below grade killed half of the Yoshino cherries in one field trial within two years (1). My best auger for planting trees picks cover the tree-hole side of this in more detail.
I look at the post or the root ball before I look at a bit size, because the thing going into the hole sets the hole and the digger only makes the round shape.
For fence work, the best fence post hole digger is the one whose printed bit and depth fit your post, and no maker ties a bit to a post size. I list fence-ready models in my best auger for fence posts picks.
What Is in the Box
Compare kits like with like. Some machines arrive with one bit, some with two bits and extension rods, and one is a power head with no bit at all. A weight or a bit size only means something when you know what the box holds.
| Kit type | What you still buy |
|---|---|
| Power head only | A bit that fits the output shaft, and any extension |
| One bit in the box | Other bit sizes and extensions, if you want them |
| Two bits and rods in the box | Fuel, oil and the safety gear |
| Battery kit | Check the box list for batteries and charger |
- Output shaft: a bit has to fit the shaft size the maker names: XtremepowerUS and DC HOUSE name 3/4 inch, Earthquake 7/8 inch smooth shaft and WORX 0.8 inch (20 mm).
- Pin or bolt: bits join with a clip and pin or a bolt and nut, as each manual shows.
- Extensions: an extension adds length, and the maker’s depth figure belongs to the bit and extension it names.
Weight and Its Basis
A weight figure only means something with its basis. The machines here print between 23 and 32 pounds on a bare-tool basis, a net or unit weight with no stated basis, or no weight at all, and figures on different bases cannot be set against each other.
| Basis printed | What it tells you |
|---|---|
| Bare tool | The machine without its batteries |
| Net or unit weight | The maker’s own basis, often silent on the bit and fuel |
| No basis | A number you cannot compare |
Noise, Vibration and Hearing Protection
Hearing protection belongs with every gas digger and with some corded ones. Three manuals print sound or vibration figures with no distance or standard named, so treat each number as that maker’s own. One corded manual says sound may exceed 85 dB(A) and that hearing protection must be worn.
A systematic review of 18 articles on agricultural and forestry workers, mostly chainsaw operators, found that workers exposed to both hand-arm vibration and noise had greater hearing loss than unexposed workers, possibly through an additive effect (2).
- Ears: hearing protection from the first start.
- Hands: gloves as the manual names them, and a rest when your fingers tingle or go numb.
- Attention: stop when you are tired or your focus slips.
I put ear protection on before I touch the starter or the trigger, and I rest when my hands tell me to.
Hard Ground, Many Holes and When to Rent
Hard clay, rock and roots can bind a bit. No manual on this page promises a result in rock or clay. When the holes are many, the bits are large or the ground is hard, a post hole digger rental or a contractor machine can be the better call. In my roundup of heavy duty earth augers, I compare seven gas models by bit size and engine.
- Hard clay: the bit can bind, and no manual here promises a result in it; follow the digging technique in the manual of your exact model.
- Rock and roots: the bit can bind and twist the machine, and one manual says not to use it in excessively rocky ground.
- Large bits: a wider bit asks more of the machine and of your wrists.
I push a spade into the ground at each spot before I pick a machine, and I read what it meets as a limit.
Safety Rules and the Full Shutdown Steps
A powered digger drives a steel bit that screws into the ground and can bind on a root, a rock or a buried object. When it binds, the machine can twist in your hands. A laboratory simulation of torque reaction on a handle found very high wrist muscle activity even when the torque pulses were short (3).
Shutdown Box: Before You Touch the Bit
Shutdown before you clear or free the bit, change or attach the bit, free a stuck bit, adjust, check or add oil or fuel, clean, load, move, store or leave the auger. Never reach toward the bit while it turns, and never clear it or free it with the machine running. Corded electric auger: release the switch or trigger, wait until the bit has stopped completely, then unplug the auger from the outlet by the plug, not the cord. Before transport or storage, also let the motor cool. Battery auger: release the switch or trigger, wait until the bit has stopped completely, then remove the battery, and the switch key where your model has one, and keep it away from the auger. Gas auger: release the throttle, trigger or control, turn the engine off, wait until the bit and every moving part have stopped completely, then disconnect the spark plug wire (a spark plug cap on some makes) and secure it away from the plug. Let the engine and muffler cool before you touch the bit or anything near the exhaust. Only then free a stuck bit or clear wrapped material, using only the method your manual specifies (gloves do not make grabbing sharp wire or cutting edges safe), and check the bit and guards for damage. Do not handle unidentified wire, cables or pipes. Do not use reverse or run the engine or motor to back the bit out unless your manual expressly authorizes it for this task, with both hands on the designated handles and everyone clear of the bit; complete the full shutdown again before any further hands-on work. Add every step your manual gives, in its order, and refit every guard and shield before you restart.
Protective Gear
Wear safety glasses with side shields or goggles meeting your manual’s specification, including ANSI Z87.1 where required, and add a face shield where required. Wear hearing protection with gas engines and wherever your manual requires it. Wear long pants and sturdy, closed footwear with secure traction, plus any additional protection your manual specifies. Tie back long hair, remove jewelry and secure drawstrings; do not wear loose clothing or loose gloves. Use the gloves specified for the task and keep hair, clothing, gloves, hands and feet away from moving parts.
Clear the Area
Before you start, walk the spot and remove rocks, sticks, wire, hose, stakes and anything else the bit could catch or throw. Identify irrigation lines, drip lines, cables and sprinkler heads before you start, and take loose garden hoses out of the work area. Do not handle or move unidentified cables, pipes or utility lines: keep the auger away from them and contact the utility if their location is uncertain.
Buried Lines
According to PHMSA, 811 is the free call-before-you-dig number, and the wait for utilities to mark their lines differs by state. Contact 811 before digging and include every planned hole in the locate request. Wait the required state notice period and confirm responses from every notified utility, including markings or a clear/no-conflict response for the work area. Resolve missing or conflicting responses before digging. Follow state ticket-validity and tolerance-zone rules, preserve markings, and keep augers outside the required clearance area. Near marks, use careful hand digging or another locating method permitted by state rules and the utility; obey any stricter auger-manual prohibition. Arrange separate locating for private services that 811 does not cover (irrigation lines, cables). Do not dig where a service’s location remains uncertain, and do not switch to a larger machine to get around it. No safe augering depth above a buried service is established, and state rules differ, so follow your one-call center. XtremepowerUS says its machine is not designed for areas with underground electric, gas, water or telephone lines, Earthquake says not to drill above underground utilities, DC HOUSE says to beware of underground hazards and WORX says to make sure no buried pipe or wire is in the working area; the VEVOR manuals print no underground-line warning. Marking a line does not make digging over it safe.
If a line cannot be located and marked, or a utility response is missing or conflicting, keep every auger away from that spot until it is resolved. If you suspect contact with a service, do not touch the auger, the bit or any exposed service; keep others away and contact the utility or emergency services from a safe place. Hitting a buried utility is a recognised safety risk and cost in excavation, and trained, careful locating cut utility strikes among UK utility workers in one trial (4). Contact 811 for every planned hole before a bit goes near the ground.
Bystanders
Keep children, pets and other people out of the work area and at least the distance specified in your exact manual. Stop if anyone enters that area. If your manual gives no number, keep everyone well clear of the work area as it directs, and stop if anyone approaches. No distance makes a work area safe on its own: keep watching it. On a two-person unit, the second person is the operator’s helper only as your manual describes. VEVOR’s D43-F and D52-F manuals say at least five meters; the DC HOUSE manual says 3 m (10 ft); the XtremepowerUS, Earthquake and WORX manuals print no number.
Binding and Torque Reaction
If the bit hits a root, a rock or a buried object, it can bind and the machine can twist or kick. Keep firm, balanced footing and hold the designated handles with both hands. Keep hands and feet away from the bit; never grasp or brace the bit or shaft. Never wrap the power cord around your hand, arm or body. Release the throttle or trigger immediately if the bit binds or control is threatened, then complete the full shutdown in the shutdown box and inspect for damage before restarting. Use reverse only where your manual authorizes it for your model. The WORX manual describes a reverse mode on its rotation selector but does not say to use it for a stuck bit.
Stuck Bit
If the bit sticks in the hole or material wraps around it, do not force it and do not reach for the bit. Stop and complete the full shutdown in the shutdown box before touching or inspecting it. Use only the freeing or clearing method specified in your exact manual; gloves do not make grabbing sharp wire or cutting edges safe. Do not handle unidentified wire, cables or pipes. Powered reverse is permitted only when your manual expressly authorizes it for that task, with both hands on the designated handles and everyone clear of the bit. Complete the full shutdown again before any subsequent hands-on work. If your manual gives no procedure, obtain manufacturer or qualified service guidance. The VEVOR D43-F and D52-F manuals describe releasing the accelerator and returning to idle to loosen a stuck bit. That is a powered step with the engine running, so use it only as that manual describes, with both hands on the designated handles and everyone clear of the bit, and complete the full shutdown again before any hands-on work. If you are unsure, ask VEVOR for guidance.
One-Person and Two-Person Units
Use the number of people your exact manual specifies. A two-person unit needs a second person who knows the plan, holds the unit as the manual describes and stays clear of the bit, and both people stop when either calls a stop. A one-person unit is operated by one person; never add a helper to a hand-held unit unless the manual says so. Earthquake sells the E43 as a one-person auger, the DC HOUSE manual describes an operator and a helper, Earthquake’s page says the Dually suits one or two people while its manual is silent, and the XtremepowerUS, WORX and VEVOR manuals state no operator count.
Slopes and Footing
On a slope or uneven ground, slow down, keep firm footing and follow only the slope or footing rule in your own manual. If your manual gives no such instruction, obtain guidance from the manufacturer before using the auger on a slope. The VEVOR manuals say not to use the product on steep, slippery slopes or slippery surfaces, to avoid working on slopes and to pay double attention if you must; DC HOUSE says not to stand on slippery, uneven or unstable surfaces; the Earthquake manuals say never to operate in wet grass.
Soil Condition
Do not dig in frozen or rock-hard ground or in ground full of roots and stones: the bit can bind and the machine can twist or kick. Wait for a thaw.
Gas: Refuelling and Fumes
Before refuelling, complete the full gas shutdown in the shutdown box. Refuel outdoors on the ground, not in a truck or trailer, with the engine cooled. Follow your exact manual’s precautions for ignition sources, filling the tank and dealing with spilled fuel. Mix fuel and oil only as the exact manual says. Never start or run a gas auger indoors or in a garage or shed, even with the doors open. Start and run it outdoors: the exhaust contains deadly carbon monoxide, which has no color, taste or smell.
A case series of fatal carbon monoxide poisonings tied to small engines, including generators and a pressure washer, found them in poorly ventilated spaces (5). Allow the muffler and engine to cool before touching them; Earthquake says the muffler area may exceed 150 degrees F.
Corded and Battery Models
Use an outdoor extension cord that meets your exact manual’s requirements for gauge, length, plug type and grounding. Keep the cord away from the bit, never carry the auger by the cord, and never use it in the rain. Follow your exact manual’s instructions for cord routing, disconnecting the plug, keeping connections dry and GFCI protection. The XtremepowerUS manual says the tool must be grounded, plugs must match the outlet and never be modified, and adapter plugs must not be used with grounded tools; it prints no gauge or length, only an outdoor cord heavy enough to carry the current, so ask the maker before you buy a cord. Use only manufacturer-approved batteries and chargers for the exact model. Before changing a battery or doing hands-on work, complete the full shutdown in the shutdown box. Keep the switch off and fingers off the trigger when installing a battery. Do not use damaged or modified batteries or chargers. Protect loose battery terminals from contact with metal objects. Follow the battery and charger manuals for moisture exposure, charging temperature, cooling and storage.
Lifting, Transport and Fatigue
Before you lift, load, carry or move the auger, complete the full shutdown in the shutdown box. Load and unload only as your manual describes, never carry the auger by its cord, and refuel a gas unit on the ground, not in the truck bed. Follow the manual’s lifting and handling instructions. Earthquake says to carry the powerhead by the handlebars and never by the auger, to transport it upright in an open vehicle when fuel is in the tank and to drain the fuel into an approved container before transport in an enclosed vehicle; WORX says to let the motor cool and secure the unit in transit. Digging with an auger is heavy, jarring work that twists your arms and back. Take breaks, stop when you are tired or your attention slips, and use the gloves your manual recommends.
Before every start I set the glasses, the gloves and the ear protection by the machine, and I do not reach toward the bit until the full shutdown is done.
Which Post Hole Digger Fits Which Job
Here is how I sort the seven machines by the job each one suits.
| Your job | Pick on this page | Printed figure that decides it |
|---|---|---|
| A few holes near an outlet | XtremepowerUS 85060 | 110 V, 10.9 A, 560 mm drilling depth |
| No outlet and no fuel can | WORX WG865 | 40 V max, 32 in working depth with the 8 in bit |
| A complete gas kit | Earthquake E43 | 8 in x 36 in bit in the box, 50:1 mix |
| A gas kit at a value price | VEVOR 43cc | 8 in x 30 in bit, printed sound table |
| Two people and larger holes | DC HOUSE 52cc | Helper position in the manual, 6 in and 10 in bits |
| Extension rods in the box | VEVOR 52cc | Three rods, 150 mm and 250 mm bits |
| A bit you already own | Earthquake Dually 10310 | 52 cc power head with no bit, 62 ft-lb output torque |
For a plug-in job the best electric post hole digger here is the XtremepowerUS, and the WORX is the only battery model.
Among gas machines, the best gas powered post hole digger for a homeowner is the one whose kit you need: a bit in the box, a helper position or extension rods.
My Overall Verdict
Seven machines made this page, and the XtremepowerUS 85060 leads it because a plug-in motor and a printed 560 mm depth suit a few holes near an outlet. The Earthquake E43 takes the higher-priced place and the VEVOR 43cc the value place.
1. XtremepowerUS 1500W Electric Post Hole Digger with 6-Inch Bit Best Overall
For a few holes near an outlet, with no fuel and no battery.

2. Earthquake E43 1-Person Gas Earth Auger, 43cc with 8-Inch Bit Best Premium
For a complete one-person gas kit with an 8 inch bit in the box.

3. VEVOR 43cc Gas Post Hole Digger with 8-Inch Bit Best Value
For a budget-tier gas kit with an 8 inch bit and a printed bystander distance.
Match the power to your outlet, the bit to the job and the manual’s safety steps to your habits, then buy the 85060 if nothing pulls you elsewhere. For a few holes near an outlet it is the best post hole digger I can recommend. My earth auger picks compare seven gas, corded and battery models.
Why XtremepowerUS 1500W Electric Post Hole Digger with 6-Inch Bit Might Be the Best Choice
I rank the 85060 first because it asks the least of a homeowner who digs a few holes: no fuel, no mix and no battery, just an outlet and the right cord.
The trade is a short list of limits: a 560 mm printed depth, a bit ceiling of 6 inches and no printed reverse.
Here is what the 85060 gives you:
✓ Plug-in motor: 110 V and 10.9 amps, with no fuel mix.
✓ Two-handle frame: both hands on the machine whenever the bit turns.
✓ Trigger start: a slow squeeze, then light downward pressure.
✓ Printed sound rule: hearing protection is required, according to the manual.
✓ Wipe-clean body: a soft cloth with mild soap and water.
Frequently Asked Questions
What is the best post hole digger?
The best post hole digger for a few holes near an outlet is the XtremepowerUS 85060, a corded machine that needs no fuel or battery. For holes far from power, the Earthquake E43 is the complete gas kit and the WORX WG865 is the only battery machine, so match the power source to your site.
What’s the best way to dig post holes?
The best way to dig post holes depends on how many you need and what lies underground, so contact 811 before any digging and then match the tool to the job. Use the steps and the number of people your exact manual states, keep both hands on the handles and stop everything if the bit binds.
Is an electric post hole digger strong enough for fence posts?
An electric post hole digger can be strong enough for fence posts when the printed bit size and depth fit the post, and no manual here promises results in hard clay or rock. The XtremepowerUS manual lists a 4 inch bit and 560 mm of depth, while WORX prints 32 inches with its 8 inch bit.
What should you look for in a post hole digger?
Look for a power source that suits your site, the bit sizes and depth maximum the maker prints and a manual with clear safety steps. Check what is in the box, because a power head sold without a bit needs a separate purchase, and read the weight basis and the warranty term.
Can one person use a gas post hole digger?
One person can use a gas post hole digger when the maker’s manual or page says the model is a one-person machine, as Earthquake says of the E43. DC HOUSE’s manual describes a helper for holes of six inches or larger, so follow the number of people your exact manual states.
References
- Wells C, Townsend K, Caldwell J, Ham D, Smiley ET, Sherwood M. Effects of planting depth on landscape tree survival and girdling root formation. Arboric Urban For. 2006;32(6):305-311.
- Thaper R, Sesek R, Garnett R, Acosta-Sojo Y, Purdy GT. The combined impact of hand-arm vibration and noise exposure on hearing sensitivity of agricultural/forestry workers: a systematic literature review. Int J Environ Res Public Health. 2023;20(5):4276.
- Armstrong T, Bir C, Foulke J, Martin B, Finsen L, Sjogaard G. Muscle responses to simulated torque reactions of hand-held power tools. Ergonomics. 1999;42(1):146-159.
- Gallagher AG, Hart M, Cleary D, et al. Proficiency based progression simulation training significantly reduces utility strikes: a prospective, randomized and blinded study. PLoS One. 2020;15(5):e0231979.
- Hyson BE, Friedman BM, Spear B, Bishop-Freeman SC. Lethal carbon monoxide generated from small internal combustion engines. J Anal Toxicol. 2024;48(8):625-629.
Safety Note: Only an adult who has read the manual and understands the controls should use an earth auger or post hole digger, never a child or anyone tired or impaired. Use the number of people your manual specifies, and keep everyone else out of the work area. The rotating bit can catch hair, clothing and gloves, and it can bind on a root, a rock or a buried object: the machine can then twist or kick in your hands. Stand with firm, balanced footing and hold the designated handles with both hands. Keep hands and feet away from the bit; never grasp or brace the bit or shaft. Never wrap the power cord around your hand, arm or body. If utility contact or a gas leak is suspected, stop work immediately. Do not touch, inspect, free or move the auger or exposed service, and do not attempt the normal hands-on shutdown or disconnect electrical connections in the suspected leak area. Leave the area, keep others away and contact the utility from a safe location; call 911 for a suspected gas leak or immediate danger. Otherwise, release the throttle or trigger immediately if the bit binds or control is threatened, then follow the shutdown procedure. On a two-person unit, both operators must understand the controls and agree on start and stop signals before starting; stop whenever either operator calls stop. Use reverse only where your manual expressly authorizes it. Never touch or clear the bit while it turns. Before you clear or free the bit, change or attach the bit, adjust, check or add oil or fuel, clean, load, move, store or leave the auger, complete the shutdown for its power type. Corded electric: release the switch or trigger, wait until the bit has stopped completely, then unplug it from the outlet by the plug, not the cord; before transport or storage, also let the motor cool. Battery: release the switch or trigger, wait until the bit has stopped completely, then remove the battery, and the switch key where the model has one. Gas: release the throttle, trigger or control, turn the engine off, wait until the bit and every moving part have stopped completely, then disconnect the spark plug wire and secure it away from the plug, and let the engine and muffler cool before touching the bit, engine, muffler or anything near the exhaust. For a drill-driven bit or any attachment system, follow the shutdown instructions in both the bit or attachment manual and the power-head or drill manual. If the bit sticks or material wraps around it, stop and complete the full shutdown before touching or inspecting it. Use only the freeing or clearing method specified in the exact manual; gloves do not make grabbing sharp wire or cutting edges safe. Do not handle unidentified wire, cables or pipes. Powered reverse is permitted only when the exact manual expressly authorizes it for that task, with both hands on the designated handles and everyone clear of the bit. Complete the full shutdown again before any subsequent hands-on work. Wear safety glasses with side shields or goggles meeting the manual’s specification, including ANSI Z87.1 where required; add a face shield where required. Wear hearing protection with gas engines and wherever the manual requires it. Wear long pants and sturdy, closed footwear with secure traction, plus any additional footwear protection the manual specifies. Tie back long hair, remove jewelry and secure drawstrings; do not wear loose clothing or loose gloves. Use the gloves specified for the task and keep them, clothing, hair, hands and feet away from moving parts. Contact 811 before digging and include every planned hole in the locate request. Wait the required state notice period and confirm that every notified utility has responded with markings or a clear/no-conflict response for the work area. Resolve missing or conflicting responses before digging. Preserve the marks and follow your state’s ticket-validity and tolerance-zone rules. Keep the auger out of the required clearance area; near marks, use careful hand digging or another locating method permitted by state rules and the utility. Follow any stricter prohibition in the auger’s manual. Marks do not show a safe drilling depth. Arrange to locate private irrigation lines, cables and other services that 811 may not cover. If a line’s location remains uncertain, do not dig there. Do not handle or move unidentified cables, pipes or utility lines. Before you start, remove rocks, sticks, wire and loose hoses, and identify irrigation lines, drip lines and sprinkler heads. Keep children, pets and other people out of the work area and at least the distance your exact manual specifies. Stop if anyone enters that area. If your manual gives no number, keep everyone well clear of the work area as it directs. No single distance is safe for every auger. On a slope or uneven ground, slow down, keep firm footing and follow only your manual’s rule. Do not dig in frozen or rock-hard ground. Before refuelling, complete the full gas shutdown described above. Refuel outdoors on the ground, not in a truck or trailer, with the engine cooled. Keep fuel away from smoking, flames, sparks and other ignition sources. Use an approved fuel container, avoid overfilling, secure the cap and follow the manual’s spill-cleanup and restart-location instructions; do not start with a fuel leak. Use the specified fuel and oil arrangement for that engine. Never start or run a gas auger indoors, in a garage or shed, or in an enclosed or poorly ventilated area, even with doors open. Operate outdoors where exhaust cannot accumulate or enter occupied spaces through doors, windows or air intakes. Exhaust contains deadly carbon monoxide. For a corded auger, inspect the cord and extension cord before use and do not use damaged cords or plugs. Use an outdoor extension cord meeting the exact manual’s gauge, length, plug and grounding requirements, and follow its GFCI instructions. Keep connections dry and the cord clear of the bit, heat, oil and sharp edges. Never carry the auger by its cord or wrap the cord around your body. Do not use it in rain or wet conditions prohibited by the manual. Use only manufacturer-approved batteries and chargers for the exact model. Complete the battery shutdown before removing or changing a battery, and keep the switch off and fingers off the trigger when installing one. Do not use damaged or modified batteries or chargers. Keep loose battery terminals away from metal objects, and follow the battery and charger manuals for moisture exposure, charging temperature, cooling and storage. Load and unload only as your manual describes, and store the auger dry and out of children’s reach. Take breaks and stop when you are tired.