

The best auger for fence posts is the one that fits your fence line, your power source and the bit sizes its maker prints. I am an agricultural engineer who runs a 3.7-acre orchard, and I judge a digging machine by its handles, its controls and the limits printed on its box.
Affiliate Disclosure: Garden Power Scout is a proud participant in the Amazon Services LLC Associates Program. As an Amazon Associate, we earn from qualifying purchases, at no extra cost to you.
My top pick, VEVOR 43cc 1250W Gas Post Hole Digger with 8 in Bit, is a complete gas kit with an 8 in bit in the box. Below are the other six, the safety steps every auger needs and the sizing facts that no maker prints.
Best Auger for Fence Posts 2026: 7 Machines I Put to Work
These seven augers cover gas, corded and battery power for a line of fence post holes. Read the safety section near the end of this page before you pick up any of them, because a bit that binds can twist the machine in your hands.
1. VEVOR 43cc 1250W Gas Post Hole Digger with 8 in Bit Best Overall
The VEVOR 43cc is the gas auger I pick for a line of fence post holes when an experienced operator wants one complete kit. VEVOR’s manual names the D43-F, a 43 cc two-stroke with an 8 in by 30 in bit (200 by 800 mm) already in the box, plus the mixing bottle, a spare spark plug and a tool set. It is my best auger for fence posts where you want one machine, one bit and nothing else to buy before the first hole.

WHY I CHOSE THIS ✓
I put this one first because it asks the least of an experienced operator who wants a complete kit. One 8 in bit, one engine and one manual that tells you where to stand, how to grip and when to stop. It is the plain, complete kit I point to for a fence line, as long as the operator has read the manual before the first start.
VEVOR 43cc 1250W Gas Post Hole Digger with 8 in Bit Specs
Key Features:
- 8 in bit in the box: One size comes with the kit, so a row of identical holes needs no second purchase.
- 43 cc two-stroke engine: VEVOR prints 1.25 kW maximum engine power, and a recoil starter means no battery to charge and no cord to drag down the line.
- Two wide looped handles: Both hands sit apart on the frame, which is where the manual wants them while the bit works.
- Safety switch plus trigger: You press and hold the safety switch, then pull the acceleration trigger, so speed builds gradually instead of arriving all at once.
- Spiral bit with a fishtail point: The point sits at the tip of the 30 in bit and gives the hole a place to start.
- Mixing bottle and tool set: The oil mixing bottle, spark plug and wrenches are in the kit, so fuel and assembly need nothing extra.
- Printed service schedule: The manual covers oil level, air filter and spark plug checks, which is more than some kits print.
VEVOR’s manual gives the working method in plain steps: hold the drill vertically, set the rod against the ground, build speed gradually, and exert some downward force. Once the rod has penetrated 10 cm, the manual says to grasp the frame strongly and increase the effort downwards, and to lower the rod gradually for a deep hole. That is a sound routine for a fence line, because every hole starts the same way. The limit is that VEVOR prints no maximum digging depth: the 30 in is the length of the bit, and the manual says nothing about how deep the machine will go.
The engine is a 43 cc two-stroke, so it runs on mixed fuel from the bottle in the kit. Mix only as the VEVOR manual says, in a clean container and never in the tank, and confirm the ratio with VEVOR support before the first tank. The manual asks for gasoline without ethanol or methanol and fills the tank to about 80 percent. Before you fill the tank, change the spark plug or touch the bit, complete the full shutdown in the shutdown box in the safety section of this page.
A fence line also asks for stamina across many holes. The manual lists 11.9 kg and does not say whether that includes the bit, so I treat it as a figure to confirm on your own unit. After a long run I brush the soil off the flights, but only after the full shutdown in the shutdown box, never with the engine turning. The manual warns of hearing loss without ear protection and of white finger from prolonged vibration. I stop the moment my hands tingle, and the manual’s instruction for tingling, numbness, pain or a color change is to consult a doctor immediately.
Mark every post position with a stake before you start, then walk the line and pull out rocks, sticks and wire the bit could catch.
VEVOR’s manual prints no buried-line warning and no torque-reaction wording, so those steps come from the safety section of this page. It names five meters (about 16 ft) as the bystander distance, VEVOR’s own figure for this model, and its only stuck-bit line is to release the accelerator, which I treat as a first reaction before the full shutdown.
The service schedule asks you to check the oil level, clean the air filter and look at the spark plug at set intervals, and the manual says to empty the tank before long storage. It limits the machine to private domestic use, says it must be operated by experienced users and bars anyone under 18. The manual asks for a helmet, protective mask, ear protection, gloves, non-slip footwear and protective clothing, with long hair tied down, and it says to avoid slopes and never to use the product on steep, slippery slopes. I put on ear protection before the pull.
Buy it if you want a gas auger with a bit already in the box for fence posts and small planting holes, and you will read the manual first. Skip it if you need a published digging depth, a reverse, a warranty term printed in the box or a second bit size. Anyone who wants more than one hole width should look at kits that ship two bits.
FINAL VERDICT
For a line of fence post holes run by an experienced operator, this is the kit that asks for the least before the first start. It ends on the manual: read it, confirm the fuel ratio and keep everyone five meters back.
It is the complete gas kit I recommend for a fence line.
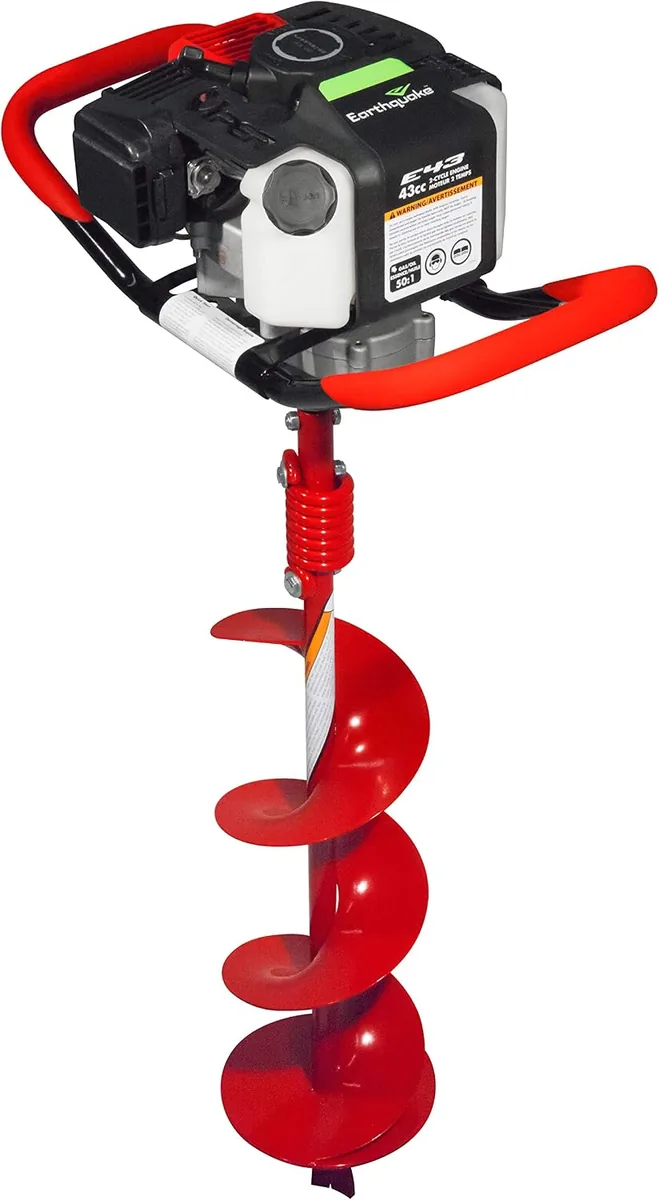
2. Earthquake E43 43cc Gas Earth Auger with 8 in Bit Best Premium
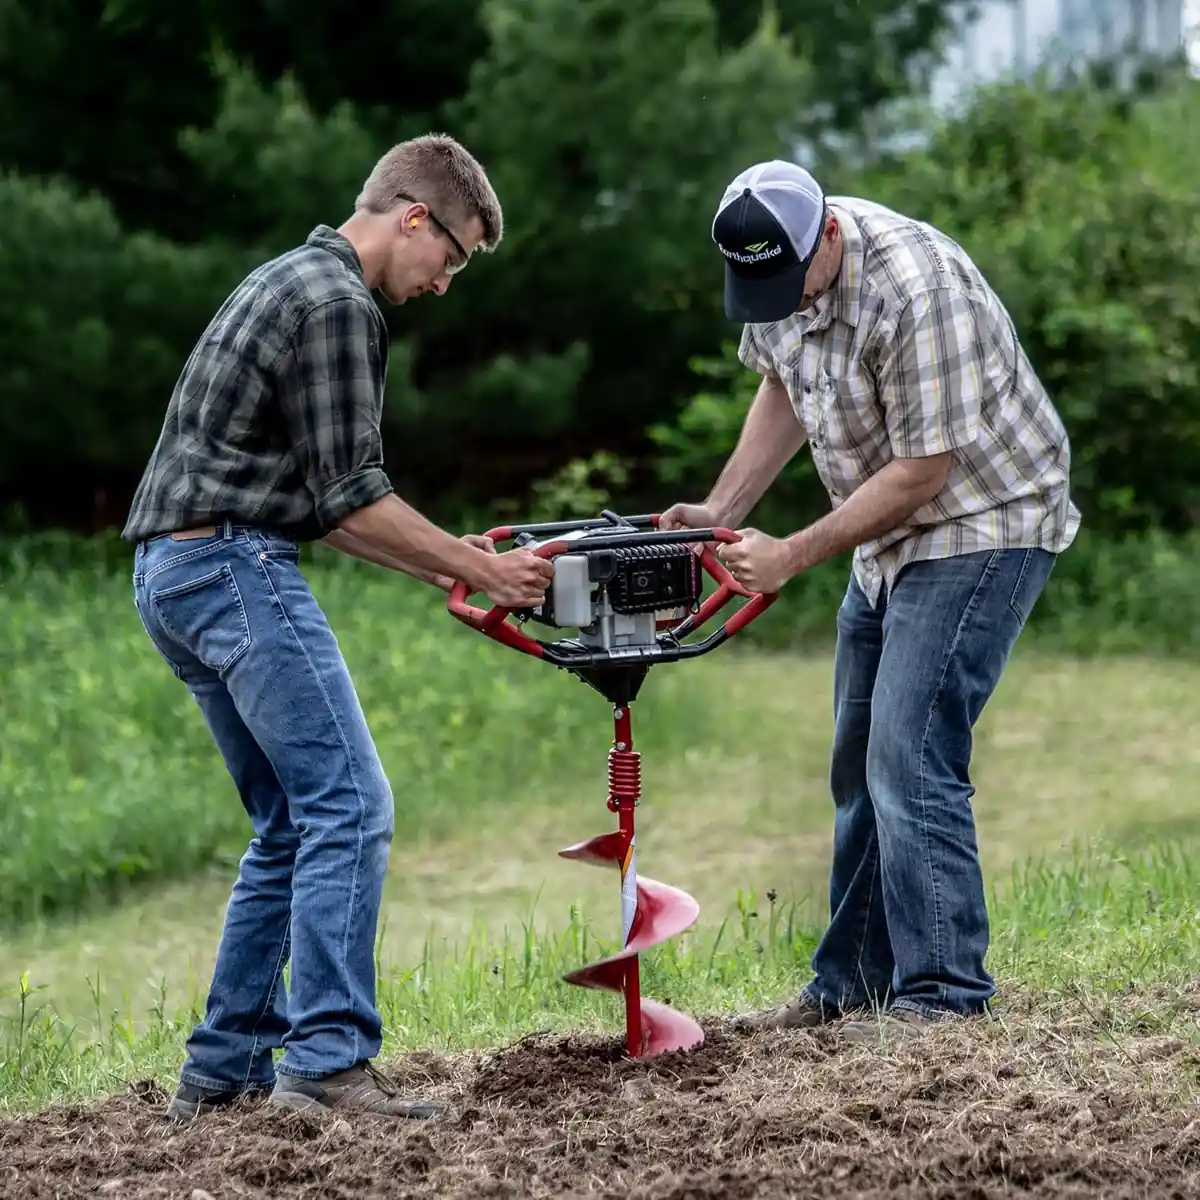
The Earthquake E43 is the step-up kit on this page: the maker sells it as a one-person gas auger and puts an 8 in by 36 in bit in the box. Earthquake says the long bit lets the operator stand upright when starting a hole, and its manual comes with a fuel mix chart and a support line. It suits the fence builder who wants a higher-priced kit from a maker with printed documentation behind it.
WHY I CHOSE THIS ✓
I rank the E43 second because it is the kit I trust to be documented. A printed mix chart, a support line and a maker-stated five-year powerhead term come with it, and that matters when one person buys one machine for a weekend fence and has to answer for it. It is the higher-priced pick, and those terms are what the step up buys.
Earthquake E43 43cc Gas Earth Auger with 8 in Bit Specs
Key Features:
- 8 in by 36 in bit: The bit comes in the box with a fishtail point and a replaceable blade, so you can start digging without buying a bit.
- Flex-Coil shock absorber: Earthquake says the coiled spring between powerhead and bit reduces upper-body impact on a stubborn rock or root. That is the maker’s claim, and the manual does not mention it.
- One-person design: The maker page and the manual’s figure label it a one-man unit, so a helper is not part of the setup.
- 50:1 fuel mix chart: The manual prints a chart for 1, 2 and 5 gallons, which takes the arithmetic out of mixing.
- Primer bulb and choke lever: A primed, choked cold start is spelled out step by step in the manual.
- Optional extensions: Earthquake sells 12 in and 18 in extensions separately for holes the bit alone cannot reach.
- Maker support: The manual lists a support line, and the maker’s page prints the warranty terms.
Earthquake’s manual wants the machine to do the cutting: drill holes without placing excessive body weight on the unit, because the auger works most efficiently with a shaving action caused by the weight of the unit itself. It also says to run at full throttle when possible and not to let the engine idle for long. The clutch transfers maximum power only after about two hours of normal operation, so early holes can feel softer than later ones. The manual prints no maximum digging depth, no torque-reaction warning and no reverse.
Choke to the end, prime until the primer hose fills, switch on, pull the starter slowly until it pulls harder, then give it a rapid full arm stroke. After five or six failed pulls you push the primer once; once it runs you go to half choke, then to run. I read that sequence twice before the first start, because the slow pull and the fast stroke are two different moves. When the engine fires, the manual says to release the throttle control momentarily with your right hand and return your left hand to the handlebar.
A fence line sometimes needs a deeper hole than the bit alone reaches. The 36 in is the length of the bit, never a digging depth, and Earthquake sells 12 in and 18 in extensions separately. Before you fit one, or attach or remove the bit, complete the full shutdown in the shutdown box in the safety section of this page. The manual’s assembly asks for a 3/8-16 by 1.5 in bolt and nut and two 9/16 in wrenches, which is all the hardware I carried to the hole. The maker lists 32 lb with no basis stated, so lifting it from the shed is the moment you learn the weight.

Register the warranty within 30 days. The manual says the warranty is valid only if the completed registration reaches Earthquake by then, and straight gasoline voids it.
The muffler and nearby areas may exceed 150 F (65 C), so keep gloves and legs clear until the engine has cooled. The manual says not to drill above underground utilities, including water lines, gas lines, electric cables or pipes, but it prints no bystander distance and no locate method, so keep everyone well clear of the work area and use the safety section for the 811 steps.
The air filter is serviced every three months or after 20 hours, and the gear case holds 4 oz of grease checked every 50 hours. Before you store or transport it, complete the full shutdown in the shutdown box in the safety section of this page; the manual then wants it stored upright with the auger removed and the output shaft greased, fuel carried upright in an open vehicle or drained into an approved container for an enclosed one. Earthquake asks for safety goggles or glasses with side shields, a protective hearing device, work gloves, sturdy footwear, long trousers and a long-sleeved shirt, with no shorts, sandals or sneakers. Hearing protection goes on before the pull.
It fits a buyer who wants a one-person gas kit from a maker that documents its fuel, its warranty and its support. Skip it if you need a published digging depth, a bit in more than one size or a battery or corded unit, or if you will not register the warranty within 30 days.
FINAL VERDICT
The E43 is the kit for a buyer who values a printed mix chart, a support line and a bit in the box. Pick it when one person will run the line and you will mix fuel by the chart.
It is the documented one-person kit I recommend when the budget stretches.
3. DC HOUSE 52cc Gas Earth Auger with 6 in and 10 in Bits Best Value
The DC HOUSE 52cc is the budget gas auger that comes with two bits, 6 in and 10 in, so one purchase covers two hole widths for fence posts and planting holes. It carries a 52 cc two-stroke, a throttle lockout and a lower support handle for a helper, and it is the best value on this page for a fence line that needs those two sizes. It is the right pick when the price matters and an 8 in bit does not.

WHY I CHOSE THIS ✓
Value is the honest word for this kit. Two bits, a lockout, a support handle and a full manual, all in the budget tier. The fuel ratio and warranty term need confirming with the seller before the first tank, and I accept that for an affordable way to match the hole width to the post.
DC HOUSE 52cc Gas Earth Auger with 6 in and 10 in Bits Specs
Key Features:
- 6 in and 10 in bits: Two diameters arrive together, so you can match the hole to the post or the planting job without a second order.
- 52 cc two-stroke engine: The manual calls it a single-cylinder, air-cooled 2-cycle with a recoil starter and a spark plug listed as L8RTC.
- Throttle trigger lockout: The manual says the trigger cannot be operated unless the lockout lever is engaged, which stops an accidental squeeze.
- Lower support handle: A second handle sits low on the frame for a helper, and the manual says the helper position uses the support handle only.
- Purge bulb and decompression button: Both help starting, and the manual describes them in its start steps.
- Stop switch on the same handle: Stop switch, trigger and lockout are grouped so the throttle hand does not hunt for controls.
- Automatic centrifugal clutch: The manual names the clutch and spur gear, so the bit should stay still at idle.
The manual’s drilling advice is gentle: squeeze the trigger slowly to engage the clutch, apply light downward pressure on the handles, and periodically raise the auger to clear drilling debris. It also says to use a shaving action and not to put excessive body weight on the unit. If the bit stalls under load, treat it as a bind: complete the full shutdown in the shutdown box in the safety section of this page, identify the cause and inspect for damage before any restart. The limit is rock: the manual says not to operate the unit in excessively rocky ground, whatever the listing’s marketing says.
The 6 in and 10 in pair is the reason this kit exists. The smaller bit handles narrow jobs and the larger one takes wider holes, so one machine can cover a post and a planting hole on the same afternoon. The kit has no 8 in bit, which is the size many kits ship, and no extension rod. I like that the trigger, stop switch and lockout sit under one hand, easy to find with a work glove on. The manual’s bit page labels the single bit as 31.5 in long, and an extension would be a separate purchase, so deep holes are not what this kit is for.
Fuel is the part to handle carefully. The manual’s text and its table do not agree on the mix ratio, so mix only as your manual says, in a separate container, and confirm the ratio with the seller before the first tank. It asks for gasoline with no more than 10 percent ethanol and fuel stabilizer, never E85, and says to mix no more than a month of fuel at a time. Before you refuel, change the bit or clear anything near it, complete the full shutdown in the shutdown box in the safety section of this page. The manual also describes two-person use, with an operator on the throttle handle and a helper on the support handle, which suits the 10 in bit.
Keep the handles below chest height. The manual says never to operate the auger with the handles above chest height, because you could lose control.
DC HOUSE prints a bystander distance of 3 m (10 ft) for children and animals, which is DC HOUSE’s own figure and no guarantee of safety. Its manual warns that the auger may twist suddenly and forcefully if it contacts rocks, roots or hidden obstacles and says to release the throttle trigger immediately. Before you inspect anything, complete the full shutdown in the shutdown box in the safety section of this page.
The manual asks for eye protection that meets ANSI Z87.1 or CE requirements, hearing protection whenever the unit runs, rubber work gloves for grip, long pants and sturdy non-slip shoes, never barefoot. It warns of underground hazards such as electrical, gas and water lines but never names 811 or tells you to have lines marked. The manual words the gear case service interval two ways, so confirm it with the seller before the first season. I wear ear protection before the pull, as the manual recommends.
This kit suits a budget buyer who wants 6 in and 10 in holes and will confirm the fuel ratio with the seller. Skip it if you need an 8 in bit, a published digging depth or a manual that agrees with itself. Anyone who wants a one-person-only rating should look elsewhere, since this manual describes a helper.
FINAL VERDICT
DC HOUSE gives the most hole-width choice for the least money. It is the value pick for a fence line that needs a 6 in or 10 in hole, with the fuel ratio checked first.
It is the two-bit value auger I recommend on a tight budget.
4. XtremepowerUS 1500W Corded Electric Post Hole Digger Only Corded Model
The XtremepowerUS 1500W is the only corded model on this page, so it needs no fuel, no mix and no battery, just an outdoor outlet within cord reach of the fence line. The manual lists a 10.9 amp draw at 110 V. It suits a short fence or a handful of holes near the house.

WHY I CHOSE THIS ✓
I give it the corded label because it solves a different problem: a fence of a few holes where fuel feels like a chore. The safety section of this page covers what the manual leaves out.
XtremepowerUS 1500W Corded Electric Post Hole Digger Specs
Key Features:
- Plug-in power: Corded 110 V means no fuel mix, no spark plug and no battery pair, so the machine is ready whenever the outlet is.
- Two-handle frame: The manual says to grip the two handles firmly with both hands, which keeps the arms apart on the frame.
- Printed drilling depth: The manual gives 560 mm as its drilling depth.
- Simple routine: Squeeze the trigger slowly, press down lightly and raise the auger often to clear debris.
- Overload advice: If the bit stops under load, the manual says to lift the auger so the motor recovers.
Position the auger upright, set your feet away from the bit, grip both handles and squeeze the trigger slowly. The manual then says to press the handles lightly downward and raise the auger frequently to clear drilling debris from the hole. If the bit stops under load, complete the full shutdown in the shutdown box in the safety section of this page, identify the cause and inspect for damage before any restart. The limits are rock and body weight: the manual says not to use the auger in excessively rocky ground and not to lean on it.
Power is the fence-line question. The manual asks for an outdoor extension cord in good condition, heavy enough to carry the current, and prints no gauge or length, so ask XtremepowerUS before you buy a cord. It also requires a grounded outlet, forbids adapter plugs and says never to carry or pull the tool by the cord. Before you adjust the tool, change the bit or store it, complete the full shutdown in the shutdown box in the safety section of this page.

Plan the cord first. I walk from the outlet to the farthest post position before I buy an extension cord.
I use the manual’s figures: a 4 in bit in its data, bits of no more than 6 in, 560 mm and 12.8 kg. It says the machine is not designed for areas with underground electric, gas, water or telephone lines but never names 811, and it prints no stuck-bit method, so contact the maker for guidance after the full shutdown. My XtremepowerUS post hole digger review covers this corded model on its own page.
The manual wants the body wiped with a soft cloth and mild soap, never ammonia, chlorine or abrasives. Before I wipe the housing, I complete the full shutdown in the shutdown box in the safety section of this page. It requires eye protection, heavy-duty non-slip gloves, sturdy boots with non-slip soles (steel-toed shoes highly recommended) and hearing protection, since sound power may exceed 85 dB(A), and it warns of white finger from prolonged use. Before I lift or move it, I complete the full shutdown in the shutdown box in the safety section of this page. I lift it by the two handles, and the 12.8 kg the manual lists is the figure I feel at every move.
It works for a short fence line near an outlet when you want an auger with no fuel to mix. Skip it if the fence runs far from power, the ground is stony or you want a bit larger than 6 in. Look elsewhere for a published warranty or a reverse.
FINAL VERDICT
The XtremepowerUS suits the buyer who has an outlet near the line and wants the least upkeep. It is a short-fence tool.
It is the corded auger I recommend for a short fence by the house.
5. WORX WG865 40V Cordless Earth Auger with 8 in Bit Only Battery Model
The WORX WG865 is the only battery model on this page, and its manual prints a maximum working depth of 32 in (80 cm) with its 8 in bit. It runs on two 20 V batteries, which WORX calls 40 V max. It suits a fence builder who wants no fuel and a machine with controls on the handle.

WHY I CHOSE THIS ✓
The reverse selector earns this fifth place. Three modes on one dial are the closest thing to a control strategy on this page. The selector is the control I check first when I set up the machine, before the trigger.
WORX WG865 40V Cordless Earth Auger with 8 in Bit Specs
Key Features:
- Three rotation modes: The manual’s selector gives reverse, forward at 145 RPM and forward at 220 RPM.
- Two-battery power: The machine runs only with both batteries installed, so charge them together.
- Printed depth and torque: The manual gives a 32 in working depth with the 8 in bit.
- Kickback and overload lights: A blue light shows kickback prevented and a red light shows fault or overload, with the machine stopping each time.
- Post fixing named: The manual lists post fixing among its intended uses.
WORX’s manual tells you to start at low speed with the tip in contact with the ground, because at higher speeds the bit is likely to bend if it turns freely. Apply pressure only in line with the bit. If it binds, the machine stops and the blue KICKBACK PREVENTED light shows. Before you inspect or restart, complete the full shutdown in the shutdown box in the safety section of this page; then check for damage and follow the manual’s lift-and-restart steps.
The machine will not run unless both batteries are installed, and if the two have different amp-hour ratings it runs only to the lower one, so charge both at the same time. WORX’s manual suggests the WA3674 and WA3676 4.0 Ah batteries with the WA3884 charger, and the listing’s box holds two WA3674 batteries and a WA3884. A battery at -4 F or colder may not start the tool, and a hot battery stops it until it cools. I charge both batteries together before I carry the tool out. Before you change a battery, complete the full shutdown in the shutdown box in the safety section of this page.

Brace the tool before you squeeze. The manual says the tool produces high output torque and loss of control can follow if you do not brace it.
The manual does not say to use reverse to free a stuck bit and prints no bystander distance or 811 wording. Its buried-line line says to make sure no electric, water or gas pipe lies in the working area.
There are no user-serviceable parts, and the manual says to wipe the tool with a dry cloth. The bit can be extremely hot just after use. WORX asks for overalls, goggles or a face mask, ear protection, a helmet, non-slip shoes and protective gloves. The manual prints no runtime or charge time, so I plan each session by the clock. The full story on this battery model is in my WORX WG865 earth auger review.
Take it if you want a battery auger with printed depth and torque and a selector that includes reverse. Skip it if you need a bit larger than 8 in, a runtime figure or a printed warranty term.
FINAL VERDICT
The WG865 is the battery choice for a fence builder who wants no fuel and a controlled machine. It fits a short to medium line where charging fits the day.
It is the battery auger I recommend for a fence without fuel.
6. VEVOR 52cc Gas Post Hole Digger with 6 in and 10 in Bits and 3 Rods Includes Extension Rods
The VEVOR 52cc is the only kit on this page that ships with three extension rods, along with a 6 in and a 10 in bit. VEVOR’s manual, for the D52-F, prints the bit sizes as 150 and 250 mm and the bit length as 800 mm. It suits a fence builder who expects to want a longer reach than one bit gives and wants it in the first box.

WHY I CHOSE THIS ✓
I rank it sixth and give it the rods label because no other kit here lets you reach further without another purchase. The 52 cc engine and two bits come with it, and the open questions on weight and warranty keep it below the kits ahead of it.
VEVOR 52cc Gas Post Hole Digger with 6 in and 10 in Bits and 3 Rods Specs
Key Features:
- Three extension rods: The rods are in the manual’s parts list and the listing’s box, so reach grows without a separate order.
- Two bits: Bits of 150 mm and 250 mm, both 800 mm long, give a narrow and a wide hole.
- Pin-and-clip fitting: The manual says to remove the clip and pin, align the holes and pin it back.
- Safety switch plus trigger: You press and hold the safety switch, then pull the trigger, so speed builds gradually.
- Five meter bystander distance: The manual names at least five meters, VEVOR’s own figure for this model.
The manual’s method is the same slow build as the other gas kits: hold the drill vertically, place the rod against the ground, start the engine and increase speed gradually with the safety switch and trigger. After the rod has penetrated 10 cm, grasp the frame strongly and increase the effort downwards. VEVOR prints no maximum digging depth, and the 800 mm is the bit length, so the rods add reach without a promised depth. My VEVOR post hole digger 52cc review goes through that kit and its bits.
Fitting the rods is the job that sets this kit apart. Before you fit a rod or attach or remove a bit, complete the full shutdown in the shutdown box in the safety section of this page. I like that the pin and clip fit together by hand, with the holes aligned and the pin clipped back in. Mix unleaded gasoline without ethanol or methanol with two-stroke oil at 40:1 in a clean container, as the manual says.
Put the pin back in before the bit touches the ground. The manual’s fitting step ends with the pin back in place.
The manual prints no buried-line warning and no torque-reaction guidance, so read the safety section of this page first. It says to avoid slopes and never to use the product on steep, slippery slopes. Its only stuck-bit line is to release the accelerator and return to idle, which I treat as a first reaction before the full shutdown.
The manual prints sound and vibration values and warns of hearing loss without ear protection and of white finger. It says the product must be operated by experienced users, bars anyone under 18 and limits it to private domestic use. VEVOR asks for a helmet, mask, ear protection, gloves, non-slip footwear and protective clothing. I wear ear protection before the pull. The 10 in bit looks wide beside the 6 in one when both lie on the grass.
Go for it if you want extension rods and two bits in one gas kit and will read the safety section first. Skip it if you want a published weight, a warranty term or a clear one-person rule. Anyone who needs only one hole width will leave half the box unused.
FINAL VERDICT
The VEVOR 52cc gives the most reach and the most parts in the box. It is the gas kit for a builder who wants rods now and will confirm weight and warranty with VEVOR.
It is the gas kit with extension rods I recommend for deeper post holes.
7. Earthquake Dually 52cc Gas Earth Auger Power Head (No Bit) Power Head Only
The Earthquake Dually is a power head sold without a bit: the listing says powerhead only, and the buyer purchases bits separately. The listing says bits from 2 to 10 in fit, which is a listing figure, and Earthquake’s manual prints no bit size. Earthquake sells it for one or two people, a claim from its maker page and listing and not from the manual.

WHY I CHOSE THIS ✓
I put it last because the buyer does the most work. A power head, then a bit chosen on the buyer’s own judgment, then a ratio and a registration form. That is a good deal for someone who has bought augers before, and a poor first purchase for everyone else.
Earthquake Dually 52cc Gas Earth Auger Power Head (No Bit) Specs
Key Features:
- Power head only: The buyer picks the bit, which suits someone who has a fence bit in mind.
- 52 cc 2-cycle engine: The manual lists a recoil start, electronic ignition and forced-air cooling.
- Two throttle controls: The maker says two independent throttles allow single or two-person operating positions.
- Caged handlebar: The listing describes handlebars that fully encase the engine.
- Idle behavior: The manual says the auger should not rotate at idle.
The manual describes the Dually as a motorized earth auger power head that drills into soil. It says to run at full throttle when possible and not to overload the machine by drilling too deep at too fast a rate. It also says never to operate in wet grass and to keep a firm hold on the handle and walk, never run. The bit you buy decides the hole, because the manual prints no depth. My Earthquake Dually auger review goes through the manual and the bit question.
To start it, prime, set the choke, switch on and pull the starter slowly before a rapid full arm stroke. I check that the unit is stable before every pull, because the manual warns the rope can cause an unanticipated jerk toward the engine. Never use starting fluid. Before you attach a bit or refuel, complete the full shutdown in the shutdown box in the safety section of this page.
Mix fuel in a separate approved container. The manual says never to mix fuel and oil in the tank, and a 50:1 ratio is required.
The manual prints no bystander distance and no 811 wording, only to keep the area clear of all persons and not to drill above underground utilities. It describes no second-operator method, so for a helper position ask Earthquake for guidance. The muffler may exceed 150 F (65 C).
Upkeep means a filter every three months or 20 hours, a gear case with 4 oz of grease checked once a year and a spark plug check each season. Before I lift or carry it, I complete the full shutdown in the shutdown box in the safety section of this page. The manual says to carry the power head by the handlebars only. For storage or transport, it wants no fuel in the tank indoors, fuel carried upright in an open vehicle or drained into an approved container, and the auger removed for long storage. Earthquake asks for goggles or glasses with side shields, a hearing device, work gloves and sturdy footwear, never shorts, sandals or sneakers. I wear hearing protection before the pull.
It makes sense only if you know the bit your fence needs and want a power head from a maker with a printed manual. Skip it if you want a complete kit, a printed digging depth or a manual that describes a second operator. First-time buyers should skip it.
FINAL VERDICT
The Dually is a power head for a buyer who already owns or will choose the bit. It suits someone who values the base over the bundle.
It is the power head I recommend only to buyers who pick their own bit.
How to Choose an Auger for Fence Posts
A fence line means many holes in a row, so the right fence post hole auger depends on how you power it, how wide a hole your posts need and how you carry it between positions. These six factors settle most of the decision.
Power Type for a Long Line of Holes
Gas, corded and battery each put a different job on the fence line. An electric fence post auger saves the fuel mix but adds a cord to route or batteries to charge, and a gas machine adds fuel, a spark plug and a hot muffler. Mix gas fuel only as your own manual says, in a separate container, because the ratio differs by model and the wrong one can damage the engine. For the electric side, my best electric post hole digger roundup covers corded and battery models.
| Power type | What you bring to the line | What to read in your manual |
|---|---|---|
| Gas | Mixed fuel in a separate container and a place to refuel outdoors | Fuel ratio, cooling steps and the bystander distance |
| Corded | An outdoor outlet and a cord the manual allows | Cord requirements, grounding and wet-location rules |
| Battery | Charged batteries, as many as the tool requires | Battery pairing, charger, cold-weather and overload behavior |
A small gasoline engine makes carbon monoxide, and a review of small-engine cases found it can reach lethal levels in poorly ventilated spaces (1). Start and run a gas auger outdoors only, never in a shed or garage with the door open. I always start a gas machine in the open yard, away from the shed wall.
Pro Tip
Walk from the outlet or the fuel can to the farthest post position before you choose. The distance you carry the supply decides more of the day than the engine size.
Bit Size and the Hole Your Posts Need
The best size auger for fence posts follows the hole your fence plan or post maker calls for. The kits on this page ship bits from 4 in to 10 in, as the makers print them, and none of those makers pairs a bit with a post size. Penn State Extension’s horse-fence guide gives a typical line post depth of 36 inches and says corner and gate posts are about 25 percent larger in diameter and set deeper, often to 48 inches, which is horse-fence advice, so use your own fence maker’s directions. For a single 4×4, my best auger for 4×4 posts roundup covers machines for single post holes.
- 4 in and 6 in bits: narrow holes, listed here only as one maker’s printed data and limit.
- 8 in bits: the single bit size in several kits on this page.
- 6 in plus 10 in: two diameters from one kit.
- Larger bits: a bigger bit is a bigger load on the operator, so check the manual before you buy one.
I measure the post I plan to set, write down the hole width my fence plan names and only then look at bit sizes. Once you know the required hole width, my best post hole digger roundup gives you corded, battery and gas models to compare.
Extensions, Printed Depth and Bit Length
A bit’s length tells you how long the bit is and says nothing about how deep the machine digs. A few makers print a maximum depth, always with the bit it names, and that figure is a limit and never a result in hard ground.
| Figure | What it tells you | What it leaves out |
|---|---|---|
| Bit diameter | The hole width that bit cuts | Fit with your post |
| Bit length | How long the bit is | Digging depth |
| Maximum depth, if printed | The maker’s maximum with the bit it names | What you get in hard ground |
| Weight | A weight on the maker’s basis | Bit, fuel or battery, unless the basis is printed |
Key Takeaway
Treat bit length as a size and a printed maximum depth as the maker’s limit. Never plan a post depth from either one.
Weight and Carrying Between Holes
You lift and carry the auger to every position, so weight matters more on a long line than it does for one hole. Compare weights only when the maker prints the same basis, such as bare tool, with bit or with batteries, and before you lift or carry the machine, complete the full shutdown in the shutdown box in the safety section below; then carry it by its handles, never by the bit or the cord. Heavy, jarring work also builds up in the hands: a pooled analysis of vibrating-tool workers found that vibration exposure is a primary risk factor for finger and hand disorders (2).
- Where a maker states a basis: such as a bare tool without batteries, use the figure only against weights on the same basis.
- Where a maker states none: treat the number as that maker’s figure and compare nothing against it.
- Bit, fuel and batteries: each adds weight that a printed figure may or may not include.
I stop and rest when my hands tingle, and I do not carry the machine farther than the next marked position without setting it down.
One Operator or Two
Use the number of people your exact manual specifies. A maker’s page can say one person while its manual is silent, and one manual here describes a helper at a support handle for larger holes. The manual’s own words decide, because a two-person unit needs a second person who knows the plan, holds the unit as the manual describes and stays clear of the bit, and both people stop when either calls a stop. If you dig alone, my best one-person earth auger roundup lists five models you can run without a helper.
Rock, Roots and When to Rent
Rock, roots and hard ground are where a bit binds, and several manuals on this page say not to use the machine in excessively rocky ground. Many holes in dense clay, a large bit or a long run of posts can be a job for a rented or contractor machine, which is a decision about workload only. I check the first spot with a hand probe or a look at the soil before I commit the machine. I compare bit sizes and engines in my best heavy duty earth auger roundup, but those figures alone do not establish suitability for hard ground.
- Hard clay or stones: the bit binds and the machine twists.
- Roots near a hedgerow: a bind is likely, so choose the position carefully.
- Very long runs: the day’s workload may call for a rental or a contractor.
Working a Fence Line With a Powered Auger
An auger for fence post holes does one job many times, so the work is mostly planning and repeating the same routine. The steps below cover the setup before the first start. If you choose gas for the fence job, I compare five models in my roundup of gas earth auger picks.
- Contact 811 for the full row and wait for every utility response, as the safety section explains.
- Stake each post position and walk the line, removing rocks, sticks, wire, hose and stakes the bit could catch.
- Confirm the hole width your fence plan names and choose the bit that matches it.
- Before you fit the bit, add fuel, install a battery or connect the cord, complete the full shutdown in the shutdown box in the safety section below, then set up your power: fuel mixed in a separate container, a cord within reach or charged batteries.
- Put on your protective gear, check that bystanders are well clear and repeat the full shutdown before every adjustment.
A fence post auger from a maker with printed manuals gives you the working method for its own machine, so read it before the first start and keep it with the tool. I mark each position with a stake and walk the line before the first start. To weigh more machines, my roundup of earth auger models covers gas, corded and battery options.
Safety Before You Start an Auger
An earth auger drives a rotating steel bit into the ground, and the bit can bind on a root, a rock or a buried object. When it binds, the machine can twist or kick in your hands. Only what your exact manual says applies to your model, and where a maker prints a different rule, follow the maker.
Full Shutdown Box
Shutdown before you clear or free the bit, change or attach the bit, free a stuck bit, adjust, check or add oil or fuel, clean, load, move, store or leave the auger. Never reach toward the bit while it turns, and never clear it or free it with the machine running.
- Corded electric auger: release the switch or trigger, wait until the bit has stopped completely, then unplug the auger from the outlet by the plug, not the cord. Before transport or storage, also let the motor cool.
- Battery auger: release the switch or trigger, wait until the bit has stopped completely, then remove the battery, and the switch key where your model has one, and keep it away from the auger.
- Gas auger: release the throttle, trigger or control, turn the engine off, wait until the bit and every moving part have stopped completely, then disconnect the spark plug wire (a spark plug cap on some makes) and secure it away from the plug. Let the engine and muffler cool before you touch the bit or anything near the exhaust.
Then Free the Bit Only as Your Manual Says
Only then free a stuck bit or clear wrapped material, using only the method your manual specifies (gloves do not make grabbing sharp wire or cutting edges safe), and check the bit and guards for damage. Do not handle unidentified wire, cables or pipes. Do not use reverse or run the engine or motor to back the bit out unless your manual expressly authorizes it for this task, with both hands on the designated handles and everyone clear of the bit. Complete the full shutdown again before any further hands-on work. Add every step your manual gives, in its order, and refit every guard and shield before you restart.
Buried Lines and 811
Contact 811 before digging and include every planned hole in the locate request. Wait the required state notice period and confirm responses from every notified utility, including markings or a clear/no-conflict response for the work area. Resolve missing or conflicting responses before digging. Follow state ticket-validity and tolerance-zone rules, preserve markings, and keep augers outside the required clearance area. Near marks, use careful hand digging or another locating method permitted by state rules and the utility; obey any stricter auger-manual prohibition. Arrange separate locating for private services that 811 does not cover, such as irrigation lines and cables.
Do not dig where a service’s location remains uncertain. According to PHMSA, the call is free and operators mark their facilities with flags or paint, and the waiting time differs by state. Damaging buried utilities is a recognised safety risk during excavation, which a training trial with utility workers addressed (3). No augering depth above a buried service is safe. Where lines cannot be located and marked, or a utility response is missing or conflicting, no auger is an option: wait until the one-call process is complete.
Binding and Torque Reaction
If the bit hits a root, a rock or a buried object, it can bind and the machine can twist or kick. Keep firm, balanced footing and hold the designated handles with both hands. Keep hands and feet away from the bit, and never grasp or brace the bit or shaft. Never wrap the power cord around your hand, arm or body. Release the throttle or trigger immediately if the bit binds or control is threatened, then complete the full shutdown in the shutdown box above and inspect for damage before restarting. Use reverse only where your manual authorizes it for your model.
A lab simulation of tool torque reactions found that wrist muscle activity was very high even though the torque pulses were short and the peaks low (4), and a study of nutrunners at an assembly plant found that handle reaction force, more than the torque setting, tracked with upper limb injury (5). Those are other tools, and they show why a braced stance and a firm grip matter on any handheld machine that can kick.
If the bit sticks in the hole or material wraps around it, do not force it and do not reach for the bit. Stop and complete the full shutdown in the shutdown box before touching or inspecting it. Use only the freeing or clearing method specified in your exact manual. If your manual gives no procedure, obtain manufacturer or qualified service guidance.
Protective Gear and Hearing
Wear safety glasses with side shields or goggles meeting your manual’s specification, including ANSI Z87.1 where required, and add a face shield where required. Wear hearing protection with gas engines and wherever your manual requires it. Wear long pants and sturdy, closed footwear with secure traction, plus any additional protection your manual specifies. Tie back long hair, remove jewelry and secure drawstrings; do not wear loose clothing or loose gloves. Use the gloves specified for the task and keep hair, clothing, gloves, hands and feet away from moving parts.
A systematic review of agricultural and forestry work, mostly chainsaw work, found that workers exposed to both hand-arm vibration and noise had greater hearing loss than non-exposed workers (6). I put on ear protection before every gas start. Digging with an auger is heavy, jarring work that twists your arms and back, so take breaks and stop when you are tired or your attention slips.
Site, Bystanders and Footing
Before you start, walk the spot and remove rocks, sticks, wire, hose, stakes and anything else the bit could catch or throw. Identify irrigation lines, drip lines, cables and sprinkler heads before you start, and take loose garden hoses out of the work area. Do not dig in frozen or rock-hard ground or in ground full of roots and stones: the bit can bind and the machine can twist or kick.
Keep children, pets and other people out of the work area and at least the distance specified in your exact manual. Stop if anyone enters that area. If your manual gives no number, keep everyone well clear of the work area as it directs. No distance makes a work area safe on its own: keep watching it. On a slope or uneven ground, slow down, keep firm footing and follow only the slope or footing rule in your own manual. If your manual gives no such instruction, obtain guidance from the manufacturer before using the auger on a slope.
Fuel, Cords, Batteries and Moving the Machine
Before refuelling, complete the full gas shutdown in the shutdown box above. Refuel outdoors on the ground, not in a truck or trailer, with the engine cooled. Follow your exact manual’s precautions for ignition sources, filling the tank and dealing with spilled fuel. Mix fuel and oil only as the exact manual says. Never start or run a gas auger indoors or in a garage or shed, even with the doors open: the exhaust contains deadly carbon monoxide, which has no color, taste or smell.
Use an outdoor extension cord that meets your exact manual’s requirements for gauge, length, plug type and grounding, keep the cord away from the bit and never use the auger in the rain. Use only manufacturer-approved batteries and chargers for your exact model, as your manual names them, and keep loose battery terminals away from metal objects. Before you lift, load, carry or move the auger, complete the full shutdown in the shutdown box above, and never carry it by its cord.
My Overall Verdict
I judged each machine on its kit, its controls and its printed limits, and the pattern is simple. A fence line rewards a complete kit, a bit that matches your hole and a power source that fits your yard.

1. VEVOR 43cc 1250W Gas Post Hole Digger with 8 in Bit Best Overall
For an experienced operator, the complete gas kit with an 8 in bit in the box.

2. Earthquake E43 43cc Gas Earth Auger with 8 in Bit Best Premium
For a higher-priced step up, a documented one-person kit with a long 8 in bit.

3. DC HOUSE 52cc Gas Earth Auger with 6 in and 10 in Bits Best Value
For a tight budget, a gas kit with a 6 in and a 10 in bit.
If the fence needs another hole width, an extension or a battery, the other four on this page cover those jobs. Read the safety section first, confirm your fuel ratio and keep everyone clear, and you have the best auger for fence posts for your line.
Why VEVOR 43cc 1250W Gas Post Hole Digger with 8 in Bit Might Be the Best Choice
I put the VEVOR 43cc first because it asks the least of an experienced operator who wants a complete kit. Its manual names the model, the 43 cc engine and the 8 in by 30 in bit, and it names a bystander distance.
The trade-off is plain: the manual prints no maximum digging depth, no reverse and no warranty term, so you plan the fence from your fence maker’s directions.
Here is why it earns the top place:
✓ Complete kit: the 8 in bit, mixing bottle and tool set are in the box.
✓ One bit size: a row of identical holes needs no second purchase.
✓ Gas power: no cord to route and no battery to charge.
✓ Named bystander distance: five meters around the work area, VEVOR’s own figure.
✓ Plain method: the manual’s steps for starting and drilling are short and clear.
Frequently Asked Questions
What size auger for a fence post?
The auger size for a fence post follows the hole width your fence plan or post maker calls for. The makers of these seven kits print their bit sizes, from 4 in to 10 in, and none pairs a bit with a post size, so compare those printed sizes with the hole you need.
How to dig fence post holes with an auger?
Dig fence post holes with an auger by contacting 811 and waiting for every utility response first, then holding the machine upright, starting it and pressing down lightly so the bit shaves the soil. Raise the bit now and then to clear the hole, and stop for the full shutdown whenever it binds or sticks.
Is a one man fence post auger enough for a full fence line?
A one man fence post auger is enough for a full fence line when its maker sells it for one person and the workload suits one person. Earthquake’s maker page describes the E43 that way, but operator count says nothing about soil, hole count or your fence plan, so plan fuel or charge and breaks.
Do you need a 2 man fence post auger?
You do not need a 2 man fence post auger unless the manual of the machine you buy requires a second operator. DC HOUSE describes an optional helper at a support handle for larger holes, and for the Earthquake Dually, sold for one or two people, ask Earthquake for guidance because its manual describes no second operator.
Is an electric fence post auger strong enough?
An electric fence post auger is strong enough for the jobs its own maker describes, and no further. XtremepowerUS warns against excessively rocky ground and bits above 6 in, while WORX prints a 32 in working depth with its 8 in bit, so match those printed limits to your own holes.
References
- Hyson BE, Friedman BM, Spear B, Bishop-Freeman SC. Lethal carbon monoxide generated from small internal combustion engines. J Anal Toxicol. 2024;48(8):625-629.
- Bovenzi M, Ronchese F, Larese Filon F, et al. The role of personal risk factors in the occurrence of the hand-arm vibration syndrome: a pooled analysis of individual data from Italian cross-sectional and cohort studies. Int Arch Occup Environ Health. 2025;98(8):757-774.
- Gallagher AG, Hart M, Cleary D, et al. Proficiency based progression simulation training significantly reduces utility strikes: a prospective, randomized and blinded study. PLoS One. 2020;15(5):e0231979.
- Armstrong T, Bir C, Foulke J, Martin B, Finsen L, Sjogaard G. Muscle responses to simulated torque reactions of hand-held power tools. Ergonomics. 1999;42(1):146-159.
- Ku CH, Radwin RG, Karsh BT. Power hand tool kinetics associated with upper limb injuries in an automobile assembly plant. J Occup Environ Hyg. 2007;4(6):391-399.
- Thaper R, Sesek R, Garnett R, Acosta-Sojo Y, Purdy GT. The combined impact of hand-arm vibration and noise exposure on hearing sensitivity of agricultural/forestry workers: a systematic literature review. Int J Environ Res Public Health. 2023;20(5):4276.
Safety Note: Only an adult who has read the manual and understands the controls should use an earth auger or post hole digger, never a child or anyone tired or impaired. Use the number of people your manual specifies, and keep everyone else out of the work area. The rotating bit can catch hair, clothing and gloves, and it can bind on a root, a rock or a buried object: the machine can then twist or kick in your hands. Stand with firm, balanced footing and hold the designated handles with both hands. Keep hands and feet away from the bit; never grasp or brace the bit or shaft. Never wrap the power cord around your hand, arm or body. If utility contact or a gas leak is suspected, stop work immediately. Do not touch, inspect, free or move the auger or exposed service, and do not attempt the normal hands-on shutdown or disconnect electrical connections in the suspected leak area. Leave the area, keep others away and contact the utility from a safe location; call 911 for a suspected gas leak or immediate danger. Otherwise, release the throttle or trigger immediately if the bit binds or control is threatened, then follow the shutdown procedure. On a two-person unit, both operators must understand the controls and agree on start and stop signals before starting; stop whenever either operator calls stop. Use reverse only where your manual expressly authorizes it. Never touch or clear the bit while it turns. Before you clear or free the bit, change or attach the bit, adjust, check or add oil or fuel, clean, load, move, store or leave the auger, complete the shutdown for its power type. Corded electric: release the switch or trigger, wait until the bit has stopped completely, then unplug it from the outlet by the plug, not the cord; before transport or storage, also let the motor cool. Battery: release the switch or trigger, wait until the bit has stopped completely, then remove the battery, and the switch key where the model has one. Gas: release the throttle, trigger or control, turn the engine off, wait until the bit and every moving part have stopped completely, then disconnect the spark plug wire and secure it away from the plug, and let the engine and muffler cool before touching the bit, engine, muffler or anything near the exhaust. For a drill-driven bit or any attachment system, follow the shutdown instructions in both the bit or attachment manual and the power-head or drill manual. If the bit sticks or material wraps around it, stop and complete the full shutdown before touching or inspecting it. Use only the freeing or clearing method specified in the exact manual; gloves do not make grabbing sharp wire or cutting edges safe. Do not handle unidentified wire, cables or pipes. Powered reverse is permitted only when the exact manual expressly authorizes it for that task, with both hands on the designated handles and everyone clear of the bit. Complete the full shutdown again before any subsequent hands-on work. Wear safety glasses with side shields or goggles meeting the manual’s specification, including ANSI Z87.1 where required; add a face shield where required. Wear hearing protection with gas engines and wherever the manual requires it. Wear long pants and sturdy, closed footwear with secure traction, plus any additional footwear protection the manual specifies. Tie back long hair, remove jewelry and secure drawstrings; do not wear loose clothing or loose gloves. Use the gloves specified for the task and keep them, clothing, hair, hands and feet away from moving parts. Contact 811 before digging and include every planned hole in the locate request. Wait the required state notice period and confirm that every notified utility has responded with markings or a clear/no-conflict response for the work area. Resolve missing or conflicting responses before digging. Preserve the marks and follow your state’s ticket-validity and tolerance-zone rules. Keep the auger out of the required clearance area; near marks, use careful hand digging or another locating method permitted by state rules and the utility. Follow any stricter prohibition in the auger’s manual. Marks do not show a safe drilling depth. Arrange to locate private irrigation lines, cables and other services that 811 may not cover. If a line’s location remains uncertain, do not dig there. Do not handle or move unidentified cables, pipes or utility lines. Before you start, remove rocks, sticks, wire and loose hoses, and identify irrigation lines, drip lines and sprinkler heads. Keep children, pets and other people out of the work area and at least the distance your exact manual specifies. Stop if anyone enters that area. If your manual gives no number, keep everyone well clear of the work area as it directs. No single distance is safe for every auger. On a slope or uneven ground, slow down, keep firm footing and follow only your manual’s rule. Do not dig in frozen or rock-hard ground. Before refuelling, complete the full gas shutdown described above. Refuel outdoors on the ground, not in a truck or trailer, with the engine cooled. Keep fuel away from smoking, flames, sparks and other ignition sources. Use an approved fuel container, avoid overfilling, secure the cap and follow the manual’s spill-cleanup and restart-location instructions; do not start with a fuel leak. Use the specified fuel and oil arrangement for that engine. Never start or run a gas auger indoors, in a garage or shed, or in an enclosed or poorly ventilated area, even with doors open. Operate outdoors where exhaust cannot accumulate or enter occupied spaces through doors, windows or air intakes. Exhaust contains deadly carbon monoxide. For a corded auger, inspect the cord and extension cord before use and do not use damaged cords or plugs. Use an outdoor extension cord meeting the exact manual’s gauge, length, plug and grounding requirements, and follow its GFCI instructions. Keep connections dry and the cord clear of the bit, heat, oil and sharp edges. Never carry the auger by its cord or wrap the cord around your body. Do not use it in rain or wet conditions prohibited by the manual. Use only manufacturer-approved batteries and chargers for the exact model. Complete the battery shutdown before removing or changing a battery, and keep the switch off and fingers off the trigger when installing one. Do not use damaged or modified batteries or chargers. Keep loose battery terminals away from metal objects, and follow the battery and charger manuals for moisture exposure, charging temperature, cooling and storage. Load and unload only as your manual describes, and store the auger dry and out of children’s reach. Take breaks and stop when you are tired.