
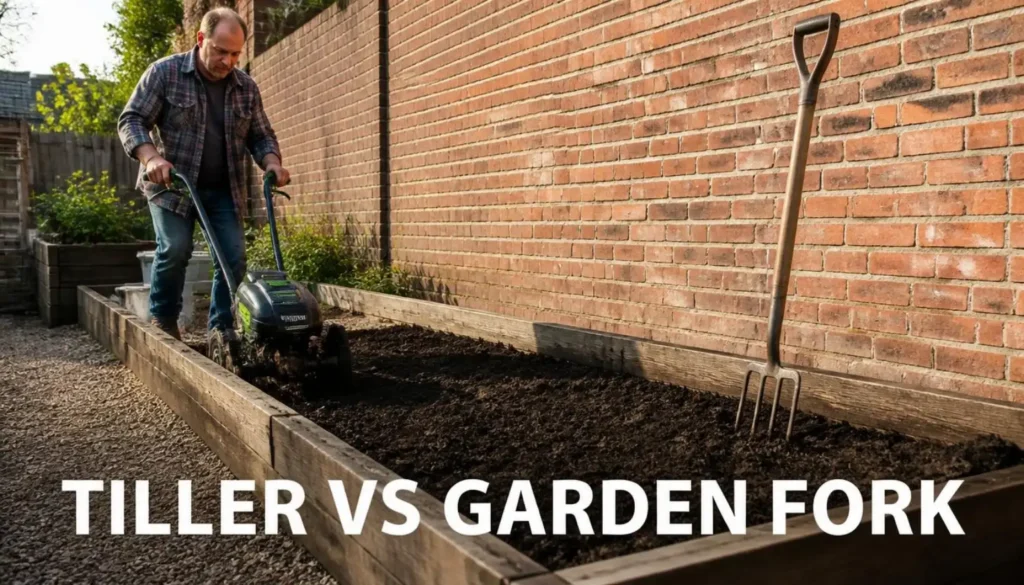
The tiller vs garden fork question has a short answer: a tiller wins on speed over a large or new bed, and a garden fork wins on small beds, compacted soil and the least damage to soil structure. I run a 3.7-acre apricot and plum orchard where tillage stays minimal, so I judge any soil tool by what it leaves in the ground and what it asks of my back. Below I show what each tool does, where extension sources disagree, what a machine adds in risk and which one fits your bed.
Tiller vs Garden Fork: The Short Answer
A tiller fits a big area of new ground that needs loosening and mixing fast. A garden fork fits a small bed, compacted or heavy soil, or any bed where soil structure matters to you. Oregon State Extension calls a digging fork “the best choice to minimize the impact of digging on soil structure, and in high clay-content soils.” The same extension service says hand-operated tillers usually work only the top 4 to 6 inches of soil. When the job is one hole for a post or a shrub instead of a whole bed, my guide to earth augers and tillers shows which tool fits.
- Large or new bed: a tiller saves the most effort, but a small machine does not break sod. Iowa State Extension says most lawn areas need a large rear-tine rototiller.
- Small or raised bed: a garden fork does the job with no motor, engine or cord and no spinning tines to clear.
- Compacted or clay soil: Oregon State and Maryland Extension both lean toward the fork, and Maryland says to drive it in, rock it and not flip the soil.
- Both: one first pass with a machine, then a fork for the compacted layer below it, is a common middle path in extension advice.
What a Garden Fork Does in a Bed
A garden fork, also called a digging fork or spading fork, is a hand tool with a short, stout handle and a square head of usually four sturdy tines. Its tines push into the ground, loosen it and lift it, and the long handle lets you lever the soil loose.
Garden Fork Uses in a Vegetable Bed
In a vegetable bed like the one beside our house, a fork earns its place in four situations. It loosens compacted soil, it opens a bed that is already worked, it mixes compost into the top layer and it lifts stones and old roots out of the way. Maryland Extension describes the first and third jobs in the same terms: drive the fork in, rock it back and forth, and use the same motion to gently mix compost into soil.
Oregon State adds the reason many growers choose it. Hand digging “can be just as effective, however, and is less likely to damage soil structure.”
How to Loosen Compacted Soil With a Fork
Maryland Extension gives a method for compacted, high-clay soil that needs no heavy lifting. The steps below follow it.
- Check that the soil is workable first: squeeze a handful into a ball, and if it holds its shape or sticks, wait a day or two (Kentucky and Iowa State Extension).
- Drive the fork into the soil and rock it back and forth.
- Move the fork 6 to 8 inches and repeat across the bed.
- Do not lift and flip the soil over, because the goal is to open the subsoil for drainage and air, not to turn the layers.
I like this method for a bed I want to keep planting: the structure stays in place and compost goes on top afterwards.
Double Digging and When It Is Worth the Work
Double digging is the hardest hand method. The University of Maine Cooperative Extension describes taking the soil out of a bed to about 8 to 10 inches deep and then working amendments in with a fork to an additional depth of 6 to 8 inches. It calls the job “very hard work, but it is worthwhile,” and its author would try it only once in a home or community garden, or every 5 or 10 years if your back allows.
What a Tiller Does, and What It Cannot Do
A tiller drives steel tines that cut, throw and mix the soil, and my guide to how a garden tiller works breaks down the parts, depth and soil action. One study of rotary tillage on a clay loam in Malaysian rice fields found that repeated passes lowered bulk density and penetration resistance compared with no tillage, and the third pass left the loosest soil (1). The finding comes from a wet rice soil, so read it as proof that a rotary tiller loosens soil, not as a promise for your garden.
Width and Depth Are Maximums
Makers print a width and a depth for each machine. These are that model’s ceilings in loose soil, never what any tiller reaches in hard clay or sod. Oregon State’s field guidance is lower: it says hand-operated machines usually work the top 4 to 6 inches.
| Model and type | Tilling width | Tilling depth |
|---|---|---|
| Mantis 3550 corded electric tiller | Up to 12 in | 8 in digging depth |
| Ryobi P2705 18 V battery cultivator | 8 in | 4 in |
| Honda FG110 mini tiller | 9 in | 8 in |
| Champion 100380 rear tine tiller | 19 in | 8 in |
Sod and Hard Ground
Iowa State Extension says tilling lets you quickly create a turf-free area, and that “most lawn areas will require a large rear-tine rototiller to break up the sod.” A mini tiller or a cordless cultivator is built for loose, worked beds, and the makers’ manuals describe them that way. For hard sod over a large area, a larger rental machine with its own manual, or a professional, is the sensible step. My roundup of mini tillers for small beds covers nine picks for narrow raised rows.
The tiller vs garden fork choice often turns on this point. Lawn ground is where a machine saves the most labor, and a bed dug last year is usually fine with a fork.
Soil Structure, Weeds and Earthworms
Extension services disagree on tilling, so I give each view with its source. Illinois Extension says tilling “aids in breaking up heavy clay soil or areas that suffer from compaction,” and also that “tilling also destroys the structure of your soil.” Oregon State Extension says mechanical tillage “does have its place, especially for establishing new beds with high compaction and low organic matter.” Maryland Extension tells gardeners to aim for a no-till or minimum-till bed. Iowa State says tilling can degrade soil structure and bring up weed seeds.
Tiller vs Garden Fork for Soil Structure
The studies below compare tillage intensity, mostly ploughing against less disturbance, on named soils. They show what disturbing soil costs, and they do not test a fork against a tiller.
- Aggregates: on a German silt-loam, three aggregate-stability measures were higher under reduced tillage than under conventional tillage (2). A meta-analysis of 295 US studies found that moving from ploughing to no-till raised surface aggregate stability, most after at least three years (3).
- Earthworms and soil animals: on a Hungarian Chernozem, no-till had the most earthworms and ploughing the fewest (4). A global analysis of 133 studies found that reduced tillage raised springtails by 35 percent, mites by 23 percent and enchytraeid worms by 37 percent (5).
- Weed seeds: after 12 years, tillage shaped the weed seedbank more than crop rotation did, and without tillage the seeds stayed concentrated near the surface (6).
Oregon State adds that repeated rototilling can compact soil just below the tillage depth and kill earthworms. The practical reading is that rocking a fork through a bed without flipping the soil disturbs little, while a tiller or a double-dug bed disturbs far more, and only the machine covers a large area fast. On the orchard I keep tillage to a minimum for this reason. If the machine is the answer, my page on front and rear tine tillers compares the two types.
Speed, Effort and Plot Size
Effort is where the tiller earns its place. A machine does the cutting and throwing, while a fork asks your arms, back and legs for every square foot.
Tiller vs Garden Fork by Plot Size
My recommendation is simple: choose by the size of the bed and by how loose the soil already is. I would rather see a reader loosen a small bed by hand than buy a machine for it, and I would rather see a large new bed done with a machine than abandoned half dug. For a small bed that does need a machine, my guide to compact tillers for small gardens ranks nine models.
| Situation | Better fit | Reason |
|---|---|---|
| Large or new area | Tiller | Does the loosening and mixing for you; sod needs a large rear-tine machine (Iowa State) |
| Small bed or raised bed | Garden fork | No power source or spinning tines; less structure damage (Oregon State) |
| Compacted or clay soil | Garden fork, with a tiller only for a first pass on a dry day | Maryland: drive in, rock, do not flip; Oregon State: tillage has its place on new, compacted beds |
| Compost or manure added each season | Either | A machine mixes it fast; a fork mixes gently and leaves the layers in place |
| Ground where buried lines are not yet located and marked | Neither tool yet | Call 811 and wait for the marks; work only where you can avoid every buried service and your own lines |
Broadfork vs Tiller: Where the Wider Fork Fits
A broadfork is a wide garden fork with long tines. Kansas State Extension describes it as capable of breaking up deep compaction and loosening a raised bed with a gentle rocking motion, and notes it is also known as the manual tiller. It sits between the two tools, with more reach than a garden fork and no engine. It still asks for hand effort, and I do not expect it to cut through sod.
Safety: Where a Tiller Is the Riskier Tool
A fork has no power source and no spinning tines. A tiller has a corded motor, a battery or a gas engine driving spinning tines, so its safety steps are the floor, and they apply every time you start it, clear it or leave it. Cub Cadet and Troy-Bilt print that their tillers are “capable of amputating fingers, hands, toes and feet.”
Full Shutdown Box
Shutdown before you clear the tines, free a root, rock or wrapped vine, adjust the depth or width, change tines, check or add oil or fuel, clean, load, move, store or leave the tiller. Never reach toward the tines while they turn, and never clear them with the machine running. Corded electric tiller: release the switch or bail, wait until the tines have stopped completely, then unplug the tiller from the outlet by the plug, not the cord. Before transport or storage, also let the motor cool. Battery tiller or cultivator: release the switch or bail, wait until the tines have stopped completely, then remove the battery, and the switch key where your model has one, and keep it away from the tiller. Gas tiller: release the clutch, drive levers or bail, turn the engine off, wait until the tines and every moving part have stopped completely, then disconnect the spark plug wire (a spark plug cap on some makes) and secure it away from the plug. Let the engine and muffler cool before you touch the tines or anything near the exhaust. EGO cultivator attachment on a compatible battery power head: release the trigger, wait until the blades have stopped completely, then remove the battery from the power head. For any other attachment system, follow the shutdown and isolation instructions in both its attachment manual and its power-head manual (a gas power head needs its own manual’s full shutdown). Only then clear wrapped roots, vines or grass by hand in sturdy gloves, cutting them free only as your manual describes, and check the tines and guards for damage. Do not reverse the tines or run the engine to unwind material unless your manual says so. Add every step your manual gives, in its order, and refit every guard and shield before you restart.
Protect Yourself and Clear the Bed
Wear safety glasses with side shields or goggles that meet ANSI Z87.1, or the eye protection your manual specifies, and a face shield where it asks for one; wear hearing protection with a gas engine or wherever your manual asks; wear long pants and the footwear and gloves your manual specifies for your model (Champion prohibits sandals, sneakers, light footwear and bare feet; YARDMAX specifies long, heavy pants, work boots and work gloves). Keep hair, clothing, jewelry, drawstrings and gloves away from moving parts.
Before you start, walk the bed and remove rocks, sticks, wire, hose, stakes and anything else the tines could catch or throw. Identify irrigation lines, drip lines, cables and sprinkler heads before you start, and take loose garden hoses out of the work area. Do not handle or move unidentified cables, pipes or utility lines: keep the tiller away from them and contact the utility if their location is uncertain. I mark the drip lines I built before any soil work, with a machine or a fork.
Buried Lines and Hidden Obstacles
According to PHMSA, dialing 811 reaches your state’s one-call center, the call is free, and the utilities then mark the exact location of their lines with flags or paint. Call 811, the free national call-before-you-dig number, before you till ground where you do not know what lies below, and always before any digging. Utilities can lie close to the surface, so a shallow pass is not a safe pass, and no manual or agency source gives a tilling depth that is safe over a buried line.
Wait for the utilities to locate and mark their lines before you start; the waiting time differs by state. Identify your own irrigation lines and cables as well, and do not assume that utility markings identify every buried obstacle. Follow your exact manual’s prohibition: Earthwise, Champion and Greenworks prohibit tilling near underground cables, pipes or hoses; YARDMAX, Tazz and Earthquake prohibit tilling above underground services; EGO requires you to ensure that no buried power cables are present. Marking a line does not make tilling over it safe, and no safe tilling depth above a buried line is established in the sources. Contact the utility if the location of its services is uncertain.
Hard-packed or frozen ground, buried stones, roots and stumps can make a tiller bounce upward or jump forward, and the tines can catch in the ground and pull a front-tine machine forward.
Hold the handles firmly with both hands, keep your feet clear of the tines, take shallow passes, and if the tines strike a hard object, stop immediately, complete the full shutdown in the shutdown box, and inspect for damage before restarting. Do not till frozen ground (Champion, Earthwise, YARDMAX).
If roots, vines or grass wrap on the tines or the machine stalls, do not force it and do not reach for the tines. Complete the full shutdown in the shutdown box, then clear the material by hand in sturdy gloves, cutting it free only as your manual describes. Do not reverse the tines or run the engine to unwind it unless your manual says so.
Soil, Fumes, Bystanders and Fatigue
Do not till soil that is too wet. Squeeze a handful into a ball: if it crumbles under finger pressure it is ready, and if it holds its shape or sticks to the tines, wait a day or two (Kentucky and Iowa State Extension). Wet clay forms hard clods and compacts (Utah State). Do not till rock-hard dry or frozen ground, which makes the tiller bounce.
Never start or run a gas tiller indoors or in a garage or shed, even with the doors open. Start and run it outdoors: the exhaust contains deadly carbon monoxide, which has no color, taste or smell (Champion; Tazz and Earthquake say to start and run the engine outdoors). A model of a 5 hp gasoline engine in an enclosed room showed carbon monoxide rising to dangerous levels within minutes (7). Allow the muffler and engine to cool before touching them (Tazz, Earthquake).
Keep children, pets and other people out of the work area and at least the distance specified for your exact model: Ryobi P2705, 50 ft; YARDMAX YT4565, 75 ft; Sun Joe TJ600E, TJ603E and TJ604E, 25 ft; BLACK+DECKER LGC120, 20 ft.
Stop if anyone enters that area. If your manual gives no number, keep everyone well clear of the work area as it directs, and stop if anyone approaches. No distance makes a work area safe on its own: keep watching it. Champion: never allow children under age 16 to operate the tiller. Sun Joe: do not allow anyone in front of a running machine.
Tilling is heavy, jarring work. Take breaks, stop when you are tired or your attention slips, and use the gloves your manual recommends to reduce vibration in your hands (Tazz, Earthquake, Mantis). A study of a large occupational power tiller measured high handle vibration and found that damping materials on the handle reduced it (8). It concerns a different class of machine, so it is only a reason to take breaks.
Start Small and Match the Tool to the Bed
Three things stay with me from this comparison. A fork disturbs little soil and costs effort, a tiller covers ground and costs safety care, and extension advice splits on tilling, so match the tool to your soil and the size of the bed. My tip is to test a patch with a fork first: if the tines slide in easily, you may not need a machine at all. Before you buy or rent anything, call 811, mark your drip lines and read your manual end to end. The right answer to the tiller vs garden fork choice is the tool that fits your bed, your soil and your back. If you decide on a machine, my ranking of garden tillers sorts nine picks for small beds and large plots.
Frequently Asked Questions
What are five uses of a garden fork?
Five uses of a garden fork are loosening compacted subsoil, digging a new bed, working compost into the top layer, raking stones and weeds out of the soil and lifting root crops. Oregon State Extension says hand digging with a digging fork is less likely to damage soil structure than a machine.
What is a garden fork?
A garden fork is a hand tool with a short handle and a head of usually four sturdy tines, also called a spading or digging fork, used to loosen, lift and turn over soil. Oregon State Extension calls a digging fork the best choice to limit damage to soil structure, especially in high clay-content soils.
What is the difference between a garden fork and a pitchfork?
A garden fork has shorter, flatter, thicker and more closely spaced tines than a pitchfork, and it is built to loosen soil, while a pitchfork moves loose material such as hay, straw and manure. Use the garden fork in the bed and the pitchfork for the loose material you spread on it.
What is a broadfork?
A broadfork is a wide garden fork with long tines that can break up deep compaction. Kansas State Extension says a gentle rocking motion can loosen a raised bed with one, and that it is also known as the manual tiller.
Can you aerate a lawn with a garden fork?
You can aerate a small lawn with a garden fork, and Clemson Extension calls a spading fork the simplest and cheapest way to do it. The tines push soil aside and pack it around each hole, which adds some compaction, and Clemson calls the method labor-intensive for large areas. A sod-coring tool removes cores instead of pushing soil aside.
References
- Mairghany M, Yahya A, Adam NM, Su AS, Aimrun W, Elsoragaby S. Rotary tillage effects on some selected physical properties of fine textured soil in wetland rice cultivation in Malaysia. Soil Tillage Res. 2019;194:104318.
- Obalum SE, Uteau-Puschmann D, Peth S. Reduced tillage and compost effects on soil aggregate stability of a silt-loam Luvisol using different aggregate stability tests. Soil Tillage Res. 2019;189:217-228.
- Nunes MR, Karlen DL, Moorman TB. Tillage intensity effects on soil structure indicators: a US meta-analysis. Sustainability. 2020;12(5):2071.
- Dekemati I, Simon B, Vinogradov S, Birkas M. The effects of various tillage treatments on soil physical properties, earthworm abundance and crop yield in Hungary. Soil Tillage Res. 2019;194:104334.
- Betancur-Corredor B, Lang B, Russell DJ. Reducing tillage intensity benefits the soil micro- and mesofauna in a global meta-analysis. Eur J Soil Sci. 2022;73(6):e13321.
- Barberi P, Lo Cascio B. Long-term tillage and crop rotation effects on weed seedbank size and composition. Weed Res. 2001;41(4):325-340.
- Earnest GS, Mickelsen RL, McCammon JB, O’Brien DM. Carbon monoxide poisonings from small, gasoline-powered, internal combustion engines: just what is a “well-ventilated area”? Am Ind Hyg Assoc J. 1997;58(11):787-791.
- Chaturvedi V, Kumar A, Singh JK. Power tiller: vibration magnitudes and intervention development for vibration reduction. Appl Ergon. 2012;43(5):891-901.
Safety Note: Only an adult who has read the manual and understands the controls should use a tiller or cultivator, never a child (Champion: never under age 16) or anyone tired or impaired. Rotating tines can cut off fingers, hands and feet, and can throw stones and debris. Never touch or clear the tines while they turn. Before you clear the tines, free a root, rock or wrapped vine, adjust the depth or width, change tines, check or add oil or fuel, clean, load, move, store or leave the tiller, complete the shutdown for its power type. Corded electric: release the switch or bail, wait until the tines have stopped completely, then unplug it from the outlet by the plug, not the cord; before transport or storage, also let the motor cool. Battery: release the switch or bail, wait until the tines have stopped completely, then remove the battery, and the switch key where the model has one. Gas: release the clutch, drive levers or bail, turn the engine off, wait until the tines and every moving part have stopped completely, then disconnect the spark plug wire and secure it away from the plug, and let the engine and muffler cool before touching the tines, engine, muffler or anything near the exhaust. EGO cultivator attachment on a compatible battery power head: release the trigger, wait until the blades have stopped completely, then remove the battery from the power head; for another attachment system, follow the shutdown instructions in both its attachment manual and its power-head manual. Then clear wrapped roots or vines by hand in sturdy gloves, only as your manual describes; do not reverse the tines or run the engine to unwind material unless your manual says so. Wear safety glasses with side shields or goggles meeting your manual’s specification, including ANSI Z87.1 where required, and add a face shield where the manual requires one. Wear hearing protection with a gas engine or wherever the manual requires it, long pants, and the footwear and gloves specified for your model. Champion prohibits sandals, sneakers, light footwear and bare feet; YARDMAX specifies long, heavy pants, work boots and work gloves. Keep hair, clothing, jewelry and gloves away from moving parts. Before you start, remove rocks, sticks, wire and loose hoses, and identify your irrigation lines and cables; do not handle or move unidentified cables, pipes or utility lines. Call 811 before tilling ground where you do not know what lies below, and always before digging. Wait for the utilities to locate and mark their lines before starting. Follow your manual’s prohibition on tilling near or above underground services; marking a line does not make tilling over it safe, and no safe tilling depth above a buried line is established in the sources reviewed. Keep children, pets and other people out of the work area and at least the distance specified for your exact model: Ryobi P2705, 50 ft; YARDMAX YT4565, 75 ft; Sun Joe TJ600E, TJ603E and TJ604E, 25 ft; BLACK+DECKER LGC120, 20 ft. Stop if anyone enters that area. If your manual gives no number, keep everyone well clear of the work area as it directs, and stop if anyone approaches. No single distance is safe for every tiller. Sun Joe also prohibits anyone from standing in front of a running machine; its distance figure does not replace that restriction. Hard-packed or frozen ground, buried stones, roots and stumps can make a tiller bounce upward or jump forward: hold the handles firmly with both hands, keep your feet clear of the tines, take shallow passes, and do not till frozen ground. If the tines strike a hard object, stop immediately, complete the applicable full shutdown described above, and inspect for damage before restarting. On a slope, slow down, keep firm footing and follow only your manual’s slope rule; makers disagree on the direction. Do not till soil that is too wet: squeeze a handful into a ball, and if it holds its shape or sticks to the tines, wait. Before refuelling, complete the full gas shutdown described above. Refuel outdoors on the ground, not in a truck or trailer, with the engine cooled. Follow your exact manual’s precautions for ignition sources, filling the tank and dealing with spilled fuel. Mix fuel only as the manual says. Never start or run a gas tiller indoors or in a garage or shed, even with the doors open. Start and run it outdoors: the exhaust contains deadly carbon monoxide. For a corded tiller use an outdoor extension cord that meets your exact manual’s requirements for gauge, length, plug type and grounding, keep the cord away from the tines and route it as your exact manual directs, never carry the tiller by the cord and never use it in the rain. Use only the battery and charger your manual names. Load and unload only as your manual describes, and store the tiller dry and out of children’s reach. Take breaks and stop when you are tired.