
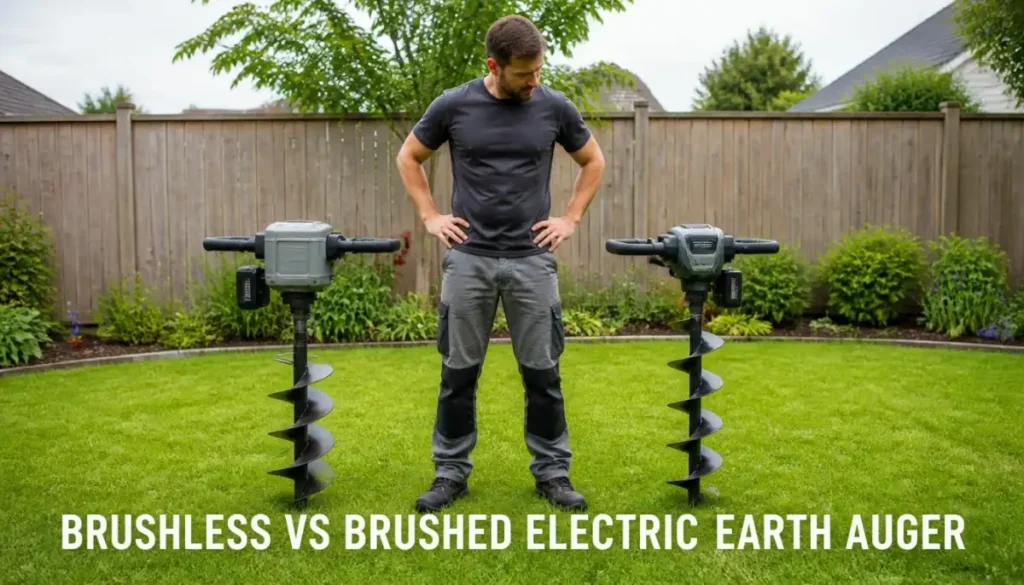
The brushless vs brushed electric earth auger choice comes down to how the motor passes current: a brushed motor uses carbon brushes that wear, and a brushless motor uses an electronic controller and has none. Neither one changes how the bit grabs the ground. As an agricultural engineer, I look first at the part of a machine that wears out first. Below I explain both designs, what stays the same, how to read a spec page and which motor fits which digging job.
Brushless vs Brushed Electric Earth Auger in Short
A brushed motor sends current to its spinning windings through two carbon brushes that press on a copper ring called the commutator. A brushless motor drops both parts. A small circuit board switches the current in fixed windings instead, and a magnet rotor turns, so no brushes slide on a commutator.
That one difference decides three things for you: what wears out, what upkeep the motor may need and which price tier the auger lands in. It decides nothing about the hazards of the bit. A bit that binds on a root twists the machine in your hands whichever motor sits inside.
- Brushed: carbon brushes wear down, and the design is older and simpler.
- Brushless: no brushes to wear, plus a controller that is one more electronic part.
- Both: the same shutdown order, the same braced stance and the same call to 811 before any hole.
Key Takeaway
Pick the motor by how often you dig, then read the exact manual for the model. The motor type never makes a risky dig safe.
How a Brushed Motor Turns the Bit
A brushed motor is the classic electric motor. It has been used in power tools for a long time because it is simple to build and cheap to make. On an electric earth auger it sits in the power head and turns the gearbox that drives the bit, a layout I break down in my guide to how an earth auger works.
What the Brushes Do
The brushes are small blocks of carbon held against the commutator by springs. As the center of the motor turns, the commutator flips the direction of the current so the motor keeps spinning in one direction. Contact is the whole trick, and contact is also the weak point.
What Wears and Why
Research on small brushed DC motors states that brush wear is one of the main factors in a motor’s life and reliability, and that the arc at the commutator erodes the brush and can damage the commutator (1). The finding comes from a bench test on an equivalent commutation circuit, not from an auger, so it explains the mechanism rather than predicting a service interval.
I read that as a plain maintenance fact: any part that rubs will wear, and a part that wears needs a plan. The exact manual says whether a given brushed auger lets you replace its brushes, and how. Before you open anything, complete the full shutdown for your auger in the shutdown box below.
How a Brushless Motor Does It Differently
A brushless motor swaps the brushes and the commutator for electronics. A controller switches the current in the fixed windings at the right moment, and the magnet rotor follows, so the motor needs no brushes or sliding electrical contacts to keep turning. That is the design makers mean when they print the word on an auger. The same motor trade shows up on battery saws, and I sort it out in my guide to brushless and brushed chainsaws.
Electronic Switching
A technical review of brushless DC motors states that they use electronic commutation instead of the mechanical commutation of brushed motors, and that the controller usually reads the position of the rotor with small Hall-effect sensors (2). The same authors list high efficiency, long operating life with no brush erosion, quiet operation and less electromagnetic interference as general advantages over brushed motors. Those are general statements about the motor type, not a test of an auger.
What Makers Say About a Brushless Earth Auger
Makers advertise a brushless earth auger as more efficient, longer lived and quieter than a brushed one, and some say it also holds up better under load. I treat the word brushless on a box as a maker’s claim about the motor. A claim on a box is not a measurement of how many holes you will dig in your soil.
The Price of the Controller
The controller is an electronic part, and any electronic part can fail, so brushless does not mean maintenance free for life. What it removes is the one wear part that every brushed motor carries. Brushless augers also tend to sit in a higher price tier, and that is the cost side of the trade. I compare the two motor designs in another handheld power tool in my guide to brushless and brushed string trimmers.
What the Motor Type Does Not Change
The motor type decides how the motor switches its current. It does not decide what the bit meets underground, how the machine reacts when the bit jams or what you must do before you touch it. Every rule in this section applies to a brushed auger and a brushless auger alike, and your exact manual adds its own steps and wins where it is stricter.
Full Shutdown Box
Shutdown before you clear or free the bit, change or attach the bit, free a stuck bit, adjust, check or add oil or fuel, clean, load, move, store or leave the auger. Never reach toward the bit while it turns, and never clear it or free it with the machine running. Corded electric auger: release the switch or trigger, wait until the bit has stopped completely, then unplug the auger from the outlet by the plug, not the cord. Before transport or storage, also let the motor cool. Battery auger: release the switch or trigger, wait until the bit has stopped completely, then remove the battery, and the switch key where your model has one, and keep it away from the auger. Only then free a stuck bit or clear wrapped material, using only the method your manual specifies (gloves do not make grabbing sharp wire or cutting edges safe), and check the bit and guards for damage. Do not handle unidentified wire, cables or pipes. Do not use reverse or run the engine or motor to back the bit out unless your manual expressly authorizes it for this task, with both hands on the designated handles and everyone clear of the bit; complete the full shutdown again before any further hands-on work. Add every step your manual gives, in its order, and refit every guard and shield before you restart.
Torque Reaction and Your Grip
When the bit binds on a root, a rock or a buried object, the machine can twist or kick in your hands. A laboratory study of simulated torque reactions in hand-held power tools found very high wrist and forearm muscle activity even when the torque pulses were short and the peaks low (3). The study simulated the torque profiles of threaded-fastener tools, not augers, so take the general point: a sudden twist loads the wrist hard.
Hold the designated handles with both hands, keep firm and balanced footing, and release the trigger at once if the bit binds. Never grab or steady the bit or the shaft, and keep the cord or the battery pack clear of your arms. After a bind, complete the full shutdown for your auger in the shutdown box above, check the bit and guards for damage, find and resolve the cause of the bind, and restart only when your manual’s conditions are met.
Eyes, Ears, Feet and Clothing
Wear safety glasses with side shields or goggles meeting your manual’s specification, including ANSI Z87.1 where required, and add a face shield where required. Wear hearing protection with gas engines and wherever your manual requires it. Wear long pants and sturdy, closed footwear with secure traction, plus any additional protection your manual specifies. Tie back long hair, remove jewelry and secure drawstrings; do not wear loose clothing or loose gloves. Use the gloves specified for the task and keep hair, clothing, gloves, hands and feet away from moving parts.
Clear the Spot and Call 811
Before you start, walk the spot and remove rocks, sticks, wire, hose, stakes and anything else the bit could catch or throw. Identify irrigation lines, drip lines, cables and sprinkler heads before you start, and take loose garden hoses out of the work area. Do not handle or move unidentified cables, pipes or utility lines: keep the auger away from them and contact the utility if their location is uncertain.
According to PHMSA, contact 811 before digging and include every planned hole in the locate request. The waiting time differs by state, so wait the required state notice period and confirm responses from every notified utility, including markings or a clear/no-conflict response for the work area. Resolve missing or conflicting responses before digging. Follow state ticket-validity and tolerance-zone rules, preserve markings, and keep augers outside the required clearance area.
Near marks, use careful hand digging or another locating method permitted by state rules and the utility; obey any stricter auger-manual prohibition. Arrange separate locating for private services that 811 does not cover (irrigation lines, cables). Do not dig where a service’s location remains uncertain, and do not bring in a larger machine to dig there instead. Markings show where a line runs, not how deep, so they never establish a safe augering depth above a buried service.
The Battery Is Its Own Hazard
A brushless motor does not change the pack that feeds it. A review of thermal runaway in lithium-ion batteries describes it as the main failure mechanism of those batteries, one that can lead to fires and explosions, and says how it unfolds depends on the battery’s materials (4). The review is not about power tool packs, so it gives no rule for yours. It supports the plain habit of following the charging and storage rules in your manual.
Before you clean soil off the flights, change the bit or put the auger away, complete the full shutdown for your auger in the shutdown box above. Store the auger dry and out of children’s reach, with the bit off the floor, and never leave it running, plugged in or with its battery in.
Wear, Upkeep and Cost Side by Side
Put the two designs next to each other and the picture is simple. Brushed means a wear part and a lower price tier. Brushless means no brush wear, an electronic controller and a higher price tier. The table lines the two designs up on the points that matter at the shelf.
| Point | Brushed | Brushless |
|---|---|---|
| How the current is switched | Mechanical: carbon brushes on a commutator feed the rotating windings | Electronic: a controller switches fixed windings and a magnet rotor turns, usually guided by Hall sensors |
| Main wear part | The brushes | No brushes; the controller is an electronic part |
| Upkeep | Brushes eventually need attention; the manual says how | No brush service |
| Price tier | Usually lower | Usually higher |
| Twist when the bit binds | Same | Same |
| Shutdown, PPE and 811 | Same | Same |
A Worked Example With a Pack Label
Say a spec page lists a brushless battery auger with a pack marked 40 V and 4.0 Ah. Multiply volts by amp-hours and you get 160 watt-hours, the energy the pack holds. A motor that wastes less as heat turns more of those 160 watt-hours into turning the bit.
What the arithmetic cannot tell you is how many holes that energy buys. The bit diameter, the soil, the depth and how hard you lean on the machine all change it. I read the printed voltage and amp-hours together, and I take hole counts only from the manual for the exact model, with the conditions it names.
How to Read a Spec Page for the Motor Type
The motor type is a single line on most spec pages, and it is easy to miss. I read it before anything else about an electric tool, because it tells me what will wear. Use the same order every time so a listing cannot hide a gap. If any other term on a spec page is new to you, my guide to what an earth auger is names the parts and types.
- Find the motor line. It names the motor type, such as brushless, or gives only a power rating.
- Read the power supply: a corded unit lists a current or wattage, and a battery unit lists voltage and amp-hours.
- Read the bit diameters the maker names and whether the bit is included.
- Read the maker’s maximum digging depth with the bit it names, and treat it as a ceiling for that bit, never a promise for hard ground.
- Check the manual for operators, reverse and the shutdown steps, and for how the maker wants the motor serviced.
Motor type and power supply are separate lines. A battery auger can be brushless, and the power supply never proves the motor design, so the spec page or the manual has to say which motor a given auger has. I skip a listing that leaves the motor line out. My comparison of corded and cordless earth augers covers the power side of that choice.
Pro Tip
Write the motor type, the power supply and the bit size on a card before you shop, and hold every listing against the same card.
Which Motor Fits Which Digging Job
The right motor follows the job, and the job follows how often you dig. I split it into three cases and keep the verdict plain.
A Few Holes a Year
A few holes for a young tree or a stake near the house suit a simple machine, and a lower price tier counts here. On my property the digging jobs are few and spread out: a replacement tree, a post for a stake, a stake for the drip header. For work like that, I look at weight, reach and what the exact manual says about service before I look at the motor. My roundup of augers for planting trees shows which models suit that job.
Regular Digging Season After Season
If you dig often, upkeep becomes a buying consideration. I recommend a brushless earth auger to anyone in that group, because it removes the brushes from the service list and the controller is built to waste less energy. Before you buy, read the exact model’s maintenance section and check that repair parts and support exist, since I weigh what a repair costs against what the tool costs new. My roundup of electric post hole diggers lists nine corded and battery picks.
When the Job Is Too Big
Every auger has limits printed in its manual: the bit sizes it accepts, the soils and conditions it warns against and the way the maker wants it used. When the job needs more than the exact model allows, ask a professional to assess it instead of pushing the machine past those limits. Where the location of a buried service stays uncertain, no auger is an option at all.
What to Remember Before You Buy
Three things stay with you. Brushed means carbon brushes that wear, brushless means an electronic controller with no brushes, and neither changes the torque reaction, the shutdown order or the call to 811. My one tip is to read the motor line on the spec page first, then the maintenance section of the manual, and match both to how often you dig. If you dig often, lean toward brushless and check that repair parts exist for the exact model. For a few holes a year, a simpler machine can do the job when its manual covers your bit size and soil. The brushless vs brushed electric earth auger decision then becomes a question of wear, upkeep and model limits, which you can settle at the shelf. My roundup of seven earth augers compares gas, corded and battery models.
Frequently Asked Questions
What is the difference between a brushless and a brushed motor?
The difference between a brushless and a brushed motor is how the current is switched. A brushed motor switches it mechanically with carbon brushes on a commutator that feed rotating windings, while a brushless motor switches fixed windings electronically and has no brushes to wear. Both types turn the bit the same way once the motor runs.
Is a brushless earth auger worth it?
A brushless earth auger is worth it when you dig often enough for brush wear and battery use to matter. For a few holes a year, a simpler machine in a lower price tier can do the job. Match the choice to how often you dig and read the manual for the exact model.
Do brushed motors wear out faster than brushless motors?
Brushed motors carry a wear part that brushless motors lack, namely the carbon brushes, and wear on those brushes is a main factor in the life of small brushed motors. A brushless motor has no brushes but relies on an electronic controller. How long either lasts depends on the model, the load and the care it gets.
Does a brushless earth auger run longer on a battery?
A brushless earth auger is built to waste less energy as heat, and makers say that helps battery use. Runtime still depends on the pack, the bit, the soil and how hard you lean on the machine. Use the figure in the manual for your model and its stated conditions, and plan for fewer holes in tough ground.
Does a brushless motor stop an earth auger from twisting back at you?
A brushless motor does not stop an earth auger from twisting back at you, because the twist comes from the bit binding in the ground. Some battery augers add an electronic protection that stops the tool and lights an indicator when the bit jams, and the exact manual says whether a model has it. Hold the handles with both hands and keep a braced stance as the manual describes.
References
- Sawa K, Ueno T, Nakano K, Toya K. Effects of brush spring force on brush wear and arc behaviors of small DC motor. 2023 IEEE 68th Holm Conference on Electrical Contacts (HOLM). 2023:1-6.
- Gamazo-Real JC, Vazquez-Sanchez E, Gomez-Gil J. Position and speed control of brushless DC motors using sensorless techniques and application trends. Sensors. 2010;10(7):6901-6947.
- Armstrong T, Bir C, Foulke J, Martin B, Finsen L, Sjogaard G. Muscle responses to simulated torque reactions of hand-held power tools. Ergonomics. 1999;42(1):146-159.
- Dai Y, Panahi A. Thermal runaway process in lithium-ion batteries: A review. Next Energy. 2025;6:100186.
Safety Note: Only an adult who has read the manual and understands the controls should use an earth auger or post hole digger, never a child or anyone tired or impaired. Use the number of people your manual specifies, and keep everyone else out of the work area. The rotating bit can catch hair, clothing and gloves, and it can bind on a root, a rock or a buried object: the machine can then twist or kick in your hands. Stand with firm, balanced footing and hold the designated handles with both hands. Keep hands and feet away from the bit; never grasp or brace the bit or shaft. Never wrap the power cord around your hand, arm or body. If utility contact or a gas leak is suspected, stop work immediately. Do not touch, inspect, free or move the auger or exposed service, and do not attempt the normal hands-on shutdown or disconnect electrical connections in the suspected leak area. Leave the area, keep others away and contact the utility from a safe location; call 911 for a suspected gas leak or immediate danger. Otherwise, release the throttle or trigger immediately if the bit binds or control is threatened, then follow the shutdown procedure. On a two-person unit, both operators must understand the controls and agree on start and stop signals before starting; stop whenever either operator calls stop. Use reverse only where your manual expressly authorizes it. Never touch or clear the bit while it turns. Before you clear or free the bit, change or attach the bit, adjust, check or add oil or fuel, clean, load, move, store or leave the auger, complete the shutdown for its power type. Corded electric: release the switch or trigger, wait until the bit has stopped completely, then unplug it from the outlet by the plug, not the cord; before transport or storage, also let the motor cool. Battery: release the switch or trigger, wait until the bit has stopped completely, then remove the battery, and the switch key where the model has one. Gas: release the throttle, trigger or control, turn the engine off, wait until the bit and every moving part have stopped completely, then disconnect the spark plug wire and secure it away from the plug, and let the engine and muffler cool before touching the bit, engine, muffler or anything near the exhaust. For a drill-driven bit or any attachment system, follow the shutdown instructions in both the bit or attachment manual and the power-head or drill manual. If the bit sticks or material wraps around it, stop and complete the full shutdown before touching or inspecting it. Use only the freeing or clearing method specified in the exact manual; gloves do not make grabbing sharp wire or cutting edges safe. Do not handle unidentified wire, cables or pipes. Powered reverse is permitted only when the exact manual expressly authorizes it for that task, with both hands on the designated handles and everyone clear of the bit. Complete the full shutdown again before any subsequent hands-on work. Wear safety glasses with side shields or goggles meeting the manual’s specification, including ANSI Z87.1 where required; add a face shield where required. Wear hearing protection with gas engines and wherever the manual requires it. Wear long pants and sturdy, closed footwear with secure traction, plus any additional footwear protection the manual specifies. Tie back long hair, remove jewelry and secure drawstrings; do not wear loose clothing or loose gloves. Use the gloves specified for the task and keep them, clothing, hair, hands and feet away from moving parts. Contact 811 before digging and include every planned hole in the locate request. Wait the required state notice period and confirm that every notified utility has responded with markings or a clear/no-conflict response for the work area. Resolve missing or conflicting responses before digging. Preserve the marks and follow your state’s ticket-validity and tolerance-zone rules. Keep the auger out of the required clearance area; near marks, use careful hand digging or another locating method permitted by state rules and the utility. Follow any stricter prohibition in the auger’s manual. Marks do not show a safe drilling depth. Arrange to locate private irrigation lines, cables and other services that 811 may not cover. If a line’s location remains uncertain, do not dig there. Do not handle or move unidentified cables, pipes or utility lines. Before you start, remove rocks, sticks, wire and loose hoses, and identify irrigation lines, drip lines and sprinkler heads. Keep children, pets and other people out of the work area and at least the distance your exact manual specifies. Stop if anyone enters that area. If your manual gives no number, keep everyone well clear of the work area as it directs. No single distance is safe for every auger. On a slope or uneven ground, slow down, keep firm footing and follow only your manual’s rule. Do not dig in frozen or rock-hard ground. Before refuelling, complete the full gas shutdown described above. Refuel outdoors on the ground, not in a truck or trailer, with the engine cooled. Keep fuel away from smoking, flames, sparks and other ignition sources. Use an approved fuel container, avoid overfilling, secure the cap and follow the manual’s spill-cleanup and restart-location instructions; do not start with a fuel leak. Use the specified fuel and oil arrangement for that engine. Never start or run a gas auger indoors, in a garage or shed, or in an enclosed or poorly ventilated area, even with doors open. Operate outdoors where exhaust cannot accumulate or enter occupied spaces through doors, windows or air intakes. Exhaust contains deadly carbon monoxide. For a corded auger, inspect the cord and extension cord before use and do not use damaged cords or plugs. Use an outdoor extension cord meeting the exact manual’s gauge, length, plug and grounding requirements, and follow its GFCI instructions. Keep connections dry and the cord clear of the bit, heat, oil and sharp edges. Never carry the auger by its cord or wrap the cord around your body. Do not use it in rain or wet conditions prohibited by the manual. Use only manufacturer-approved batteries and chargers for the exact model. Complete the battery shutdown before removing or changing a battery, and keep the switch off and fingers off the trigger when installing one. Do not use damaged or modified batteries or chargers. Keep loose battery terminals away from metal objects, and follow the battery and charger manuals for moisture exposure, charging temperature, cooling and storage. Load and unload only as your manual describes, and store the auger dry and out of children’s reach. Take breaks and stop when you are tired.