
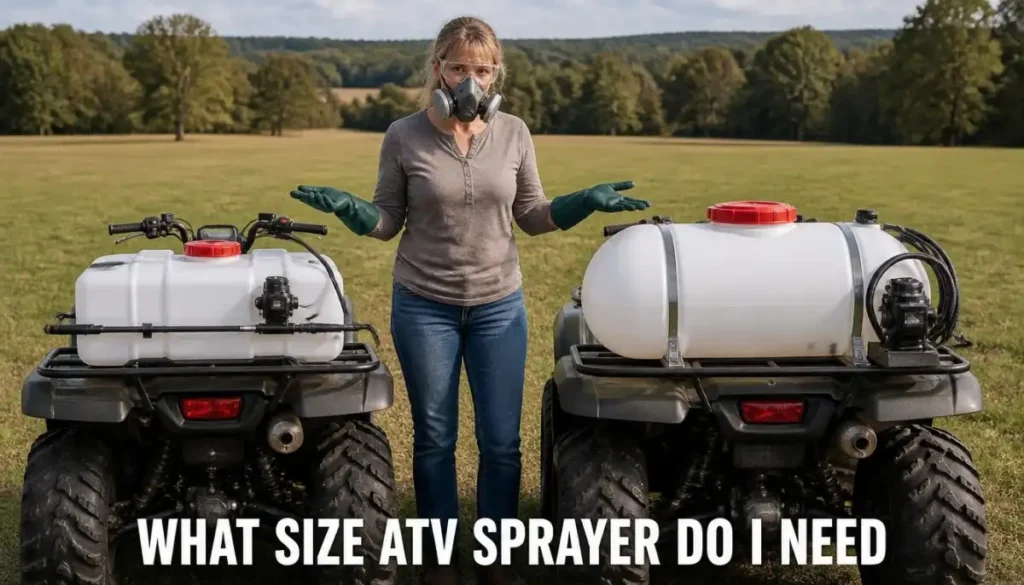
The right ATV sprayer size is the tank your job needs, and only one whose full load stays inside what your vehicle’s own manual lets the rack carry. Plain water weighs about 8.3 pounds per gallon, so a 25 gallon tank holds about 208 pounds of liquid before the tank, pump and hose are counted. I trained in plant protection, and that training taught me to size a sprayer by the load it carries and the job it does, not by the biggest figure on the box. Below you get the weight arithmetic, the effect of liquid surge and slopes, the printed tank sizes of four 12V spot sprayers, and the wiring, filling and cleaning steps that go with a big tank.
What Size ATV Sprayer Do I Need? Match the Tank to the Rack
Tank size follows from one number that is not printed on any sprayer: the rack and tow capacity in your vehicle’s owner’s manual. The sprayer’s tank, pump, hose and wand ride on top of the liquid, and the liquid is the heavy part. A bigger tank saves refill trips only as long as the vehicle still handles well with that tank full. My guide on backpack and ATV sprayers shows what changes when a vehicle carries the tank.
The U.S. Geological Survey prints the weight of water at 70°F as 62.300 pounds per cubic foot. A US gallon is 231 cubic inches, or about 0.1337 cubic feet, so a gallon of plain water weighs about 8.3 pounds. The table multiplies that out for the tank sizes covered here, for water only: a mixed product changes the weight, and the product label decides what goes in the tank.
| Tank size | Plain water, about | Spot sprayer printed at this size |
|---|---|---|
| 5 gallons | 42 lb | Ironton 5 gallon spot sprayer |
| 15 gallons | 125 lb | Master Mfg 15 gallon and Chapin 97200E |
| 25 gallons | 208 lb | Master Mfg 25 gallon Deluxe |
Weight Check
Add the empty sprayer’s own weight and anything else on the rack to the water weight, then compare the total with the rack figure in the vehicle’s manual. The sprayer’s manual does not replace that figure.
My Sizing Rule
I go down one tank size when the full weight leaves little room under the manual’s rack figure. A smaller tank refilled twice costs a few minutes, and a 15 gallon ATV sprayer filled with water already carries about 125 pounds of liquid. A vehicle that is overloaded costs far more. I recommend sizing for the job in front of you and the rack you own, never for the largest tank a listing offers. My comparison of 15 and 25 gallon sprayers puts tank size, weight and rack limits side by side.
Start With the Vehicle Manual’s Rack and Tow Limit
The owner’s manual for your exact vehicle sets how much you may carry, and no sprayer listing can override it. I read that page before I read any sprayer specification, because every other size decision depends on it. A sprayer maker prints a tank size, and the vehicle’s manual decides whether that tank is too big for your rack.
- Find the rack capacity for your exact vehicle in its owner’s manual, and write it down.
- Multiply the tank’s gallons by 8.3 for the weight of plain water.
- Add the sprayer’s own weight and anything else you carry on the rack.
- If the total is at or above the manual’s figure, choose the next smaller tank. My 15 or 25 gallon sprayers comparison shows that step down on two real 12V units.
The sprayer manuals say little about the vehicle side. Ironton’s manual says to secure the sprayer tank to your ATV rack with two tank straps and not to ride or carry cargo on the sprayer. Master Mfg’s manual says only to make sure the sprayer is securely attached to the vehicle, and Master Mfg’s product page says the tank has molded inserts for its own mounting kit, sold separately. Chapin’s manual says its sprayer is designed to be attached to stable surfaces.
None of the three prints a rack load or a slope angle for the vehicle. That is why the vehicle’s manual comes first.
Liquid Surge, Baffles and Slopes
Liquid in a tank does not stay put when the vehicle brakes, turns or climbs. It shifts, and the weight shifts with it. Montana State University Extension, in its guidance on ATV safety while spraying, ties handling to how much liquid sloshes and where the weight sits.
What Montana State Advises
I put baffles at the top of my questions before I look at the pump, because they are the one tank feature Montana State ties directly to stability on a slope.
Stay within the rack and tow capacity in your vehicle’s owner’s manual. Sloshing liquid shifts weight and changes how the vehicle handles: Montana State University Extension advises a spray tank with internal baffles and the lowest practical center of gravity, a boom that works as low to the ground as possible, and a rear-mounted boom or equipment that lowers the operator’s exposure. On an ATV, follow its manual and your hands-on training for body position and for the slopes it permits with a sprayer load; Montana State’s advice for ATVs on a hill is to lean your body uphill, and body position does not guarantee protection against a rollover.
In a UTV, stay properly restrained inside the vehicle and follow its manual’s slope limits. Research on ATV injuries has linked uphill travel to backward rollovers.
A study of ATV patients at one regional trauma center linked uphill travel to backward rollovers (1). It is a single center’s series and says nothing about sprayer loads.
What the Sprayer Makers Print
Ironton’s manual is the only one of the three with a vehicle section. It says an ATV will be less stable with a filled sprayer attached, that the center of gravity will be higher and the weight distribution different, and that the driver should use particular caution on sloped or rough surfaces to avoid rollover. It recommends a vehicle with a rollover protection system for non-level terrain, it says not to exceed 5 mph, and it sets the driver at 16 or older.
Master Mfg’s and Chapin’s manuals print no load, slope or speed line, so for those two the vehicle’s manual and your hands-on training are the whole guide. My comparison of Master Manufacturing and Ironton sprayers shows which 12V unit fits an ATV better.
No Riding With a Hand Wand
Montana State University Extension advises not to ride and spray if you have to hold a wand or lance.
Wear the helmet and other protective gear the Consumer Product Safety Commission recommends, get hands-on training from a qualified instructor, and sit only in the positions the manufacturer designed for occupants. The CPSC says never to ride with more passengers than there are seats. In a UTV, fasten the seat belts and keep every part of your body inside the vehicle as its manual directs.
The CPSC says riders younger than 16 should drive only age-appropriate youth model ATVs, never adult ATVs, and that off-road vehicles are designed for off-road terrain, not paved surfaces. Most ATVs seat one rider.
Tank Sizes as Printed for Four 12V Spot Sprayers
Each of these four is an ATV spot sprayer that a vehicle’s rack carries. None has a battery of its own: each clamps to the vehicle’s battery through a wire harness. The table gives each maker’s printed tank, flow and pressure ceiling, and where a maker prints no reach figure it says so.
| Sprayer | Tank | Pump flow, maker’s figure | Pressure ceiling, maker’s figure | Reach, maker’s figure |
|---|---|---|---|---|
| Ironton 5 gallon spot sprayer | 5 gallons | 1.0 GPM | Up to 40 PSI | Not listed |
| Master Mfg 15 gallon spot sprayer | 15 gallons | 1.0 GPM | Up to 40 PSI | 18 ft up, 20 ft out |
| Chapin 97200E EZ Mount | 15 gallons | 1.0 GPM | Up to 60 PSI | Not listed |
| Master Mfg 25 gallon Deluxe spot sprayer | 25 gallons | 2.2 GPM | Up to 70 PSI | 25 ft up, 30 ft out |
The 25 gallon ATV sprayer is a different load on the same rack: it carries about 83 more pounds of plain water than the 15 gallon units. I read the tank column and the flow column together, because a bigger tank only changes the job when the pump and wand can work through it. For the step above that, my guide to 25 or 40 gallon sprayers shows what the bigger tank adds and needs.
Each pressure figure is that maker’s ceiling for that model, and I do not rank one maker’s figure against another’s. The reach figures are the makers’ own. Every unit here uses a hand-held spray gun, so the no-riding sentence above applies to all of them.
Pump, Pressure and Nozzle Choices That Follow the Tank
A bigger tank does not change the physics of the pump and the nozzle, but it does make the pump work through more liquid. This section covers what powers these sprayers and why the pressure figure on the box is a limit.
How an ATV Tank Sprayer Is Powered
An ATV tank sprayer of this type runs on the vehicle’s 12 volt supply, with a wire harness and clamps that connect to the vehicle battery. Master Mfg and Chapin name diaphragm pumps for their units, and Ironton calls its pump an on-demand pump that starts when the gun trigger is squeezed. North Dakota State University Extension says diaphragm pumps are commonly used with ATV sprayers (2).
Pressure Is a Ceiling, Not a Setting
A sprayer’s maximum pressure is the limit of the machine, not a setting to aim for. The product label and the nozzle’s maker decide the pressure and the nozzle for a job. Higher pressure makes more fine droplets that drift, and the nozzle you choose changes the droplet size. My guide on PSI on a sprayer explains pressure, ranges and limits.
A laboratory test of 32 nozzle and pressure combinations found that nozzle type, nozzle size and pressure all change the droplet size and velocity spectra (3). The test used boom-type agricultural nozzles on a rig, not an ATV spot gun. A Kansas State extension author adds that higher pressures make many more droplets under 100 microns (4). That paper is about field sprayers, so I treat it as direction, not as a setting for your gun.
At scale I checked nozzle output with calibration cylinders before each campaign, and I still read a printed flow figure as the maker’s figure until clean water tells me otherwise. My guide to spray nozzle types covers droplet size and drift basics.
Wiring, Water Test and Filling a Big Tank
Every task in this section puts your hands near the tank, the pump or the harness, so it starts with the shutdown box below. Complete it before you wire, test, open the tank, fill, clean or move the sprayer, and again before you correct a leak.
Full Shutdown Box: Emergency First
Emergency first: if a battery becomes unusually hot, swells, hisses, gives off an unusual odor or smokes, stop using the sprayer without handling or removing the battery, keep people away and follow the battery manual’s emergency instructions; if it smokes, burns or presents immediate danger, move away and call 911 or the fire department without finishing the routine shutdown.
Full Shutdown Box: Before You Open or Move Anything
Shutdown before you open the tank, fill or refill it, change or clean a nozzle, clear a clogged nozzle, clean or rinse the sprayer, adjust or repair anything, charge or change the battery, move, store or leave the sprayer. Never point the wand at yourself, another person or a pet. During normal spraying, move only as the equipment manuals and the product label permit; walking while spraying with a backpack unit, or driving a mounted boom at the spraying speed its manual describes, is operation, not transport. Never ride while operating a hand-held wand or lance.
Full Shutdown Box: 12V Vehicle Sprayer
12V vehicle sprayer (ATV, UTV, cart or tow-behind): first stop and secure the vehicle as its manual directs. Then release the trigger, close the wand or boom valve and switch the pump off at its switch. Relieve all trapped pressure using only your exact manual’s procedure and a discharge destination consistent with the product label, without opening the tank or loosening any part beforehand unless that procedure expressly requires it, and never toward yourself, another person or an animal. Then disconnect the pump’s 12V supply at the connection your manual specifies. Reconnect it only after the work is complete, every part is secured and the pump switch is off.
Full Shutdown Box: Protective Equipment and Refit
Wear the protective equipment the product label requires while you clean the tank, the strainer or a nozzle. Clear a clogged nozzle only with the method in your exact manual; never clear a nozzle with your mouth and never by blowing into it. Add every step your manual gives, in its order. Refit every part, close the lid and check for leaks with clean water before product goes back in.
Manual procedures come first. Ironton’s and Master Mfg’s manuals both say to disconnect power to the sprayer and then relieve system pressure by squeezing the gun trigger. Chapin’s manual prints no pressure-relief procedure, so get guidance from Chapin before you open or service a Chapin unit. Where your exact manual gives a different order, follow the manual’s order and keep every other step of the box.
Wire the Pump as the Manual Says
Before any wiring work on the pump, complete the full shutdown in the shutdown box, including its emergency exception and securing the vehicle. Wire the pump the way your sprayer’s manual says, and use the fuse the manual lists. To disconnect the supply, follow the shutdown box through securing the vehicle, stopping the pump and relieving the pressure, then disconnect it as your manual directs; reconnect it only after the work is complete, every part is secured and the pump switch is off.
Ironton’s manual gives an order: disconnect the vehicle battery ground wire, connect the remote switch’s red clamp to the positive terminal, connect the black clamp to the negative terminal, then reconnect the ground wire. It says to connect in that sequence to avoid possible shock, and never to touch both battery terminals at once or with non-insulated tools. Master Mfg’s and Chapin’s manuals print no connection order. Master Mfg warns that clamps on the opposite posts make the pump run backwards, and Chapin warns not to let the wiring harness be pinched or damaged, because it can overheat.
I follow the order the manual prints for the unit in front of me and I do not carry one maker’s order over to another maker’s sprayer. I also look along the harness for anywhere a strap could pinch it, as Chapin’s warning says.
Run a Clean Water Test First
Before the first water test, complete the full shutdown in the shutdown box, then fill the tank with clean water and close the lid as your manual directs. Connect the power (install the battery or connect the 12V supply) only when you are ready to test. Run the sprayer and watch the wand, hose, fittings and tank seams for leaks without touching pressurized parts.
Before you open the tank, correct a leak or add product, complete the full shutdown again. Before every use, check the tank, strainer, hose and nozzle, and fix any leak before product goes in. Follow your manual’s first-use steps.
Master Mfg’s manual says to test the sprayer with fresh water before adding and spraying chemicals, to check for cracks and leaks, and to test again with water after any repair. I use that first fill to look at the lid, the drain cap and every hose joint, which on a 25 gallon sprayer are a lot of places to leak.
Mix and Load Outdoors
The product label is the law. It tells you what protective equipment to wear, how and where you may use the product, what weather it allows, how long to stay out of the treated area, how long to wait before you harvest, how to protect bees and other pollinators, and how to dispose of leftover product and the empty container. Using a registered pesticide in a way its label does not allow is against federal law. Your sprayer’s manual does not replace the label, and the label does not replace the manual: read the label before you open the container, and follow both.
Wear the protective clothing and equipment the product label requires, and put it on before you open the container. Wear the eye protection and gloves the label names every time you mix, load, spray, clean the tank or clear a nozzle. Cornell’s pesticide safety program also advises chemical-resistant gloves, goggles and a respirator when you handle moderately toxic products, even when the label does not call for them.
Wear every respirator the label requires, of the type the label names, and follow the respirator maker’s instructions for fit, use and care. If you follow Cornell’s advice and wear one the label does not require, or if it is unclear which respirator or filter is right, get qualified guidance on the respirator and filter before you handle the product. Protective equipment lowers your exposure; it does not make spraying safe.
A review of the research on coveralls for agricultural pesticide users found that the real-world effect of protective equipment may be over-estimated (5). Treat the equipment as one layer, not a guarantee.
The manuals add their own protective equipment. Chapin’s manual says to always wear goggles, gloves, a long sleeve shirt, long pants and full foot protection when spraying. Ironton’s manual says to wear protective clothing, eye protection and chemical resistant gloves when filling, using and cleaning the sprayer. Master Mfg’s manual says to wear chemical resistant gloves when twisting the nozzle, rubber gloves when you clean the suction strainer, and rubber gloves and eye protection when you drain the tank.
The Label Decides the Amount
The product label, not this page, gives the amount of product, the dilution and the mixing order, so read it before you mix. Do not combine products unless the mixture complies with every product’s label and its compatibility has been established through the manufacturers or a qualified pesticide specialist; nobody’s advice overrides a label prohibition.
Before you load the sprayer, complete the applicable full shutdown in the shutdown box, including its emergency exception, and wear the protective equipment the product label and your manual require for the task. Mix and load outdoors, away from other people (including children), pets and livestock, and where a spill or overflow cannot reach a well, a drain or other water. Read the label before you open the container, stand upwind, and do not eat, drink or smoke while you handle pesticides.
Never use your mouth to siphon a pesticide from its container. Keep the fill hose above the level of the liquid in the tank so the product cannot siphon back into your water supply, and never leave the sprayer unattended while you fill it. Use measuring tools kept only for pesticides, never kitchen utensils or food containers. Mix only as much as the job needs so the tank ends empty; do not store leftover mix in the sprayer for later, because it can damage the sprayer’s parts.
Ironton’s and Master Mfg’s manuals both bar anyone under 16 from operating the sprayer. Master Mfg’s manual adds that its sprayer is not certified for dispensing drinking water or other consumable liquids.
If Someone Is Exposed
If someone is exposed to a pesticide, follow the first-aid section of the product label and call Poison Control at 1-800-222-1222, and keep the product label with you. Call 911 in an emergency.
Rinsing and Storing a Large Tank
A 25 gallon tank holds a lot of product residue in its hose, pump and strainer, so cleaning and storage deserve the same care as filling. Complete the full shutdown from the box above before you start either one.
Clean the Tank After Use
Before you clean the sprayer, complete the applicable full shutdown in the shutdown box, including its emergency exception, and wear the protective equipment the label and your manual require. Clean the sprayer as soon as you can after use, because dried product is harder to remove than product still in solution. Empty the tank, rinse the tank, hose, wand and nozzle, and clean the strainers and screens, following the product label and your manual; extension guidance warns that water alone may not remove every product.
Clean it away from desirable plants, wells and other water, and wash the outside. Do not pour leftover product or rinse water down a sink, a toilet or a storm drain, or onto bare ground.
Master Mfg’s manual says to flush the sprayer as the chemical maker recommends and not to store the sprayer with chemicals in the tank. Chapin’s manual says to flush the pump with water after use and not to let chemicals sit in the pump for long idle periods. The strainer on the suction line is where each manual sends you when flow drops. I review the 15-gallon 12V unit in my Master Manufacturing sprayer review.
Follow the product label’s instructions for rinsing the empty container, handling the rinse water and disposing of the container, and rinse only a container the label directs you to rinse. Add rinse water to a spray mixture only when the label permits it and the mixture can take it without exceeding the permitted fill level or changing the label-directed mixture. Never reuse an empty pesticide container for any purpose. For leftover product, follow the label’s disposal steps, or call your state pesticide agency or a household hazardous waste program.
Store the Sprayer Drained
Before you store the sprayer, complete the applicable full shutdown in the shutdown box, including its emergency exception. Store pesticides in their original containers, with the label on, locked up or under the control of a person who can keep others away, and out of the reach of children. Never put a pesticide in a container used for food, drink or household products.
Keep pesticides away from food, animal feed and protective equipment, and store pesticides and fertilizers apart, because they can react with each other and start a fire. Store the sprayer drained, cleaned and dry, as your manual describes, with the battery stored as the battery manual describes.
Chapin’s manual says to store the tank upside down in a warm, dry place. Master Mfg’s manual says freezing without the right winterization steps voids the warranty, and Ironton’s manual says the sprayer will be damaged if it freezes.
Hang the harness and the gun where the tank cannot crush them. Chapin’s manual warns that a pinched or damaged wiring harness can overheat, so look it over before the first use of the season.
Choosing Your Tank Size
Remember three things: the rack and tow capacity in the vehicle manual sets the ceiling, plain water weighs about 8.3 pounds per gallon, and a hand wand is never used while riding. My own tip is to write the rack figure and each tank’s water weight on one card and keep it with the sprayer’s manual, so the sum is done before the tank is full. Read your vehicle’s manual page on loads before you buy, because the right tank size for an ATV sprayer is the smallest one that does the job and stays inside the manual’s rack figure when it is full. My roundup of ATV spot sprayer picks puts five 12V units side by side on tank, pump and hose specs.
Frequently Asked Questions
What size ATV sprayer tank do I need?
The ATV sprayer tank you need is the one that fits your job and whose full weight stays inside your vehicle’s rack and tow capacity, as the owner’s manual states it. Plain water weighs about 8.3 pounds per gallon, so 15 gallons is about 125 pounds and 25 gallons about 208 pounds before the sprayer itself. The manual’s figure is a limit, not a target, so if the total comes close, go one size down.
What size sprayer tank can an ATV carry?
The size of sprayer tank an ATV can carry is set by the rack and tow capacity in that vehicle’s owner’s manual, not by the sprayer maker. Ironton, Master Mfg and Chapin print tank sizes from 5 to 25 gallons, and none of their manuals gives a rack load or slope figure. Add the water weight of the tank to the sprayer’s own weight and compare the total with the vehicle’s figure.
What is liquid surge in an ATV sprayer tank?
Liquid surge in an ATV sprayer tank is the liquid shifting as the vehicle brakes, turns or climbs, which moves weight and changes how the vehicle handles. Montana State University Extension advises a tank with internal baffles, which reduce surges and improve stability when turning on slopes or hills. Follow your vehicle’s manual for the slopes it permits with a sprayer load.
How do you find your ATV’s rack load limit?
Find your ATV’s rack load limit in the owner’s manual for that exact vehicle, because the sprayer’s manual does not replace it. Write the figure down and compare it with the water weight of the tank plus the sprayer’s own weight. If you cannot find the figure, ask the vehicle’s maker or dealer before you load a full tank.
How do you rinse and store a large ATV sprayer tank?
Rinse and store a large ATV sprayer tank only after you complete the full shutdown in the shutdown box above, then follow the product label and your sprayer’s manual. Chapin’s manual says to store the tank upside down in a warm, dry place, and Master Mfg’s manual says not to store the sprayer with chemicals in the tank.
References
- Brandenburg MA, Brown SJ, Archer P, Brandt EN. All-terrain vehicle crash factors and associated injuries in patients presenting to a regional trauma center. J Trauma. 2007;63(5):994-999.
- Proulx R. Spray Equipment and Calibration. AE73. North Dakota State University Extension; revised October 2025.
- Nuyttens D, Baetens K, De Schampheleire M, Sonck B. Effect of nozzle type, size and pressure on spray droplet characteristics. Biosyst Eng. 2007;97(3):333-345.
- Wolf RE. Strategies to Reduce Spray Drift. MF-2444. Kansas State University Agricultural Experiment Station and Cooperative Extension Service; March 2000.
- Garrigou A, Laurent C, Berthet A, et al. Critical review of the role of PPE in the prevention of risks related to agricultural pesticide use. Saf Sci. 2020;123:104527.
Safety Note: Read your sprayer’s manual and the product label before you open any container. The label is the law: it tells you what protective equipment to wear, how and where you may use the product, what weather it allows, how long to stay out of the treated area, how long to wait before you harvest, how to protect bees and other pollinators, and how to dispose of leftovers and the empty container. Using a registered pesticide in a way its label does not allow is against federal law. This page never gives an amount of product, a dilution or a mixing order: the label does. Wear the protective clothing and equipment the label requires, put it on before you open the container, and wear the eye protection and gloves it names whenever you mix, load, spray, clean the tank or clear a nozzle. Protective equipment lowers your exposure; it does not make spraying safe. Wear every respirator the label requires, of the type it names, and follow the respirator maker’s fit, use and care instructions. Before you clean or store the sprayer, or wire a 12V pump, complete the shutdown below first. Before you mix or load, complete the shutdown below, including its emergency exception. Mix and load outdoors, away from other people (including children), pets and livestock, and where a spill cannot reach a well, a drain or other water. Stand upwind, never use your mouth to siphon a product, keep the fill hose above the liquid so it cannot siphon back into your water supply, and never leave the sprayer unattended while you fill it. Mix only what the job needs, and do not store leftover mix in the sprayer. Never point the wand at yourself, another person or a pet, and never test a spray against your hand. Emergency first: if a battery becomes unusually hot, swells, hisses, gives off an unusual odor or smokes, stop using the sprayer without handling or removing the battery, keep people away and follow the battery manual’s emergency instructions; if it smokes, burns or presents immediate danger, move away and call 911 or the fire department without finishing the routine shutdown. Otherwise, before you open the tank, fill it, change or clean a nozzle, clear a clogged nozzle, clean or rinse the sprayer, adjust or repair anything, charge or change the battery, load, unload, transport, store or leave the sprayer, or lift, put on or take off a backpack unit, complete the shutdown. During normal spraying, move only as your manual and the product label permit, and never ride while operating a hand-held wand or lance. Battery sprayer: release the trigger or close the wand valve, then switch the pump off. Relieve all trapped pressure using only your exact manual’s procedure and a discharge destination consistent with the product label, without opening the tank or loosening any part beforehand unless that procedure expressly requires it, and never toward yourself, another person or an animal. Then remove the battery. 12V vehicle sprayer: first stop and secure the vehicle as its manual directs, then release the trigger, close the wand or boom valve and switch the pump off. Relieve all trapped pressure using only your exact manual’s procedure and a discharge destination consistent with the product label, without opening the tank or loosening any part beforehand unless that procedure expressly requires it, and never toward yourself, another person or an animal. Then disconnect the pump’s 12V supply at the connection your manual specifies, and reconnect it only after the work is complete, every part is secured and the pump switch is off. Wear the label’s protective equipment while you clean the tank, the strainer or a nozzle. Clear a clogged nozzle only with the method in your exact manual, never with your mouth and never by blowing into it. Refit every part and check for leaks with clean water before product goes back in. For the first water test, complete the shutdown first, fill the tank with clean water and close it as your manual directs, connect the power only when you are ready, and watch the wand, hose, fittings and tank seams for leaks without touching pressurized parts; complete the shutdown again before you open the tank, fix a leak or add product. Wind, heat and fine droplets carry spray off target: the label may be stricter than any extension guideline, and extension sources give different wind figures, so no single number fits every situation. Do not spray during a temperature inversion, and do not assume that calm air, early morning or evening is suitable. Do not spray just before rain. Keep children, pets and other people out of the area while you spray and off the treated area for as long as the label says, and remove toys and cover pet food and water dishes first. The label’s pollinator wording decides when you may spray around flowering plants, and early morning or evening is not automatically suitable. A sprayer that has held weed killer should stay a weed-killer sprayer: extension services advise a dedicated sprayer, and rinsing may not remove every residue. Follow the product label’s instructions for rinsing empty containers, handling rinse water and disposing of them, and never reuse an empty pesticide container; for leftover product, call your state pesticide agency or a household hazardous waste program, and never pour it down a sink, a toilet or a storm drain. Store pesticides in their original containers, locked up and out of the reach of children, away from food and animal feed, and keep pesticides and fertilizers apart. If someone is exposed, follow the first-aid section of the label, call Poison Control at 1-800-222-1222 and keep the label with you; call 911 in an emergency. If product spills, keep people and animals away and follow the label’s emergency directions; try to contain a small spill only if the label says that is safe and you have the protective equipment it requires, and otherwise get help (the emergency number on the label, Poison Control if anyone is exposed, 911 for a fire, immediate danger or a large spill). Use only the battery and charger the maker supplies or lists for your exact sprayer, charge and store the battery as your manual describes, and do not use a damaged battery or charger: lithium-ion batteries can overheat and catch fire. Wire a 12V pump the way your manual says and use the fuse it lists. On an ATV or UTV, wear the helmet and protective gear the Consumer Product Safety Commission recommends, get hands-on training, sit only in the positions the manufacturer designed, never ride with more passengers than there are seats, and in a UTV fasten the seat belts and keep every part of your body inside the vehicle; stay within the rack and tow capacity in your vehicle’s owner’s manual, and remember that sloshing liquid shifts weight and changes how the vehicle handles; Montana State University Extension advises against riding and spraying if you have to hold a wand or lance. Stop at once, complete the full shutdown and inspect if the sprayer leaks, loses pressure or runs without spraying, and restart only as the manual allows. If a battery becomes unusually hot, swells, hisses, gives off an unusual odor or smokes, do not handle or remove it: keep people away, follow the battery manual’s emergency instructions, and if it smokes or burns, move away and call 911 or the fire department. Before you fill the tank, complete the shutdown, and fill it only to the level your manual allows. Carrying a full tank is tiring: rest when you are tired.